Automation has become the ‘it’ thing in the world of business. The need for organizations to cut costs has forced them to improve internal processes to provide improved service while also conserving time. Unfortunately, it's not always easy for teams to streamline everything internally because they often seem like complicated processes - but there are ways around this. Using Appsmith, developing internal tools can cut costs, time and even improve your workflow by connecting services across specialized platforms with Zapier.
Zapier has thousands of apps and services that can meet almost all your business automation needs. Integrating Appsmith into the mix opens up a whole new dimension. In this way, you'll have a more efficient system in which you can connect anything from, say, a MailChimp email campaign to a Google form with data from your ERP or CRM systems delivered within the app!
In this blog, we will be looking at adding automation to Appsmith applications using Zapier.
Let’s get started!
Building Internal Tools with Appsmith
Appsmith is a powerful platform to build admin panels, dashboards, crud apps, and internal tools. It allows us to create these applications with little to no coding required. We can build apps that integrate with just about any service you can think of. Today, Appsmith has more than 15+ data source integrations; a few popular ones include Postgres, MongoDB, Google Sheets. That's one of the best things about Appsmith -- it's completely customizable. But if you want to build apps with Appsmith, you will likely be doing some coding in JavaScript. Yes, we can use JS anywhere across the Appsmith applications to bind, transform and create actions to the data. In terms of UI, Appsmith provides more than 25 widgets with a wide range of styling options. While it's not hard to use Appsmith to build apps, you will need to start building them to get to the next level with Appsmith.
Now, let’s build a simple newsletter application that can help collect contacts from Appsmith and send Emails using Sendinblue via Zapier.
Building UI on Appsmith
The idea of our newsletter is to collect emails from users and to maintain campaigns on Appsmith. Let’s get started by following the below steps:
- Create a new account on Appsmith (it’s free!), if you are an existing user, log in to your Appsmith account.
- Create a new application by clicking on the Create New button under the Appsmith dashboard.
- We’ll now see a new Appsmith app with an empty canvas and a sidebar with two directories: Datasources and Widgets.
- Click on the + icon next to the widgets section and drag and drop a container widget onto the canvas.
- Next, bring in a form widget inside the container and two input widgets inside the form.
- We can configure widgets and their properties by clicking on the cog icon on the top right. This will open a property pane where we can update all the widgets settings.
- Now set the form labels to name and email.
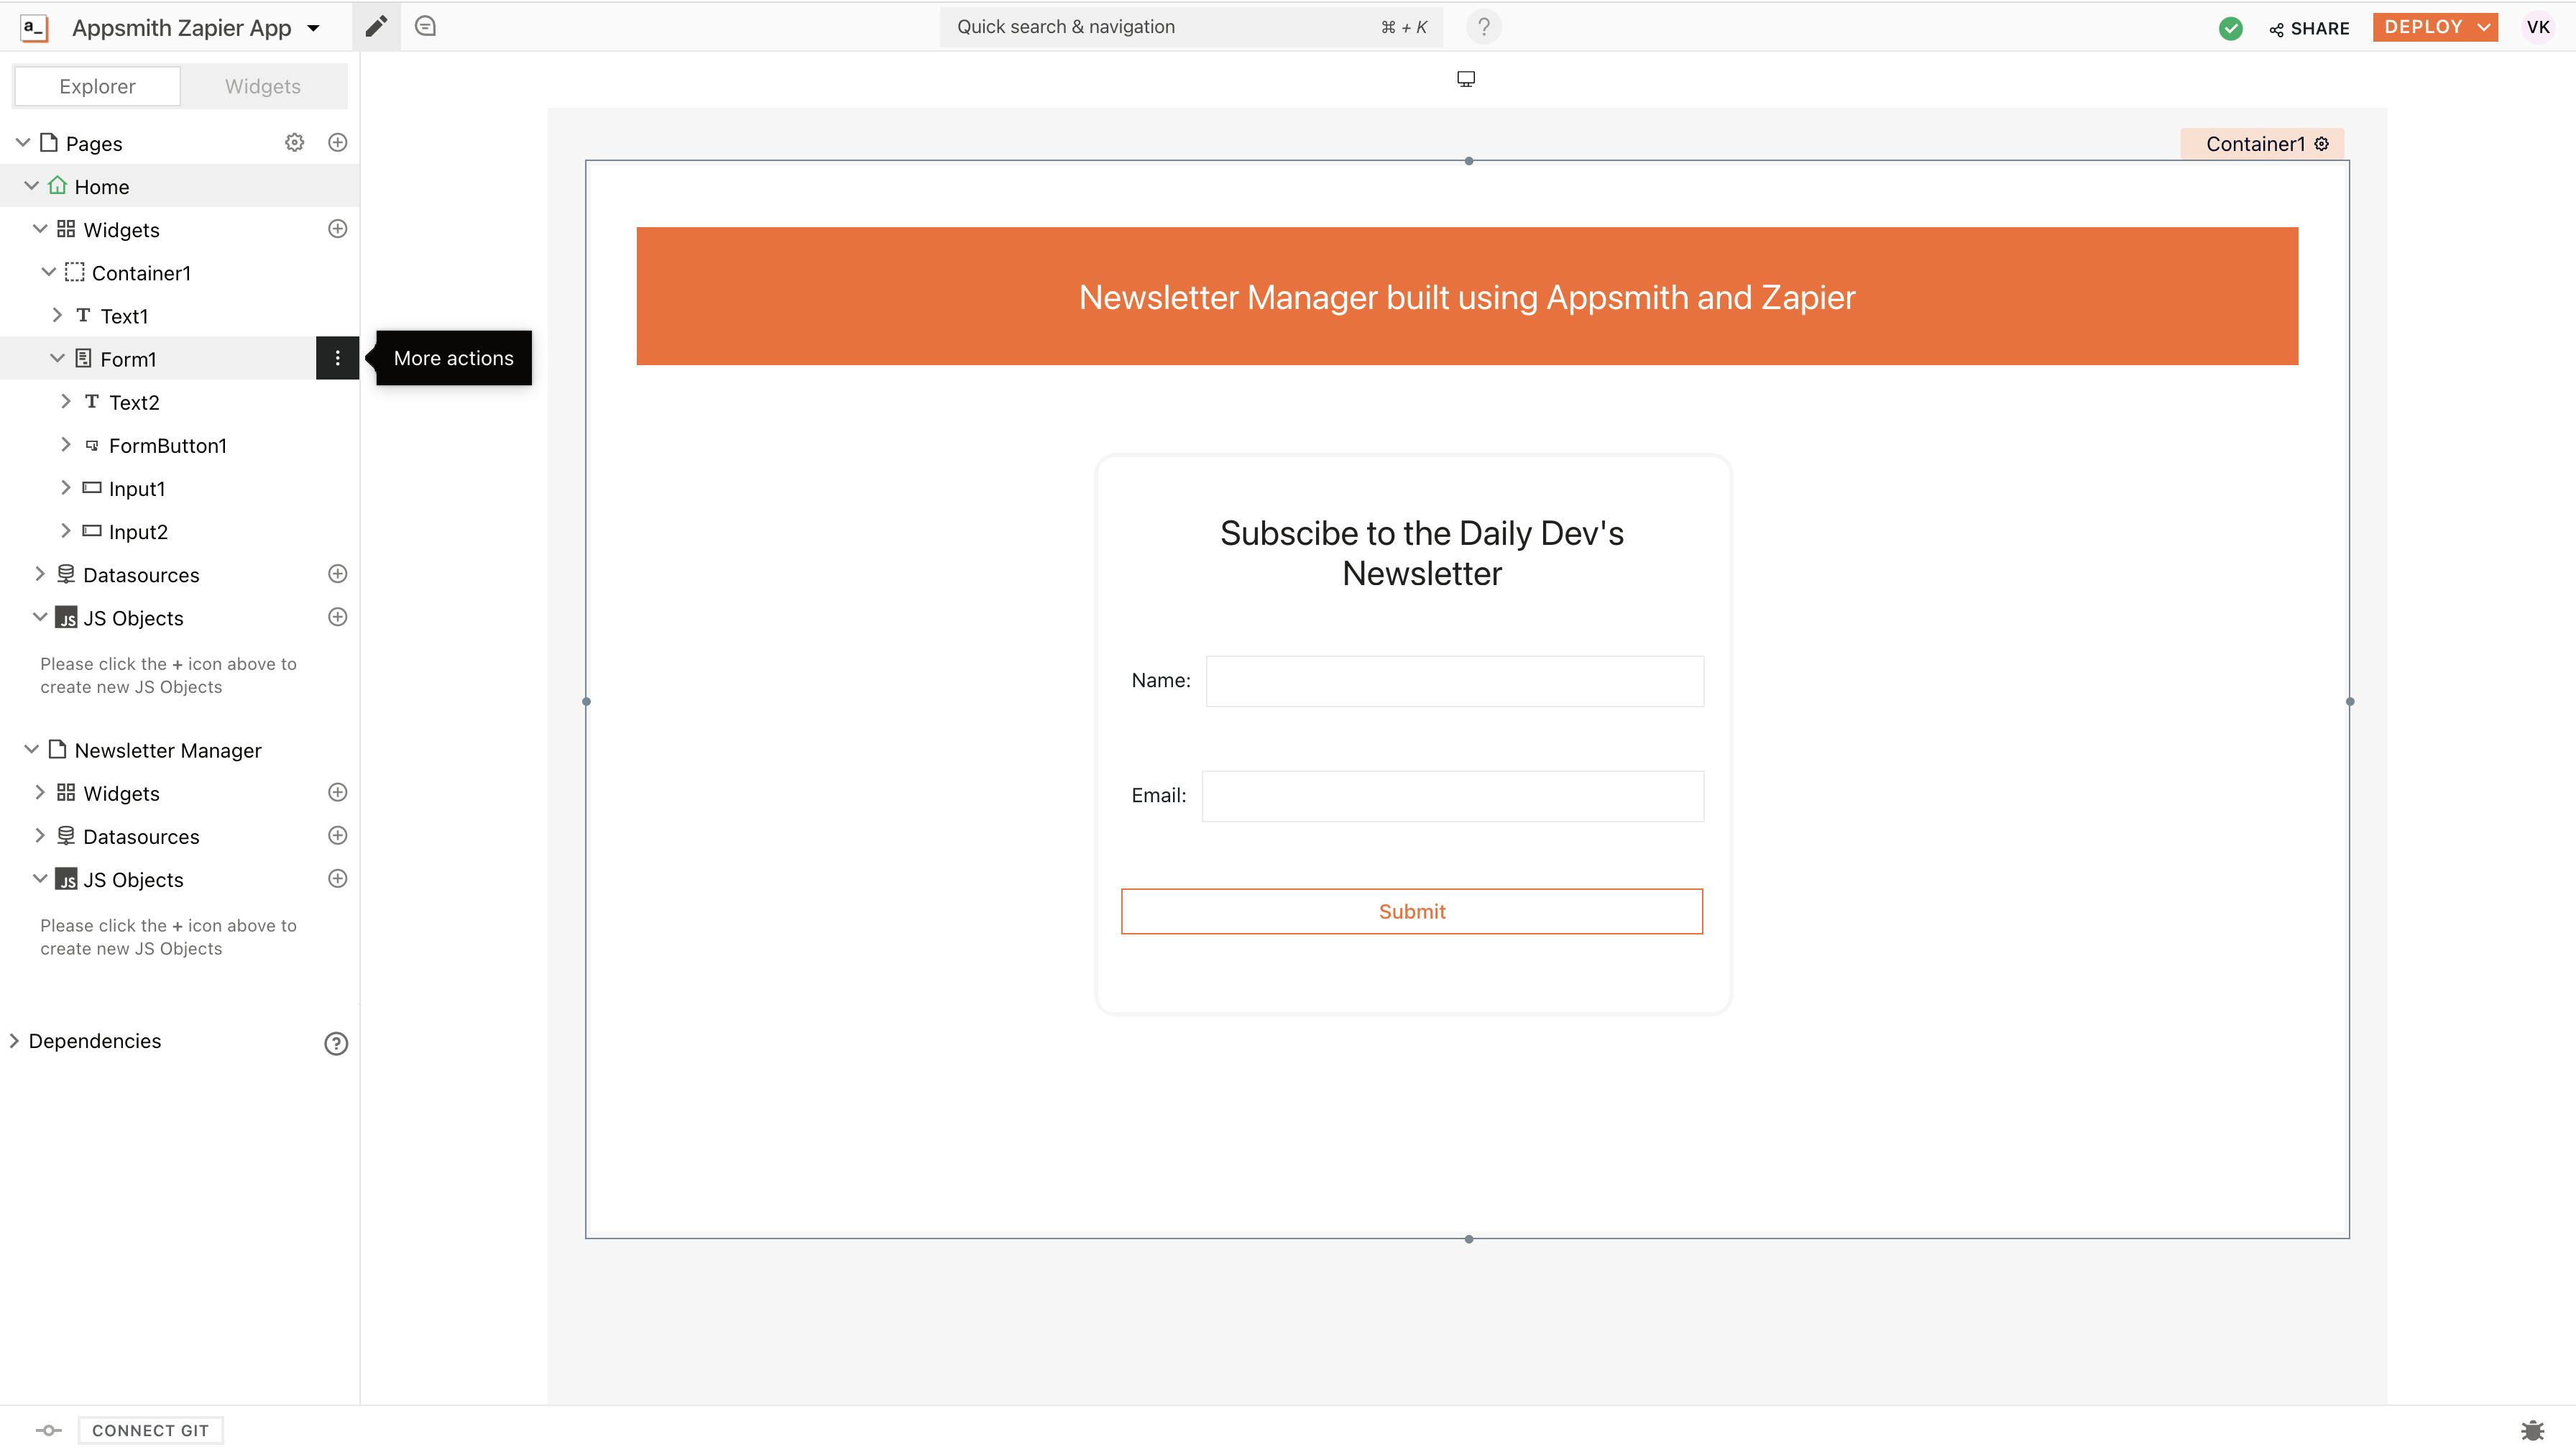
- Additionally, you can add a text widget to add aesthetics to our application; the following is how the UI looks like:

Excellent, our UI is now ready; let’s create a new Zapier workflow to connect to SendInBlue and manage our newsletter.
Set Up Zapier with Appsmith
Excellent, our UI is now ready; let’s create a new Zapier workflow that can connect to SendInBlue and manage our newsletter.
- First, create a free account on Zapier and select create custom workflow option from the dashboard.
- On Zapier, every action on the workflow is named on Zap; to establish a connection between Zapier and Appsmith, let’s create a Webhook.
Webhooks are essentially a way to create a communication channel. It allows you to listen to an event and run a command or take any action you want. Here, the event will be triggered by an API call from Appsmith.
- Now open the Appsmith app, click on the + icon next to the Datasource section from the sidebar, and choose Create New API.
- Copy the webhook URL from Zapier and set the request type to POST. For ease, let’s also rename the query to
addContact. - Here, we also need to send the data from the Form widget we had created earlier; now, let’s use their names to collect data and pass them in the Webhook.
- Navigate to the Body tab on the API and paste the following code snippet:
{
    "name":"{{Input1.text}}",
    "email":"{{Input2.text}}"
}
- This code snippet will send the information from the Input widgets to Appsmith.
- Lastly, set the button onClick property to execute a query and set it to
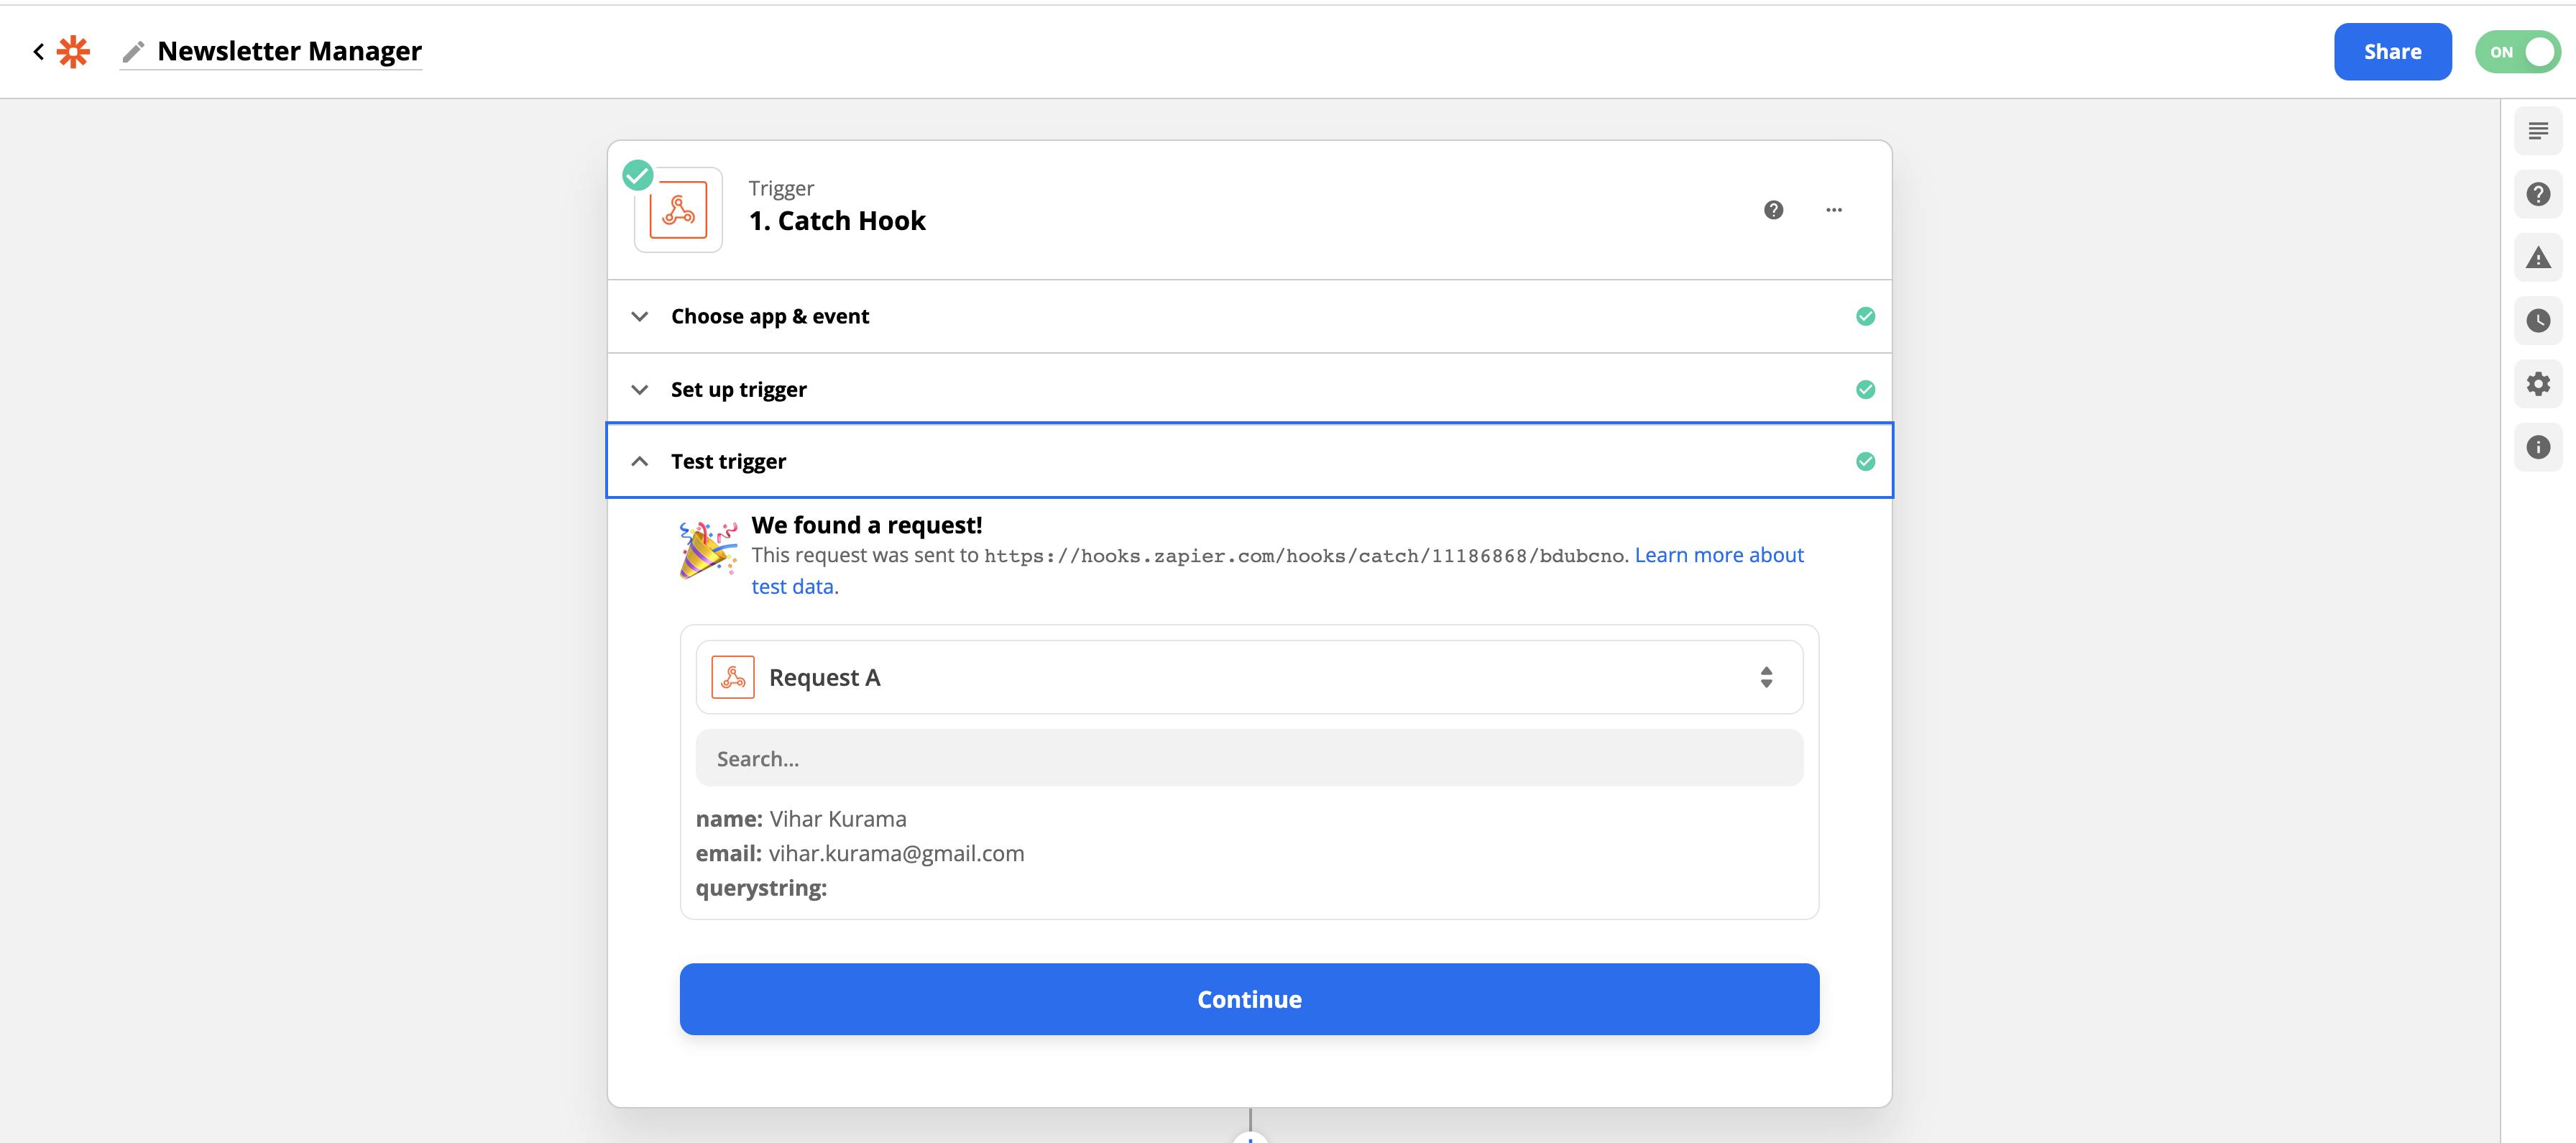
addContact. - Now, on Zapier, hit the test button and send a request by filling the form on Appsmith and hitting the API. We should see the successful response on Zapier.

- Next, click on the
+icon beneath the zap to add a new workflow. Select the SendInBlue Zap from the list. - We will need to authenticate with SendInBlue from Zapier to access the workflow; for this, you can either create a new account or log in with your existing credentials.
- Next, set the Action type to
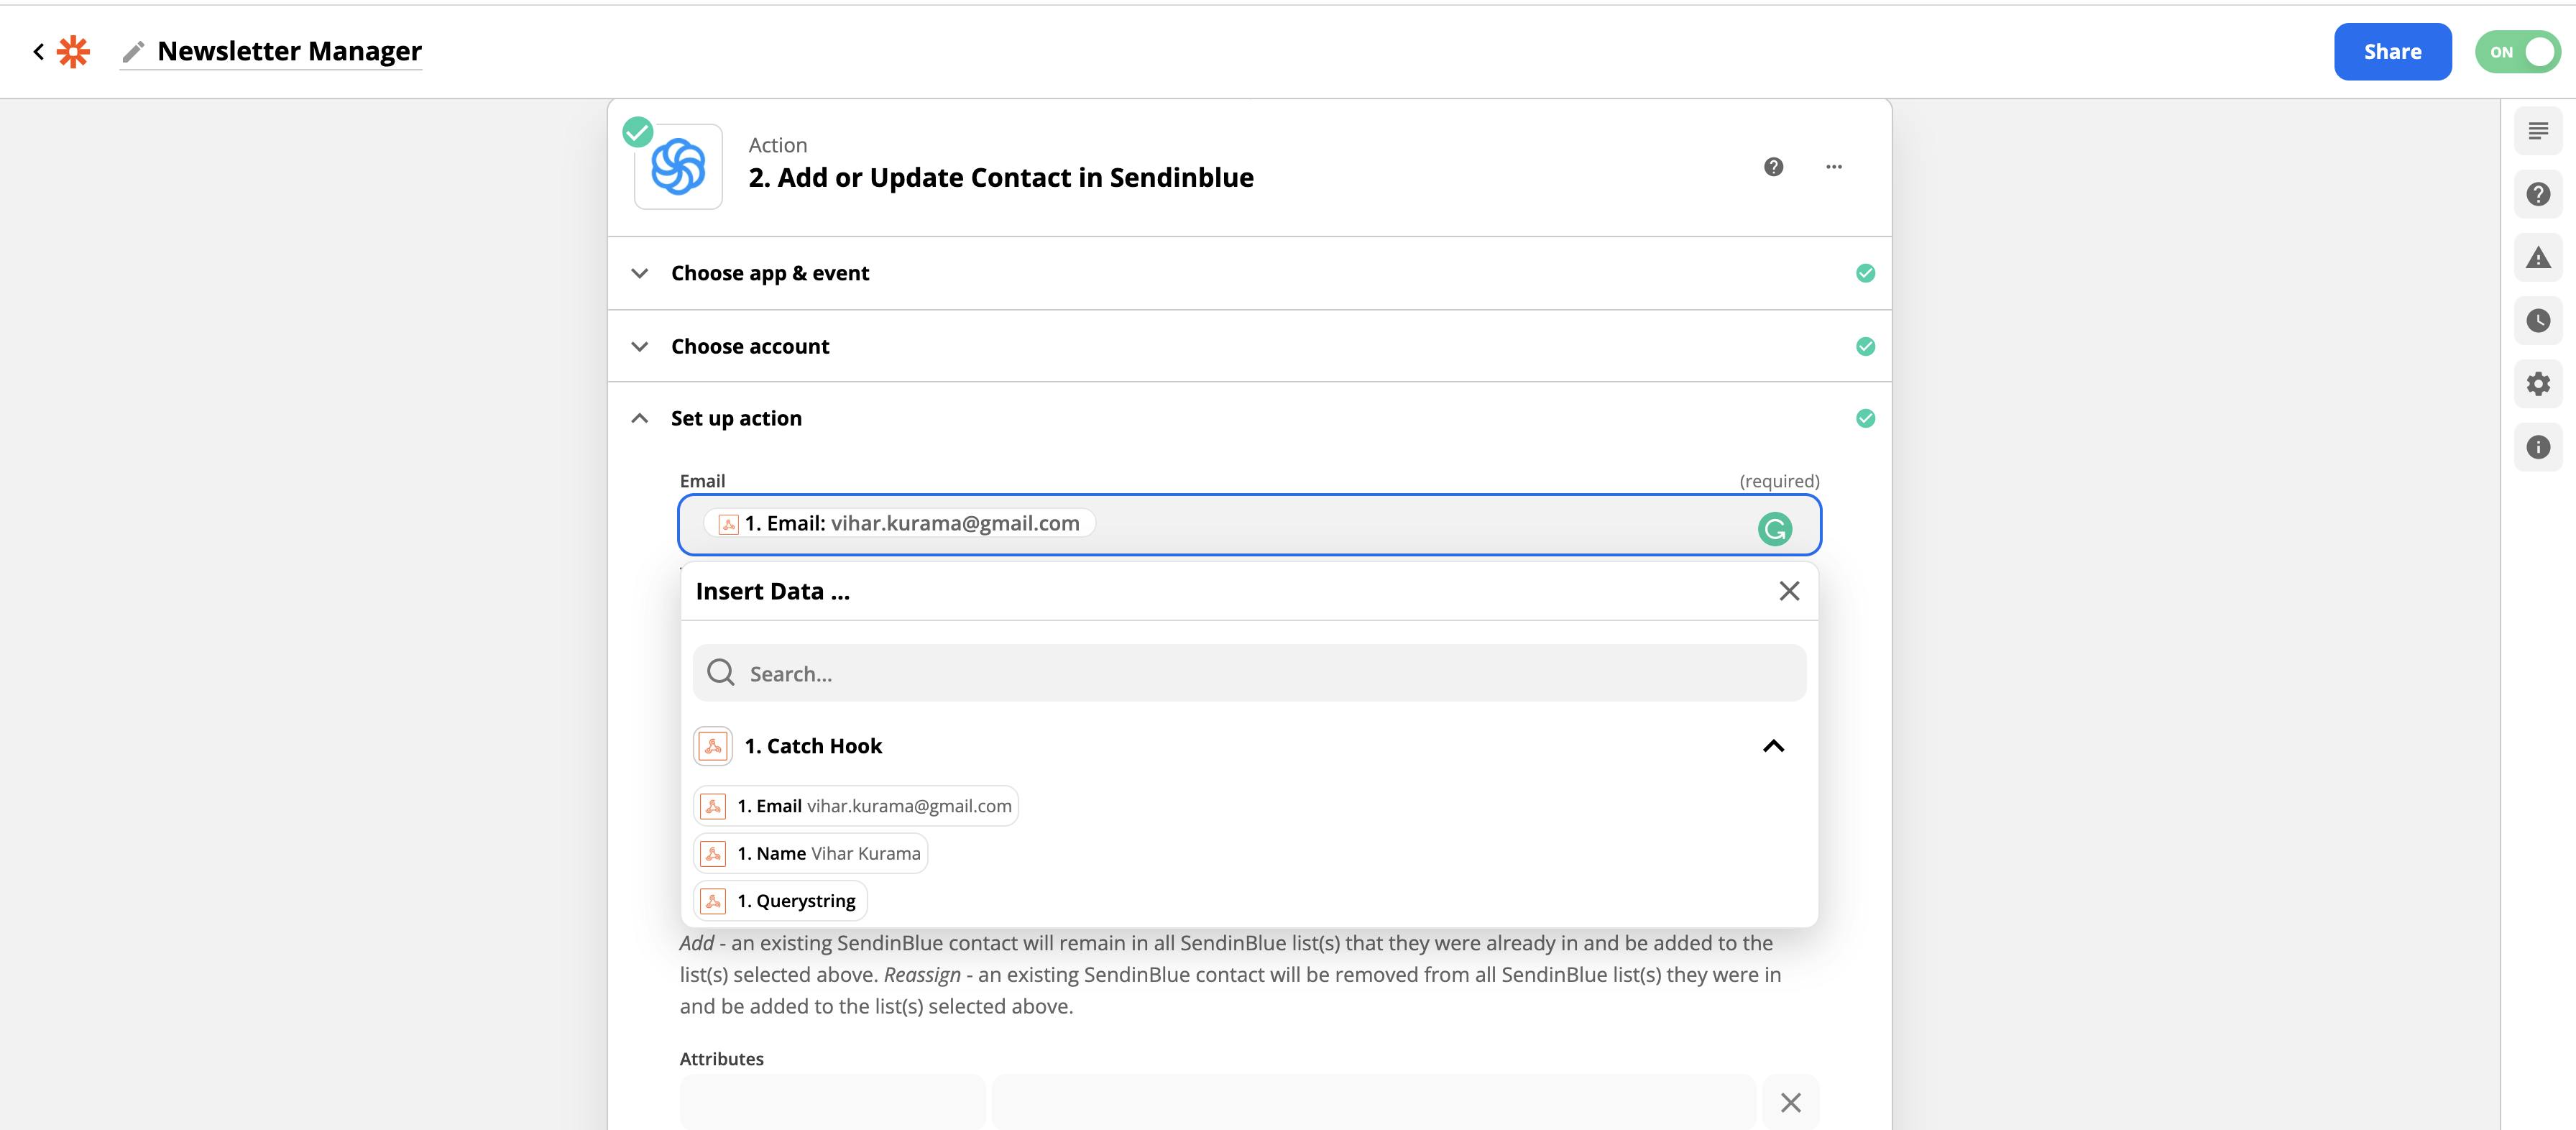
Add or Update in Sendinblueand fill in the details related to Email; here, we can also use the data sent from the Webhook. In the following screenshot, we select the EMail field data to be the email received from the webhook.

- Similarly, you can add a Send Transactional Email in Sendinblue action to the workflow using the Seninblue Zap.
With this, whenever a new user subscribes to the Newsletter, he receives a confirmation Email and will be added to the contact list on Sendinblue.
And just like that, we could configure and build an entire Newsletter manager without writing code. This application can be extended in multiple ways, such as creating new email campaigns, filtering contacts, blocking users, and many more! The entire demo app of this tutorial can be found here. This is just one example of how you can automate your apps on Appsmith!
We hope that you will have a better idea of how to leverage automation in your Appsmith applications. For more information on automating your Appsmith applications, please contact me anytime at vihar@appsmith.com.

