JUnit is one of the most popular unit testing frameworks used with Java to create repeatable tests. With JUnit each test is written as a separate method inside a Java class. IntelliJ IDEA provides an option to run these test cases from within the IDE.
In case you have a module that communicates with a MySQL database, you can unit test the module by providing it access to a MySQL server running inside a testcontainer. You can also configure this MySQL database instance with your desired username, password and database name (in MySQL server) using the API provided by Testcontainers framework.
In case you use Maven to manage dependencies in your project, as used in Appsmith , you can add the following snippet in your POM file to include all the required packages:
<dependency>
    <groupId>org.testcontainers</groupId>
    <artifactId>testcontainers</artifactId>
    <version>1.15.1</version>
    <scope>test</scope>
</dependency>
To create a new MySQL testcontainer instance with JUnit 4 you may follow these steps as used in Appsmith's unit test file to test its MySQL plugin:
public static MySQLContainer mySQLContainer = new MySQLContainer("mysql:5.7")
            .withUsername("username")
            .withPassword("password")
            .withDatabaseName("test_db");
Please note that Testcontainers framework is different for JUnit4 and JUnit5. Please use the framework as per the JUnit version that you have used. For more details please see Testcontainers page.
Databases spwaned using Testcontainers when run from within the IDE can seem to become inaccessible from outside the IDE. In order to connect to such databases you can uses the database tool that comes with IDEA ultimate version.
Steps to connect to the MySQL database:
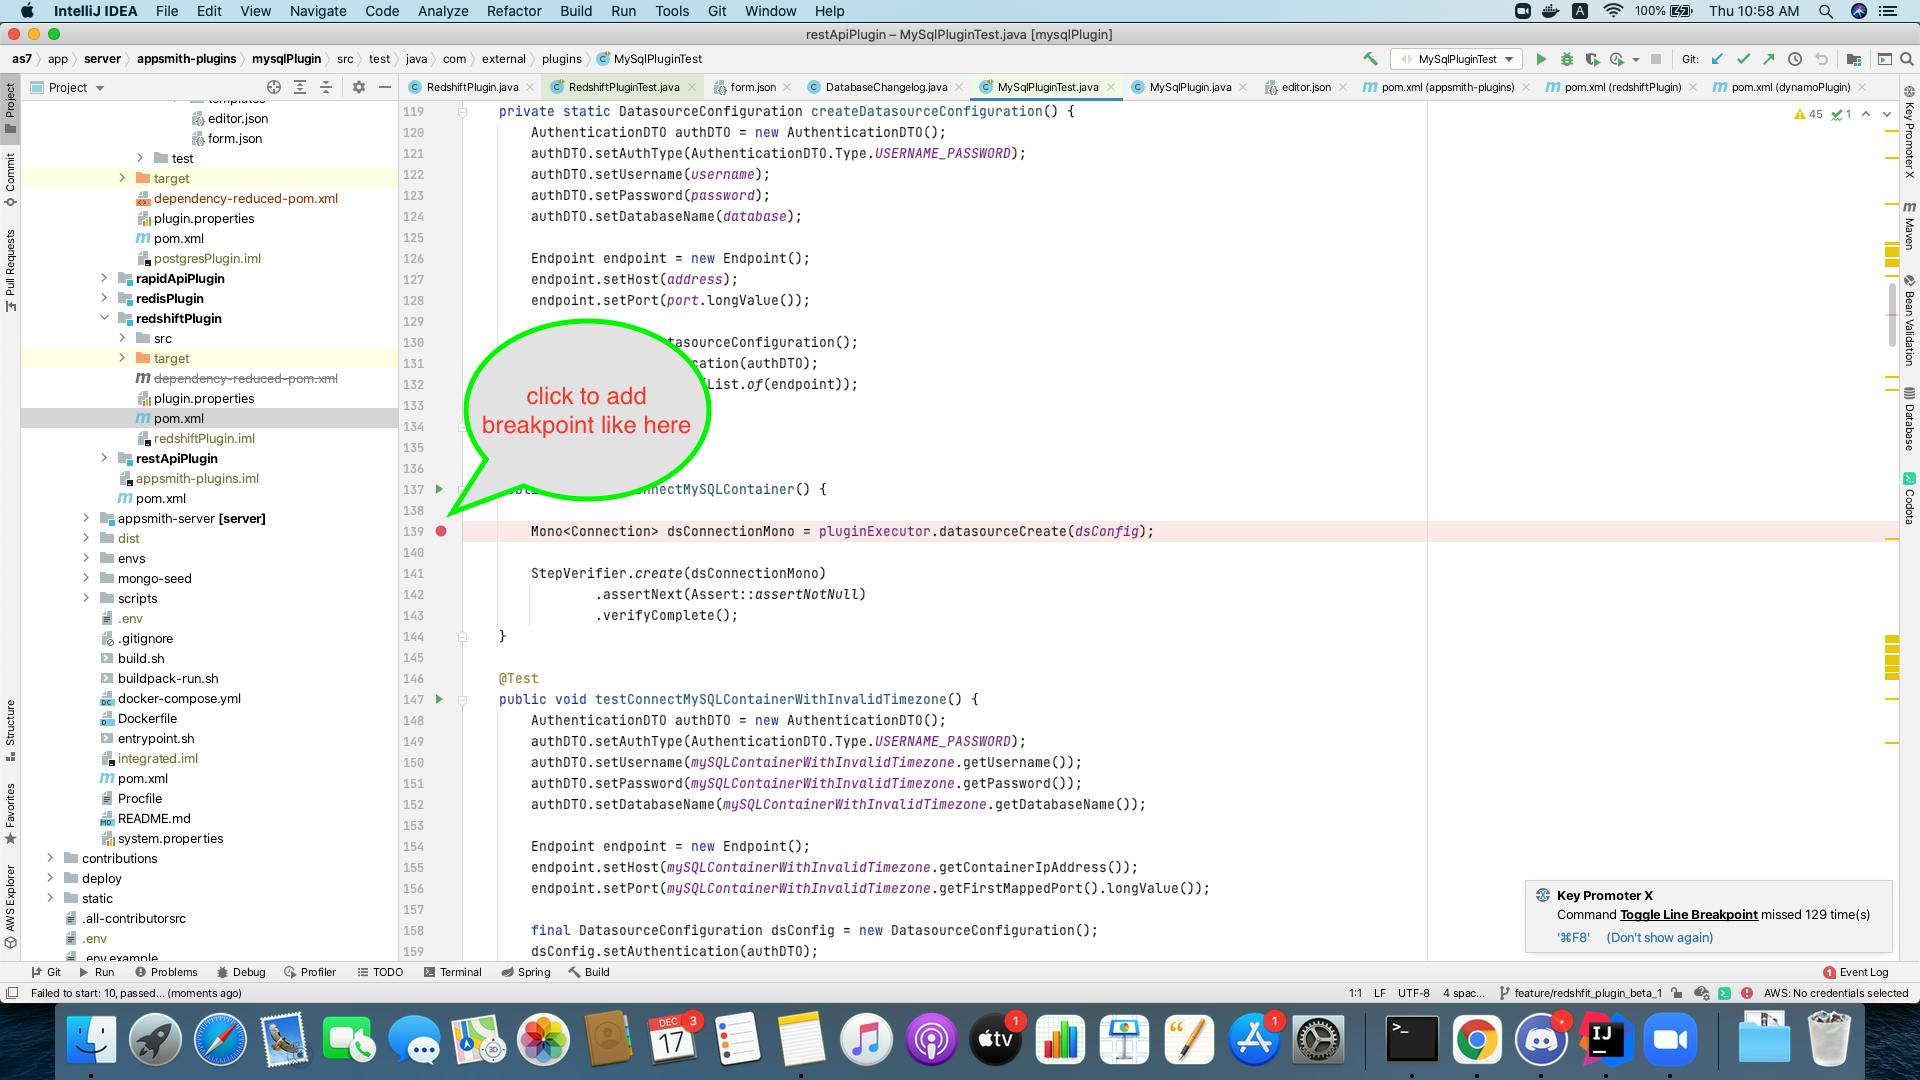
Add a debug point in the code such that the testcontainer has been brought up at this point.
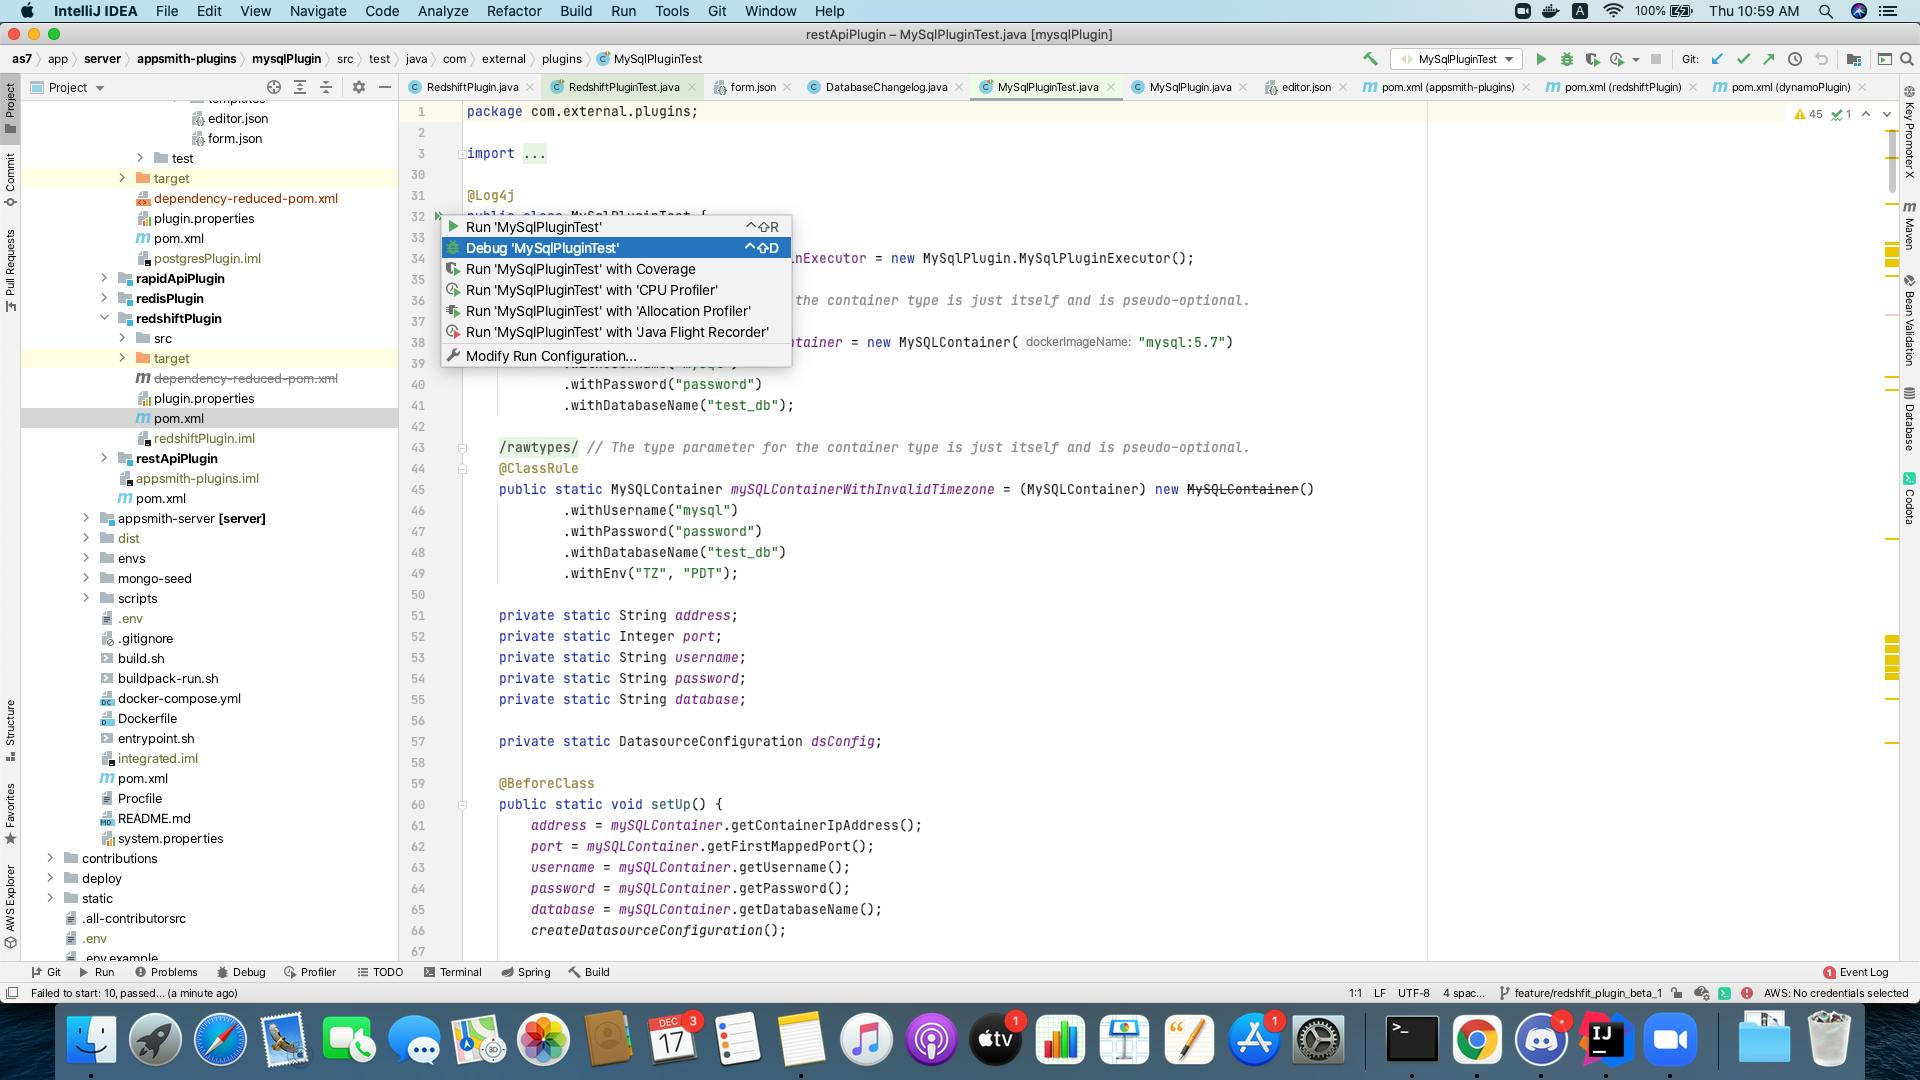
Run the test program using debug mode and wait till it stops on the break point.
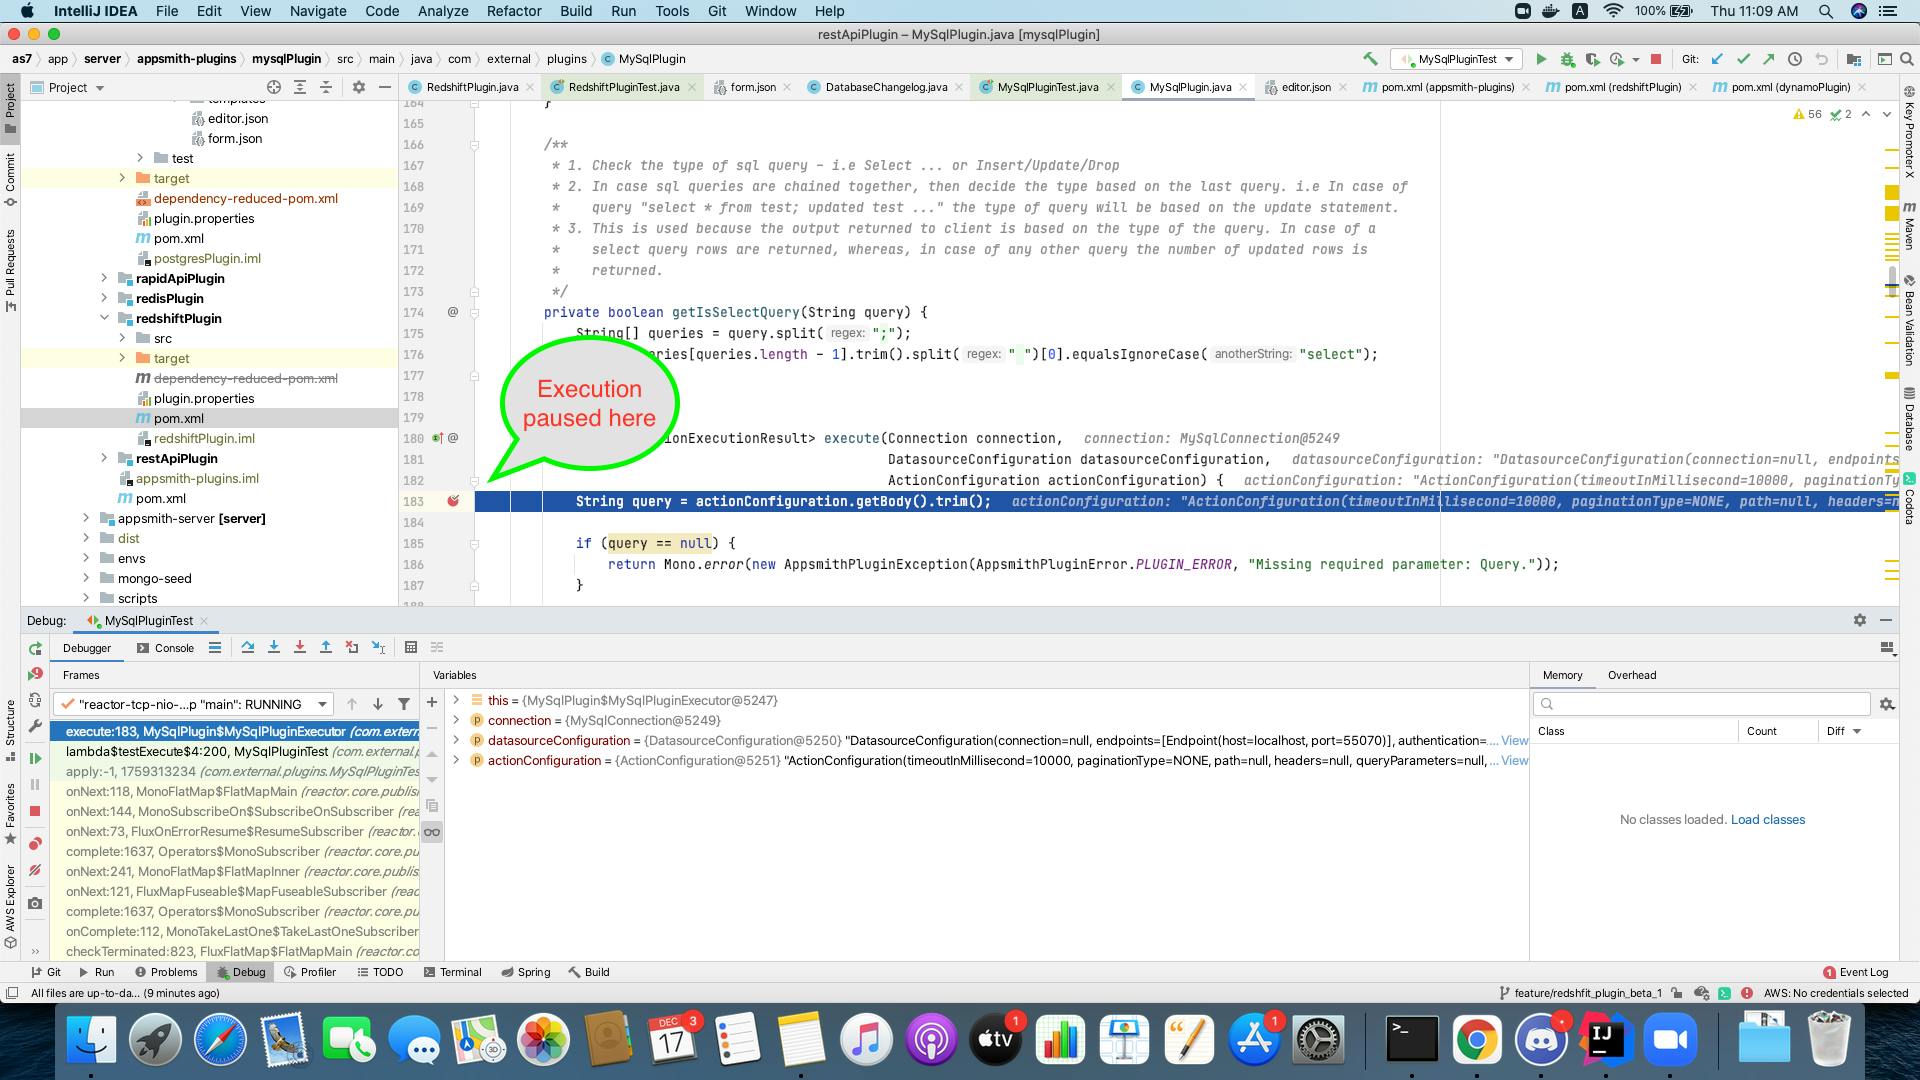
Click on the database tool.
Select your database type.
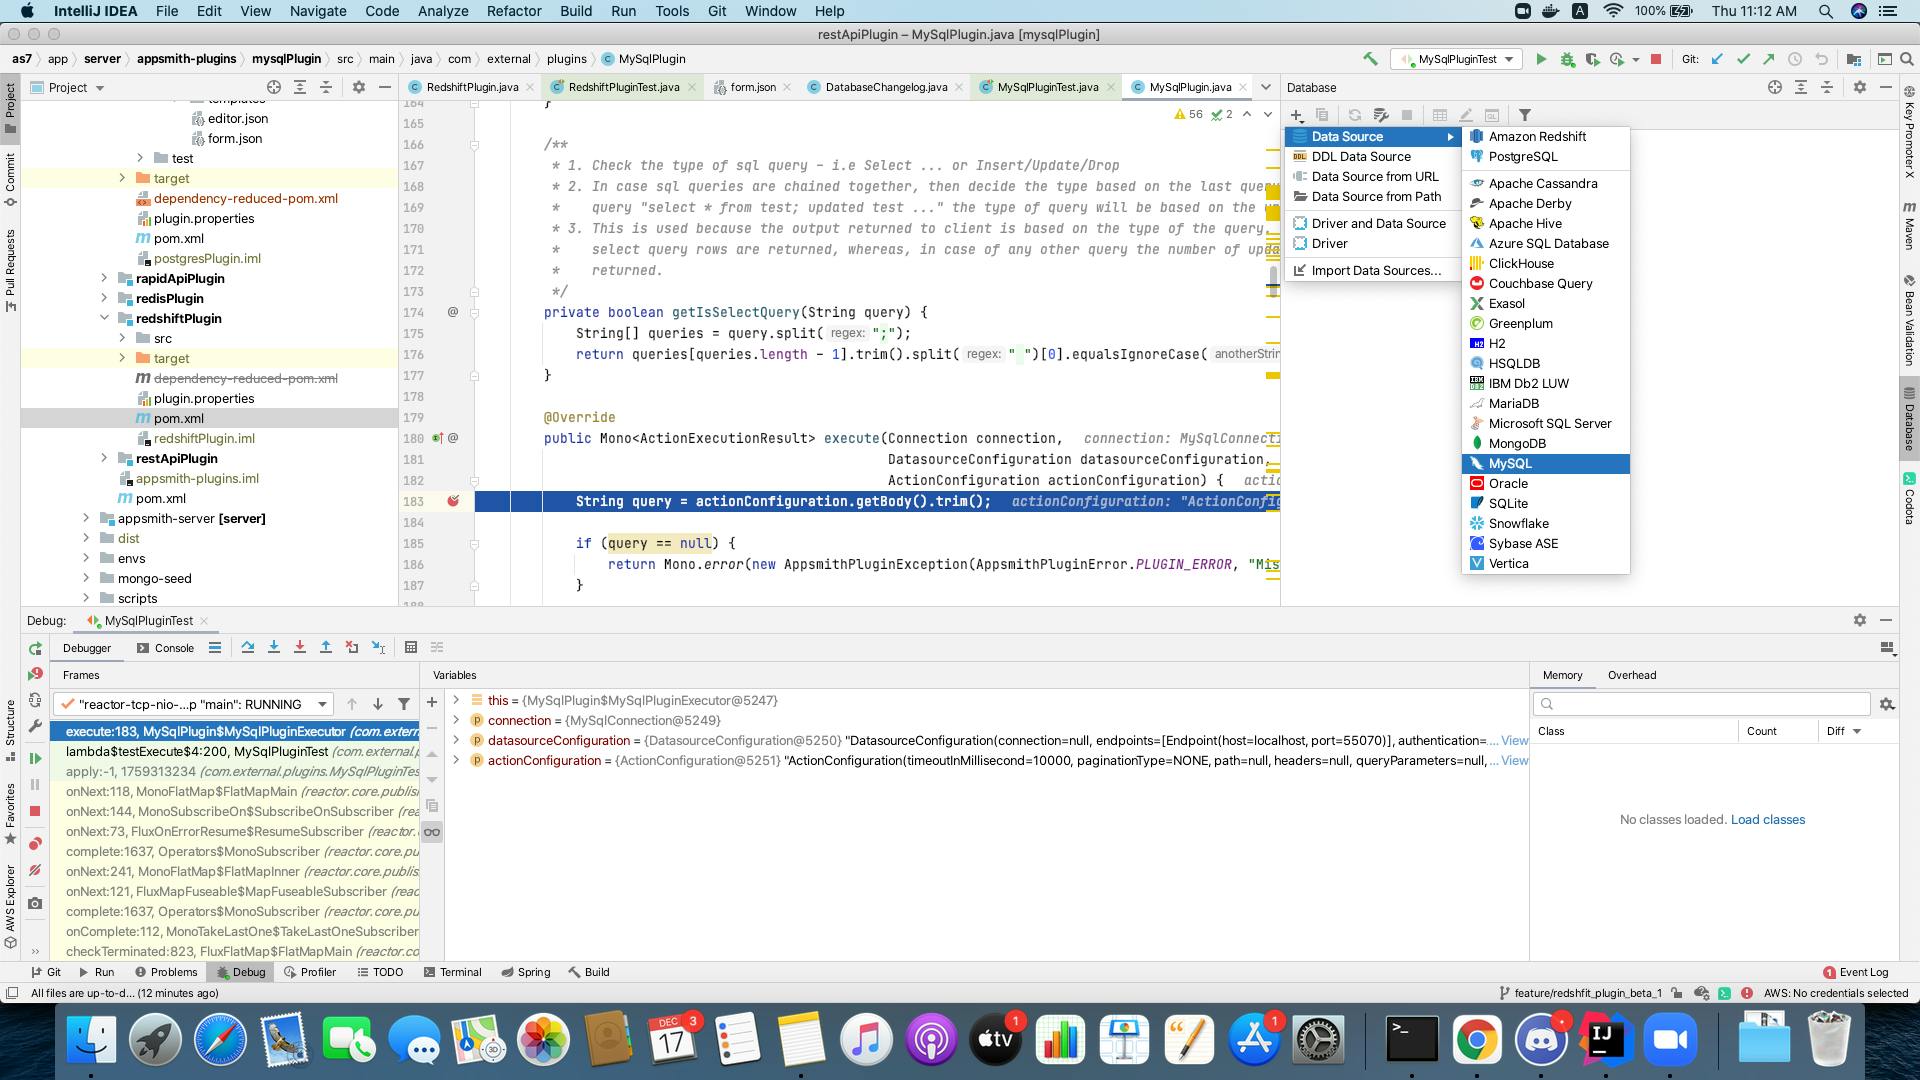
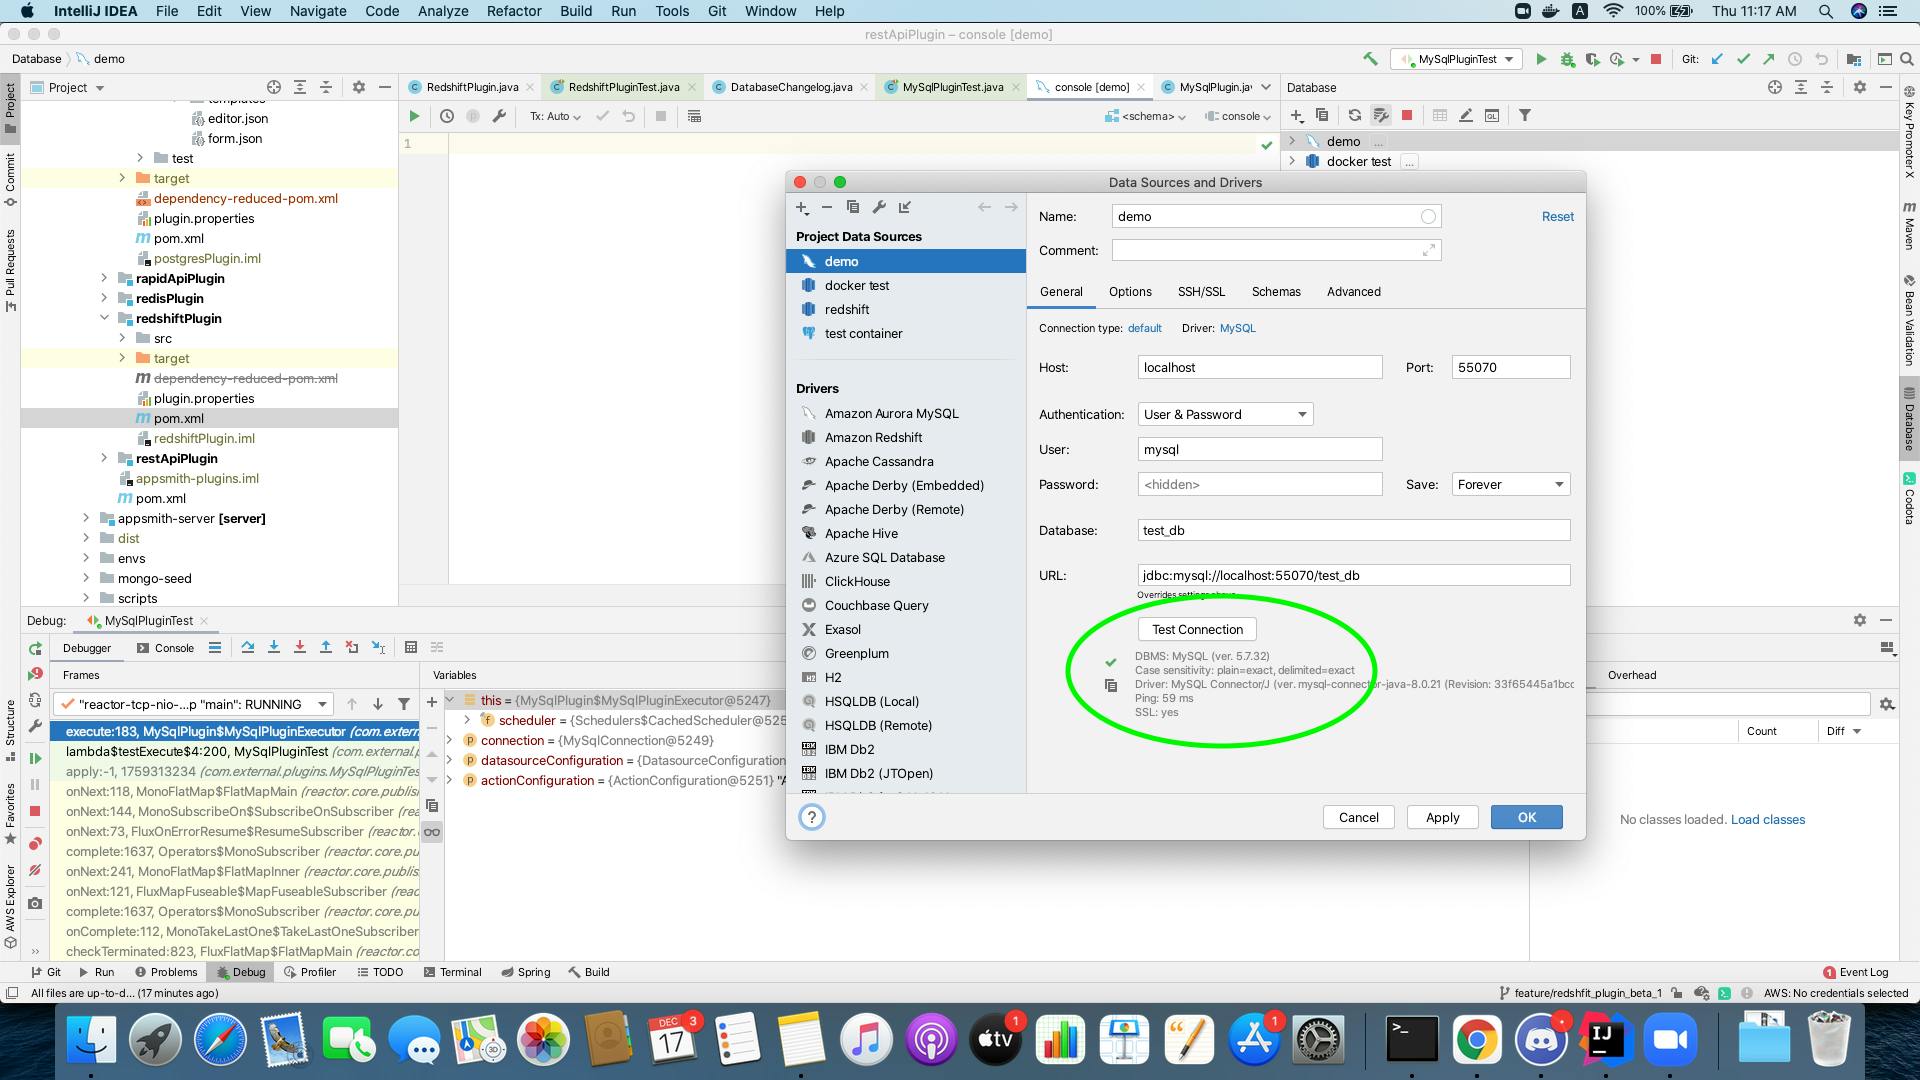
Fetch your credentials. You may read the credentials from the testcontainer using the following API when using with JUnit 4.
address  = mySQLContainer.getContainerIpAddress();
port     = mySQLContainer.getFirstMappedPort();
username = mySQLContainer.getUsername();
password = mySQLContainer.getPassword();
database = mySQLContainer.getDatabaseName();
Test your connection and save credentials.
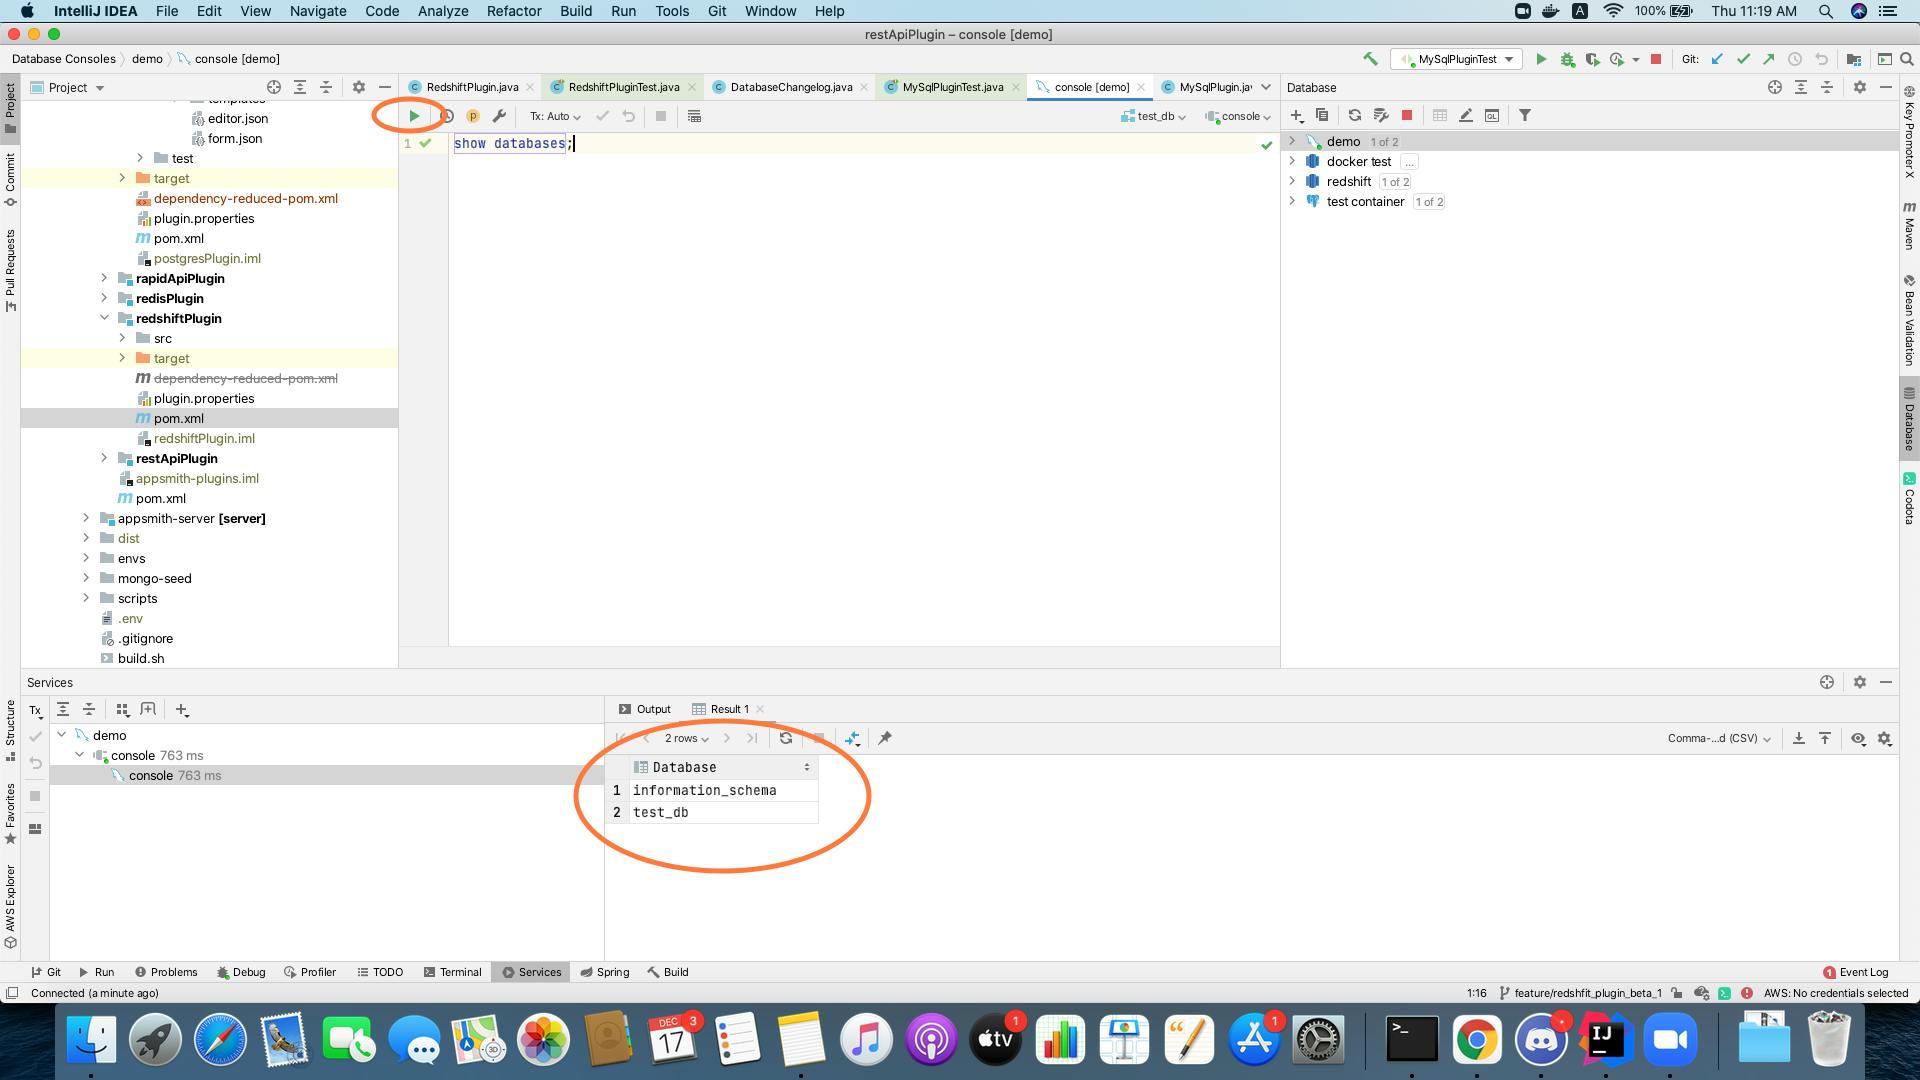
Run query.
It is noteworthy that Testcontainers provide containerized instances of many other popular databases as well, like Postgres, MongoDB and Neo4j. Similarly, IntelliJ IDEA's database tool also provides connectivity support for most of the popular databases. The steps described above, to integrate the testcontainers package or to investigate the containerized database, can be used with databases other than MySQL as well. In summary, the steps to write a unit test using JUnit and any testcontainer can be generalized as follows:
- Add dependency for JUnit package.
- Add dependency for testcontainers package.
- Write code snippet to start a containerized instance of your desired database.
The steps to investigate the containerized database instantiated above can be generalized as follows:
- Add a debug point after the container is instantiated but before the test ends.
- Start the test and wait till the execution stops at the debug point.
- Use the database tool to connect to the containerized database and run queries on it.
In case you need access to more code examples to see the above steps in usage, do checkout the test files in Appsmith's GitHub repository. I hope this article was useful to you and do share your feedback in comments.
