

How To Build A Catalog Manager for a Shopify Store

In this article, we will be building a Shopify Dashboard that fits into your custom workflow. But before that, let’s set some context. Lots of store owners choose Shopify as their go-to online store. It’s a mature product with excellent features like the store admin panel and full API access.
That said, it’s not without its flaws.
Integrating with no-native Shopify services can be a real pain, and it’s almost impossible to build custom workflows with the Shopify admin panel. We’ve also published another post on how to make a Shopify admin panel.
In this article, I’ll be showing you how to overcome all of these hurdles so you can build a dashboard app for your Shopify store that fits into your workflow. We’re going to do this by covering the following concepts:
- How to integrate with Shopify APIs on Appsmith
- How to set a custom theme for your Shopify dashboard
- How to use dynamic parameters in API calls
- How to use the Google Sheets integration
Feel free to peek into the app we’ll be building.
Sounds good? Let’s begin!
How to integrate with Shopify APIs on Appsmith
Lots of services provide secure access to resources via APIs. This makes it possible to design complex workflow and unlock new capabilities. Shopify is not exempt from this rule as we’ll be extensively making use of their APIs.
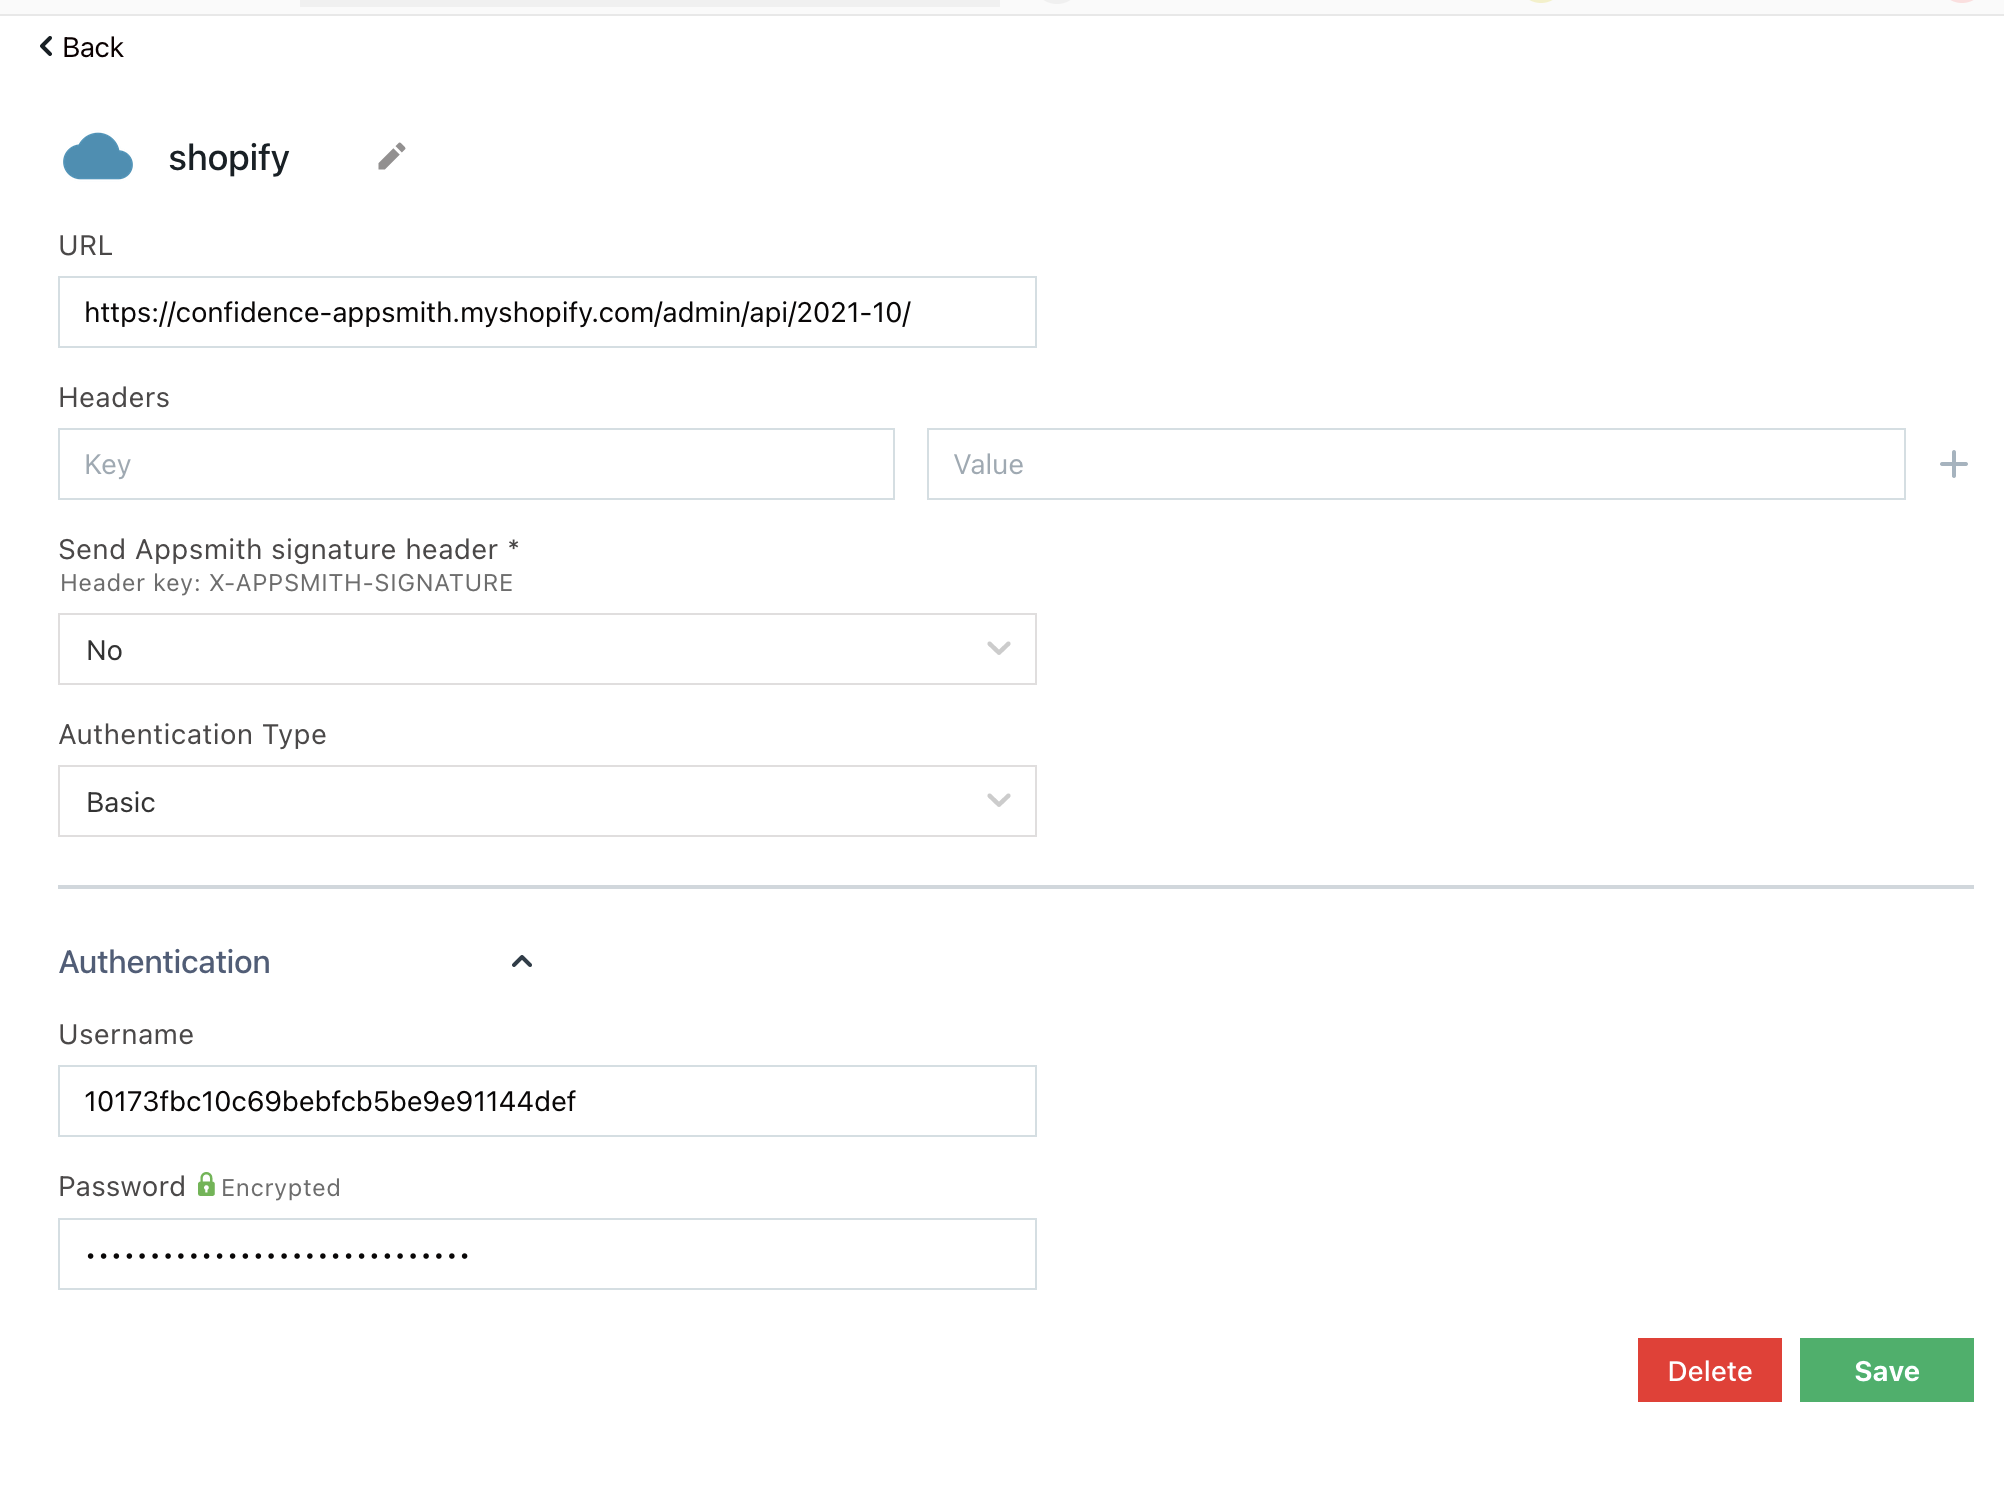
To get started, enable Private apps in your Shopify dashboard. Create a new app and configure the permission level. You’ll be presented with the following details to interact with the API securely:
Your store endpoint i.e https://your_store_name.myshopify.com/admin/api/2021-10/
A username
And also a password i.e shppa_cc*******
With these details, we can begin building the dashboard. So signup for Appsmith if you’re yet to do so, and create a new app.
In the new app, click on Datasource > Create New > Authenticated API. Be sure to set Authentication Type to Basic and then fill the form. Here’s a quick snapshot of mine:
Using the Shopify data source, let’s create a new API to get all products from the store. Call this get_products and it should be a request to the products.json route.
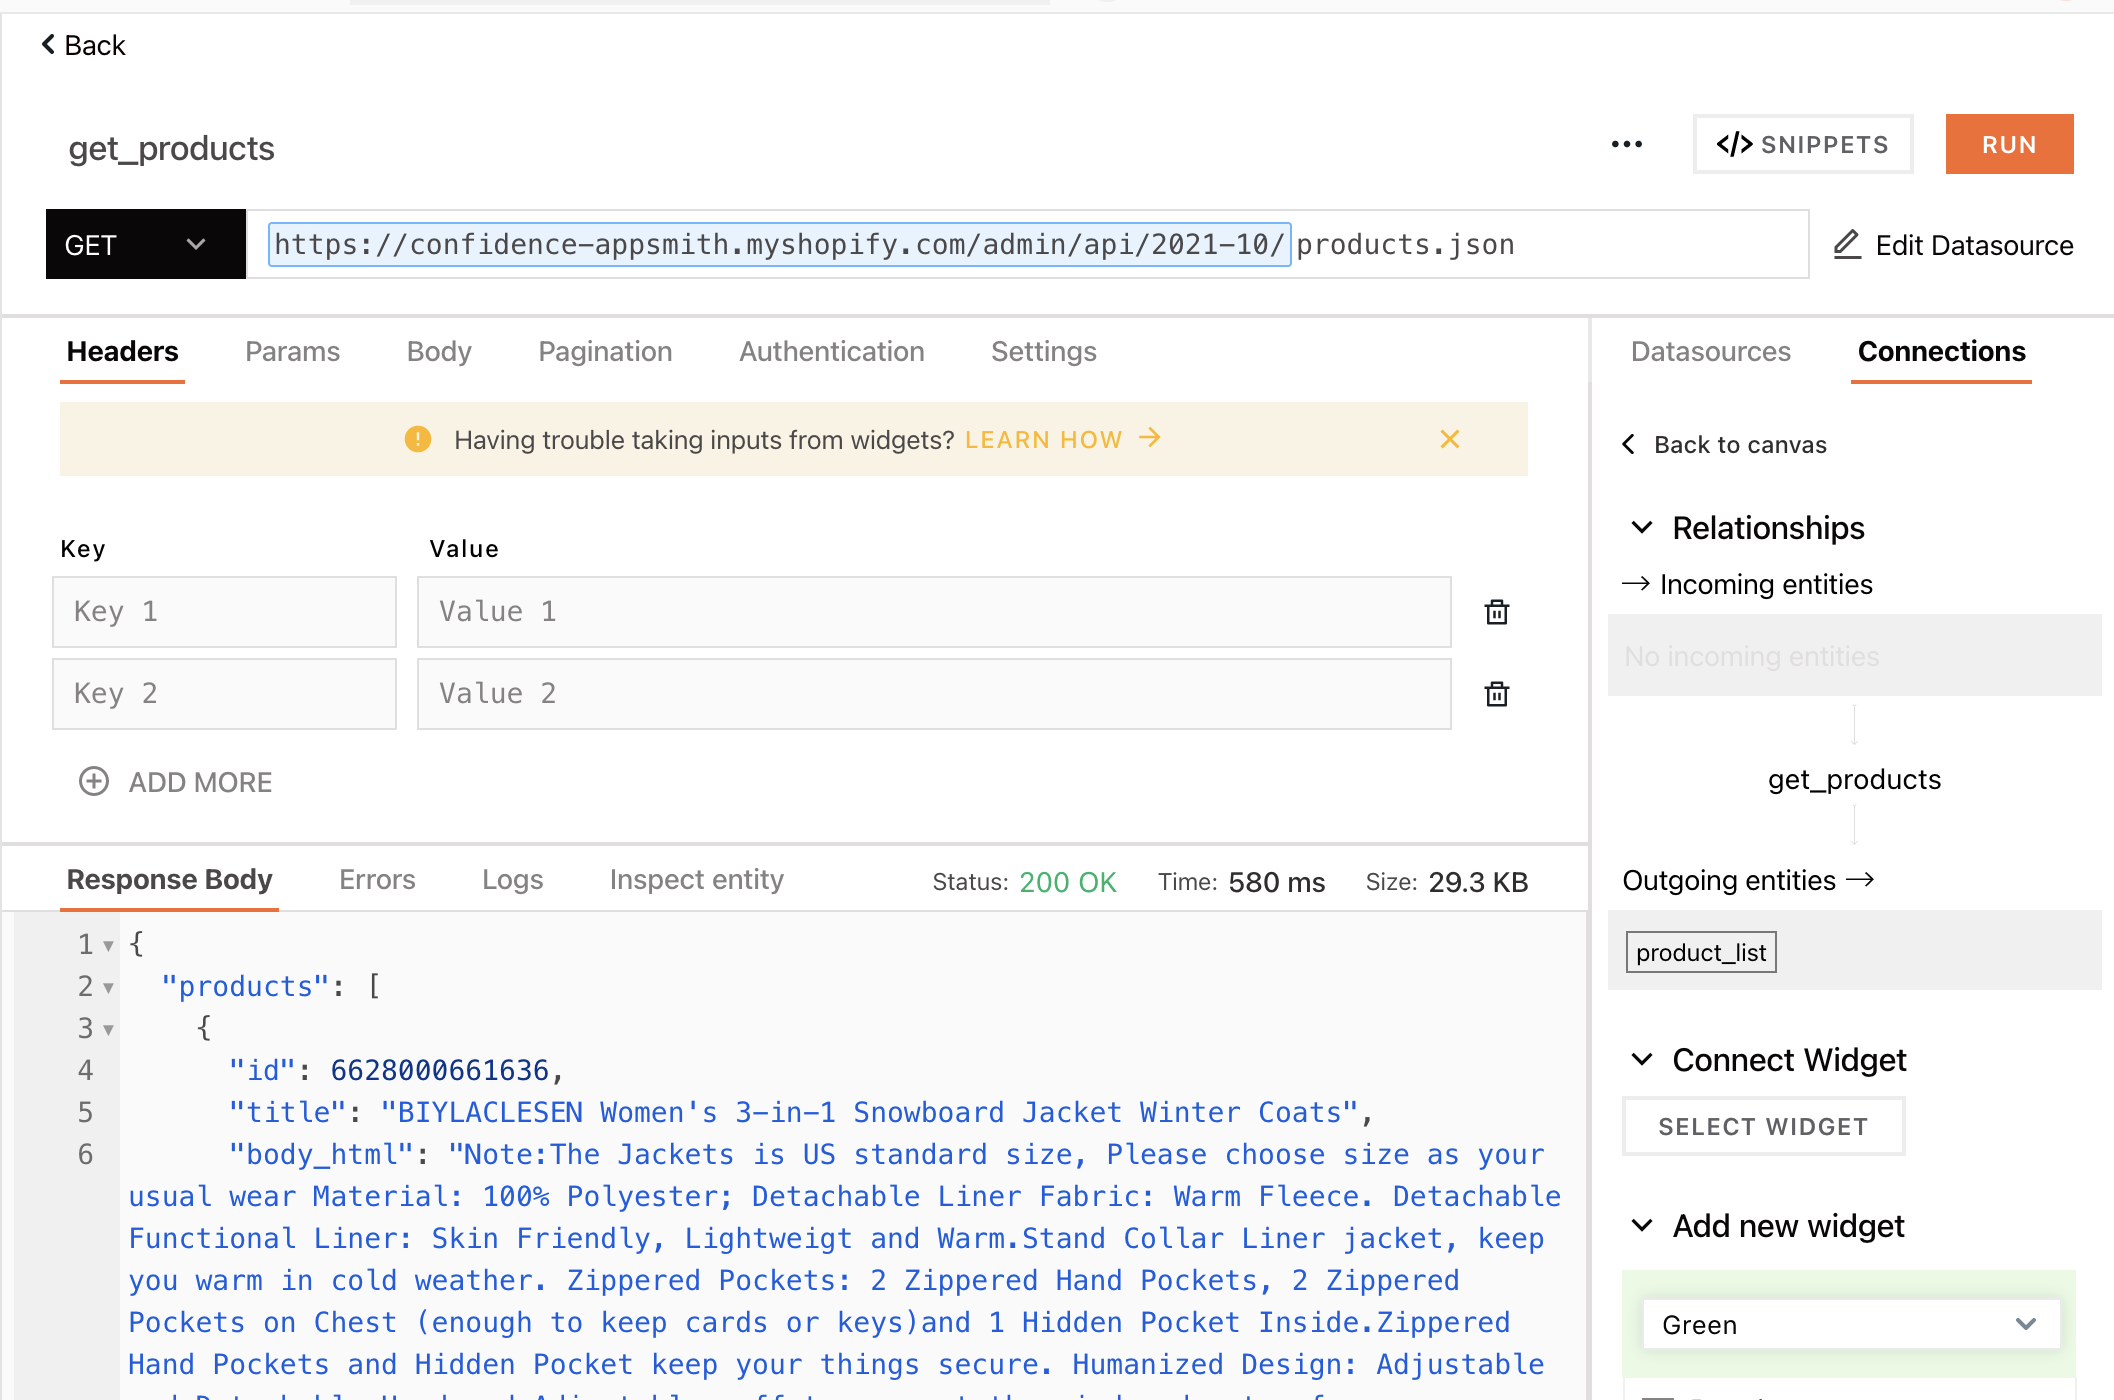 Now we have data coming into the app. Let’s go build some styled UI components to display this.
How to set a custom theme for your Shopify dashboard
There are many widgets to choose from on Appsmith; the best part is that you can customize and style the look and feel of many. Let me show you how to do this.
From the widgets tab, drag a container widget into the canvas. In the opened configuration menu (called property pane), give it a Border Radius of 5 and set some Box Shadow. You should have a cool looking card container:

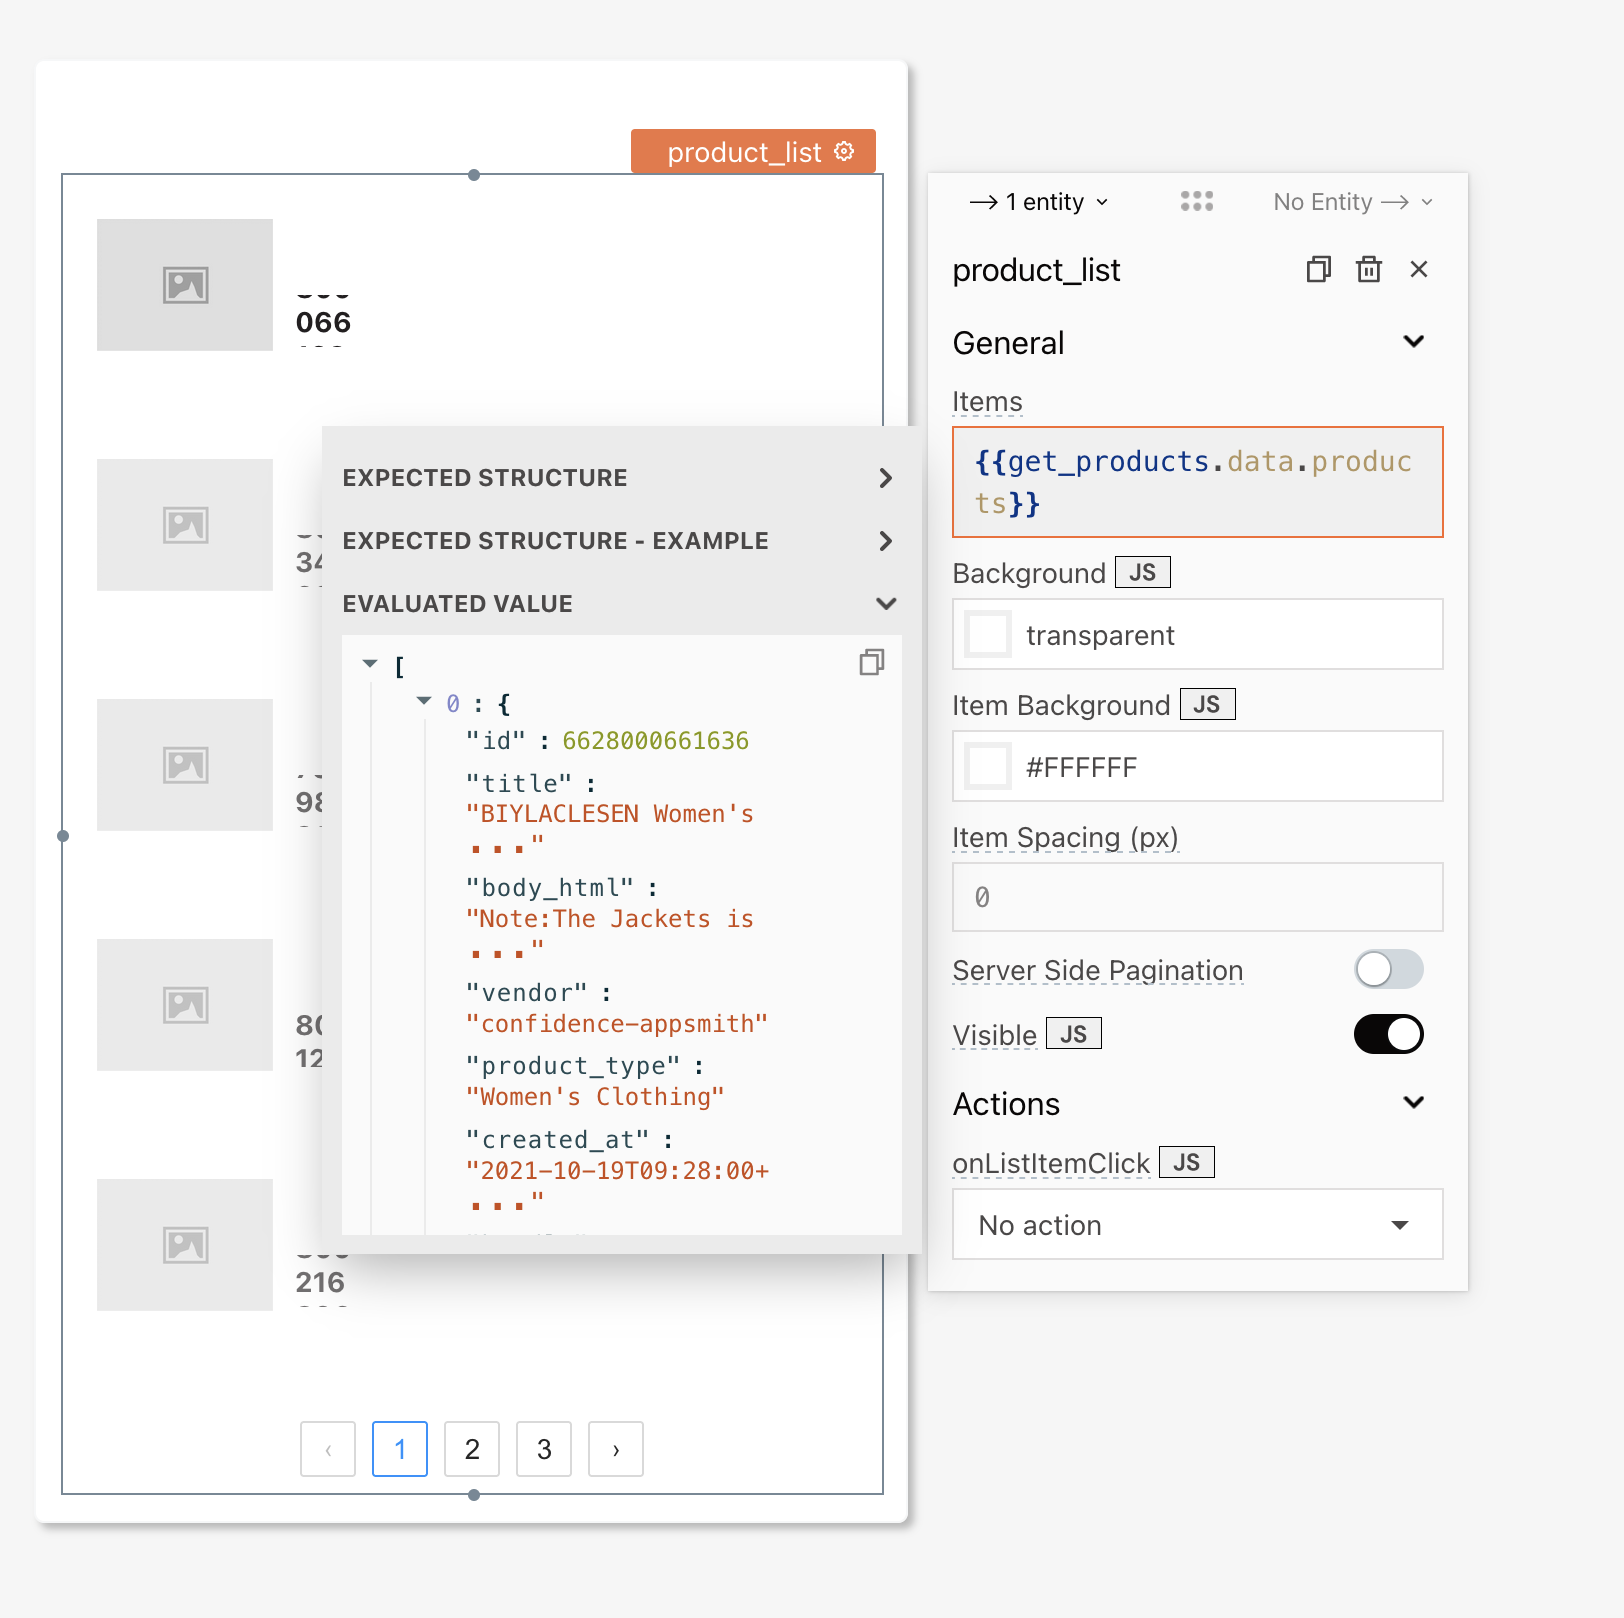
Now you can bring in a list widget into the container and bind the data from the get_products query like this:
And similarly, you can display the product image and name by accessing the data from {{currentItem}}. Here’s an example:
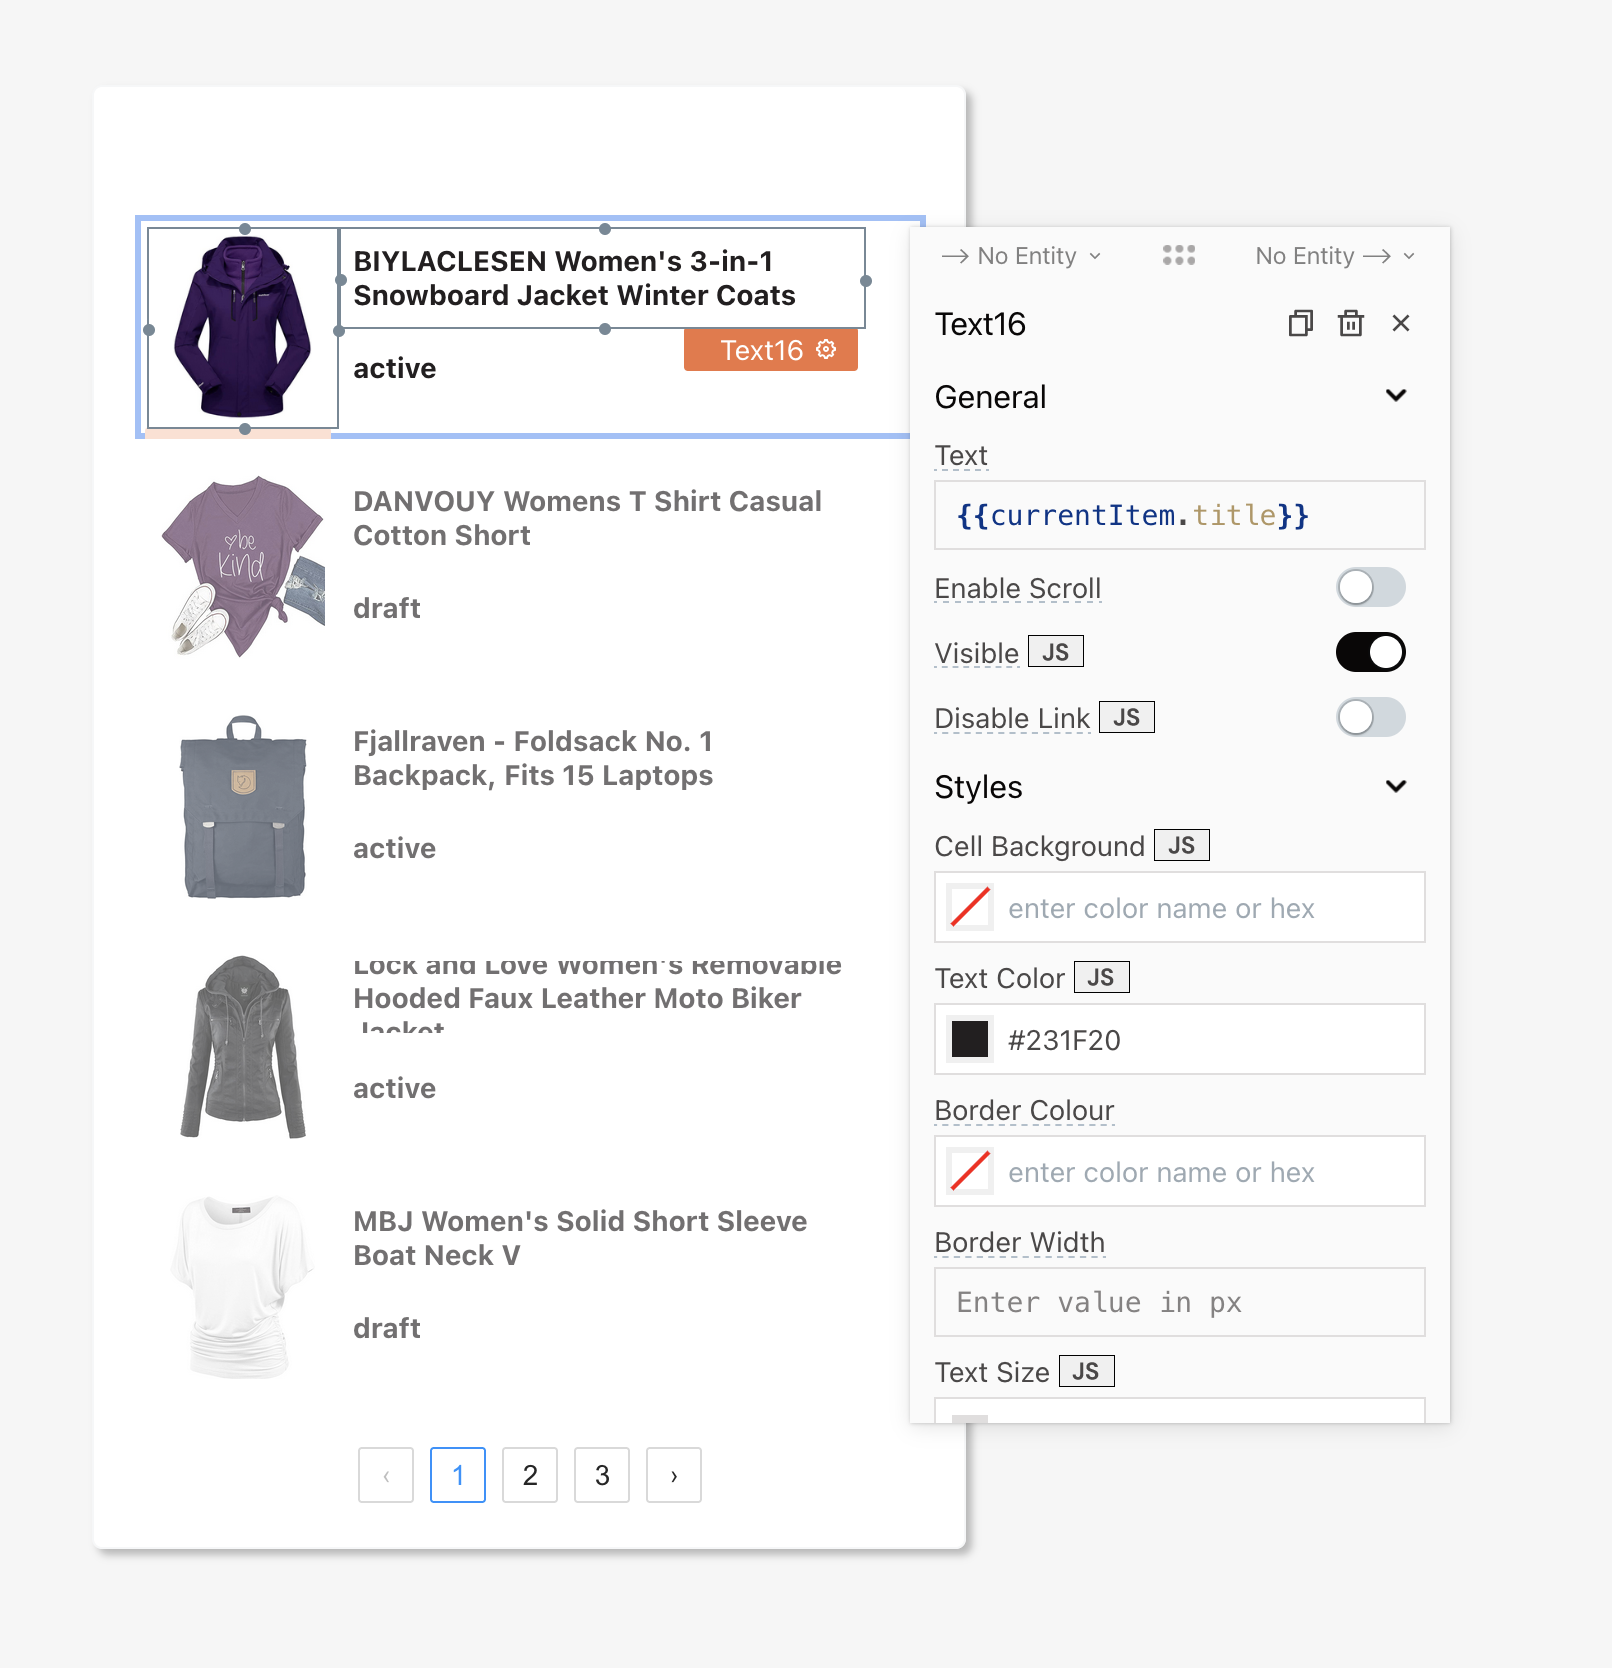
Cool! That’s how easy it is to style components by using the Styles section in the property pane.
How to use dynamic parameters in API calls
So far, our app can read data and display it in the UI. Now let’s add a flow that allows us to write data. To do this, let’s build a product update feature.
Using the concepts illustrated in the previous sections, build an update form UI that looks like this:
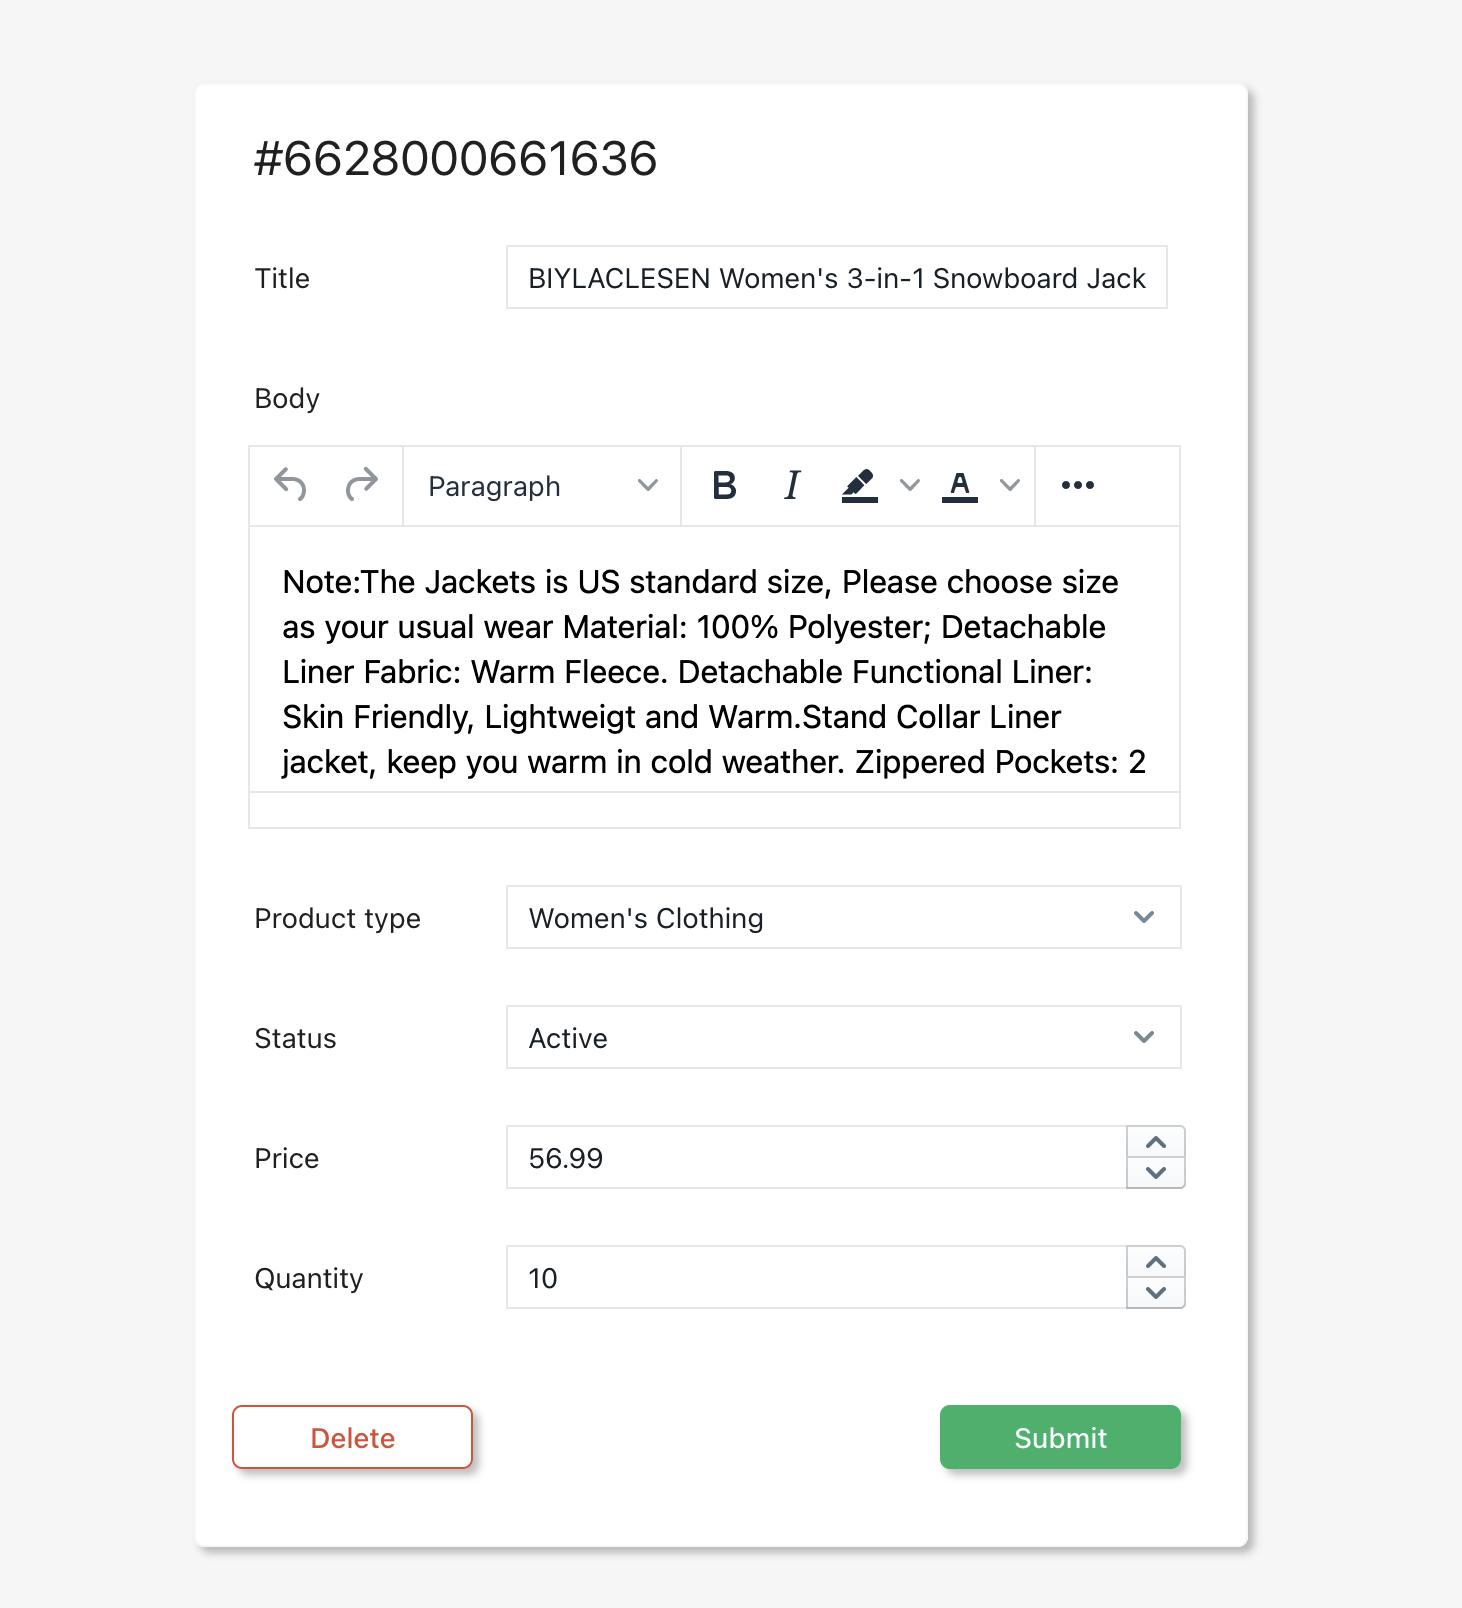
And should be configured such that all input widgets are named and have default values based on the product selected from the product_list widget i.e the tile input widget is named up_title and has a Default Text of {{product_list.selectedItem.title}}:
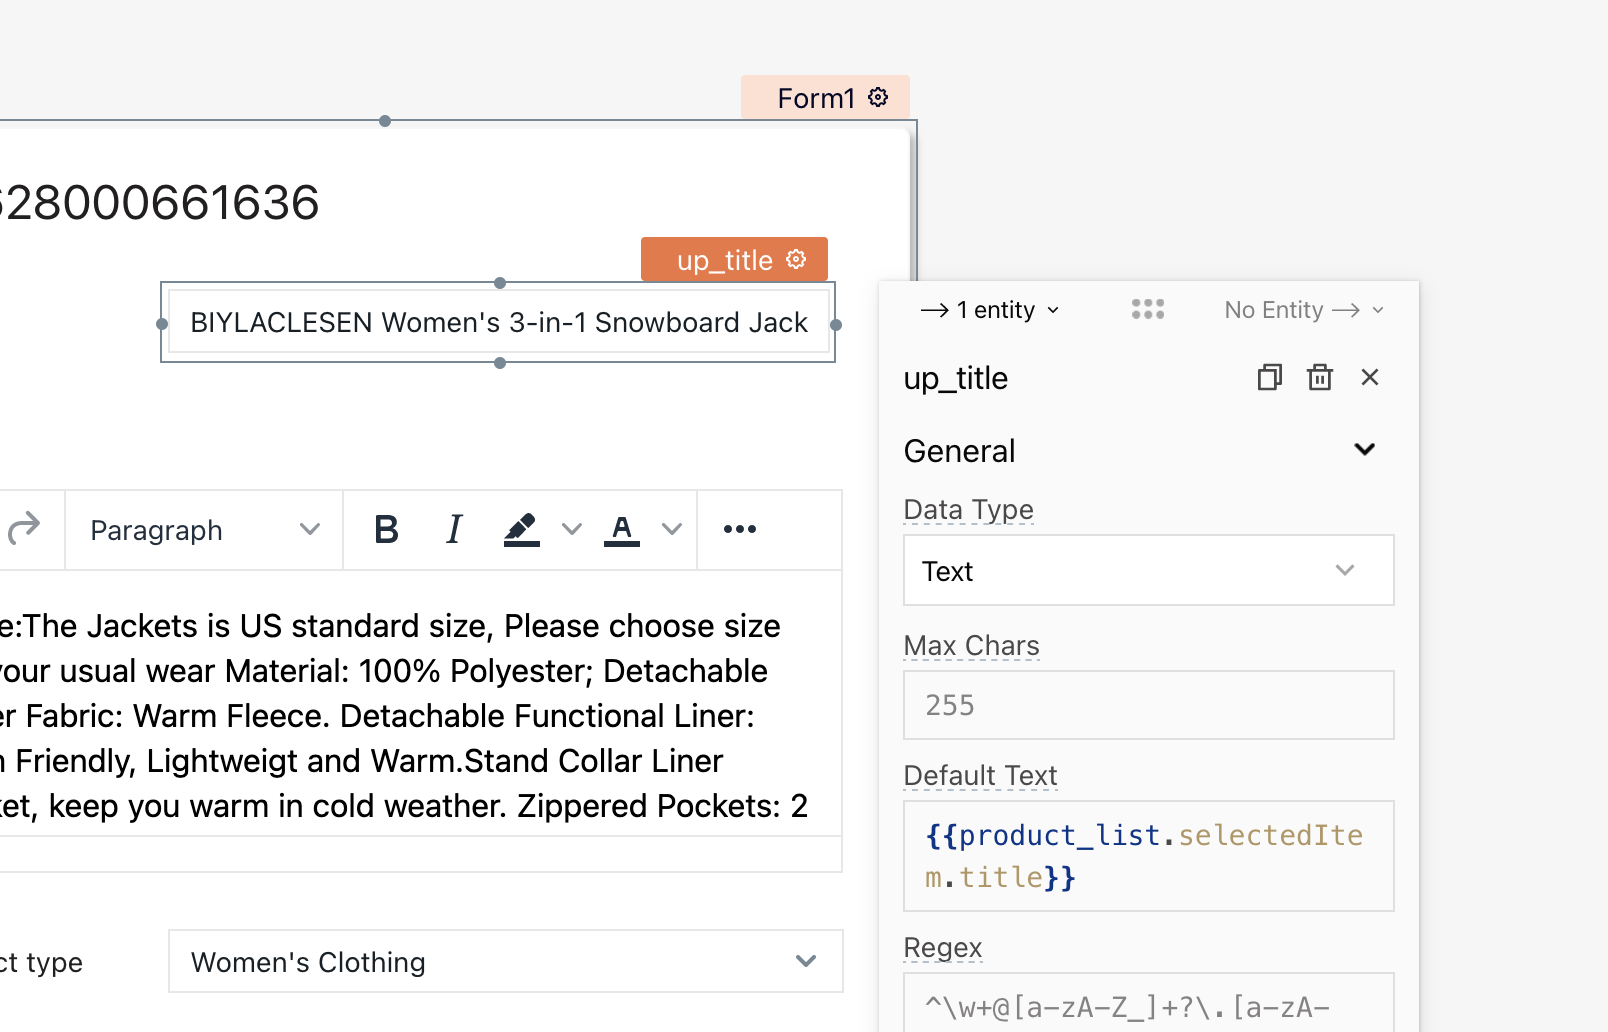
Cool. Do the same for all the other input widgets in the form.
Now, using the Shopify data source configured earlier, create a new update query that takes input from the form widgets as parameters. Here’s an example:
{
    "product": {
        "title": {{up_title.text}},
        "body_html": {{up_body_html.text}},
        "product_type": {{up_product_type.selectedOptionValue}},
        "status": {{up_status.selectedOptionValue}}
    }
}
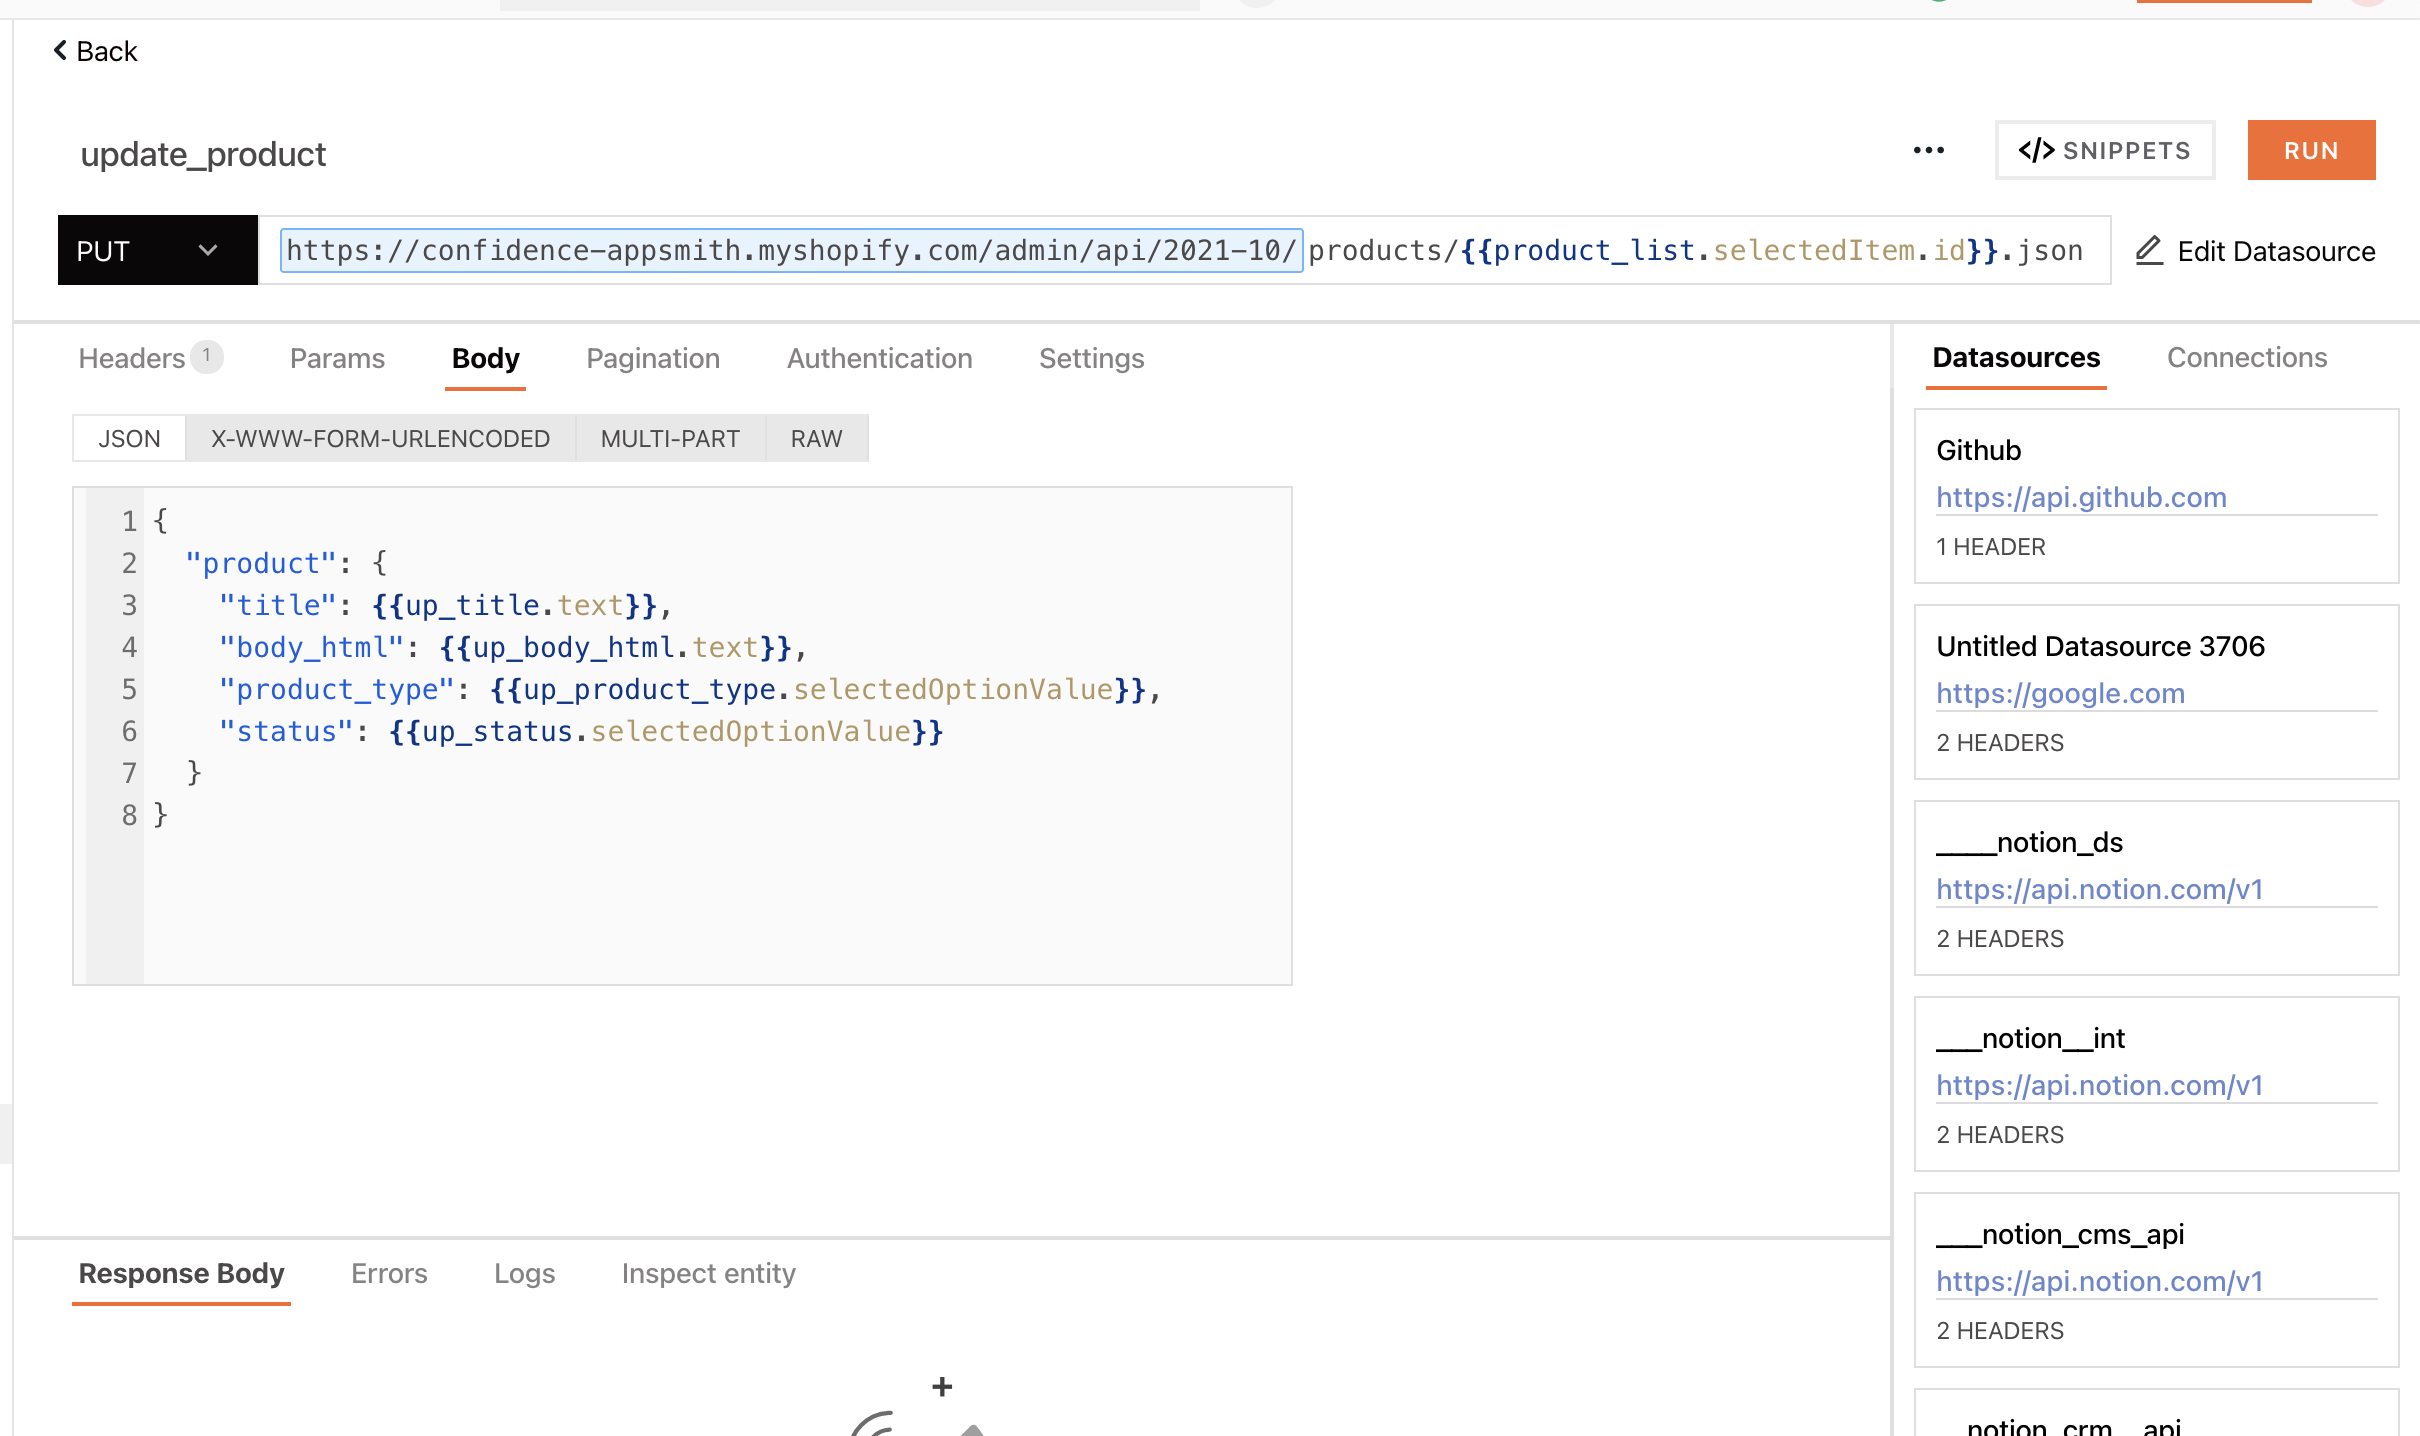
You’ll also notice that the ID of the product to be updated is populated from the product selected on the product_list widget and used in the endpoint URL.
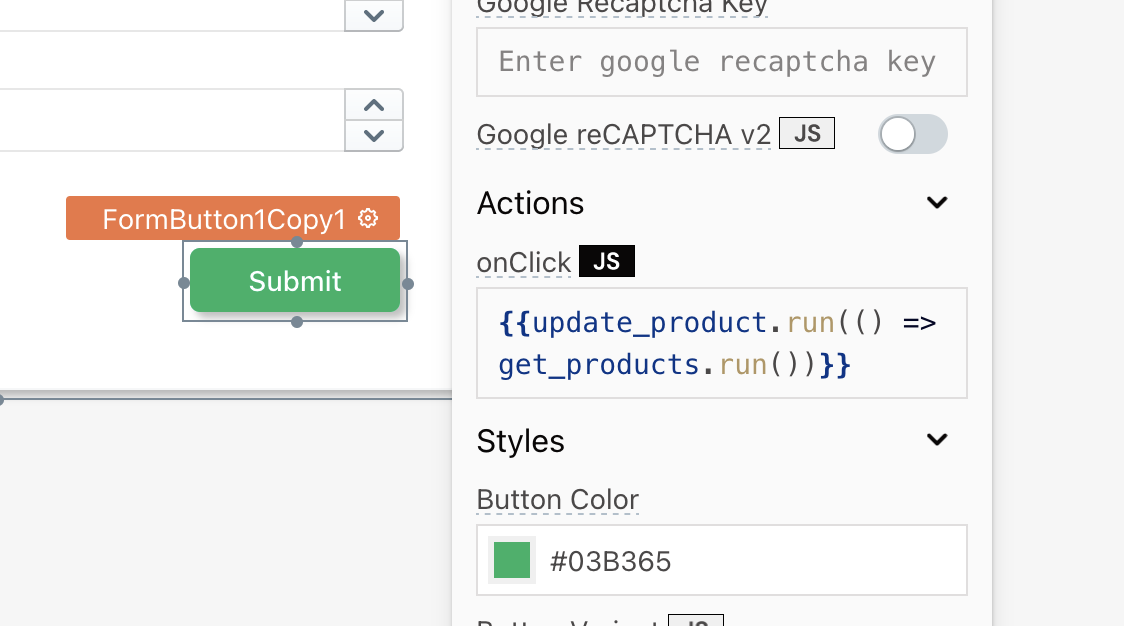
Awesome! To finish this up, go back to the form submit button and configure it to run the update query. We should also add a get_products query so that all data in the app is refreshed i.e:
{{update_product.run(() => get_products.run())}}
And that’s how easy it is to pass dynamic parameters to API calls!
Lastly, let’s talk about how to integrate with Google Sheets.
How to integrate with Google Sheets
This section will be quite advanced, so stick with me! We will build a bulk import functionality from Google sheet, a feature not natively supported by the Shopify API.
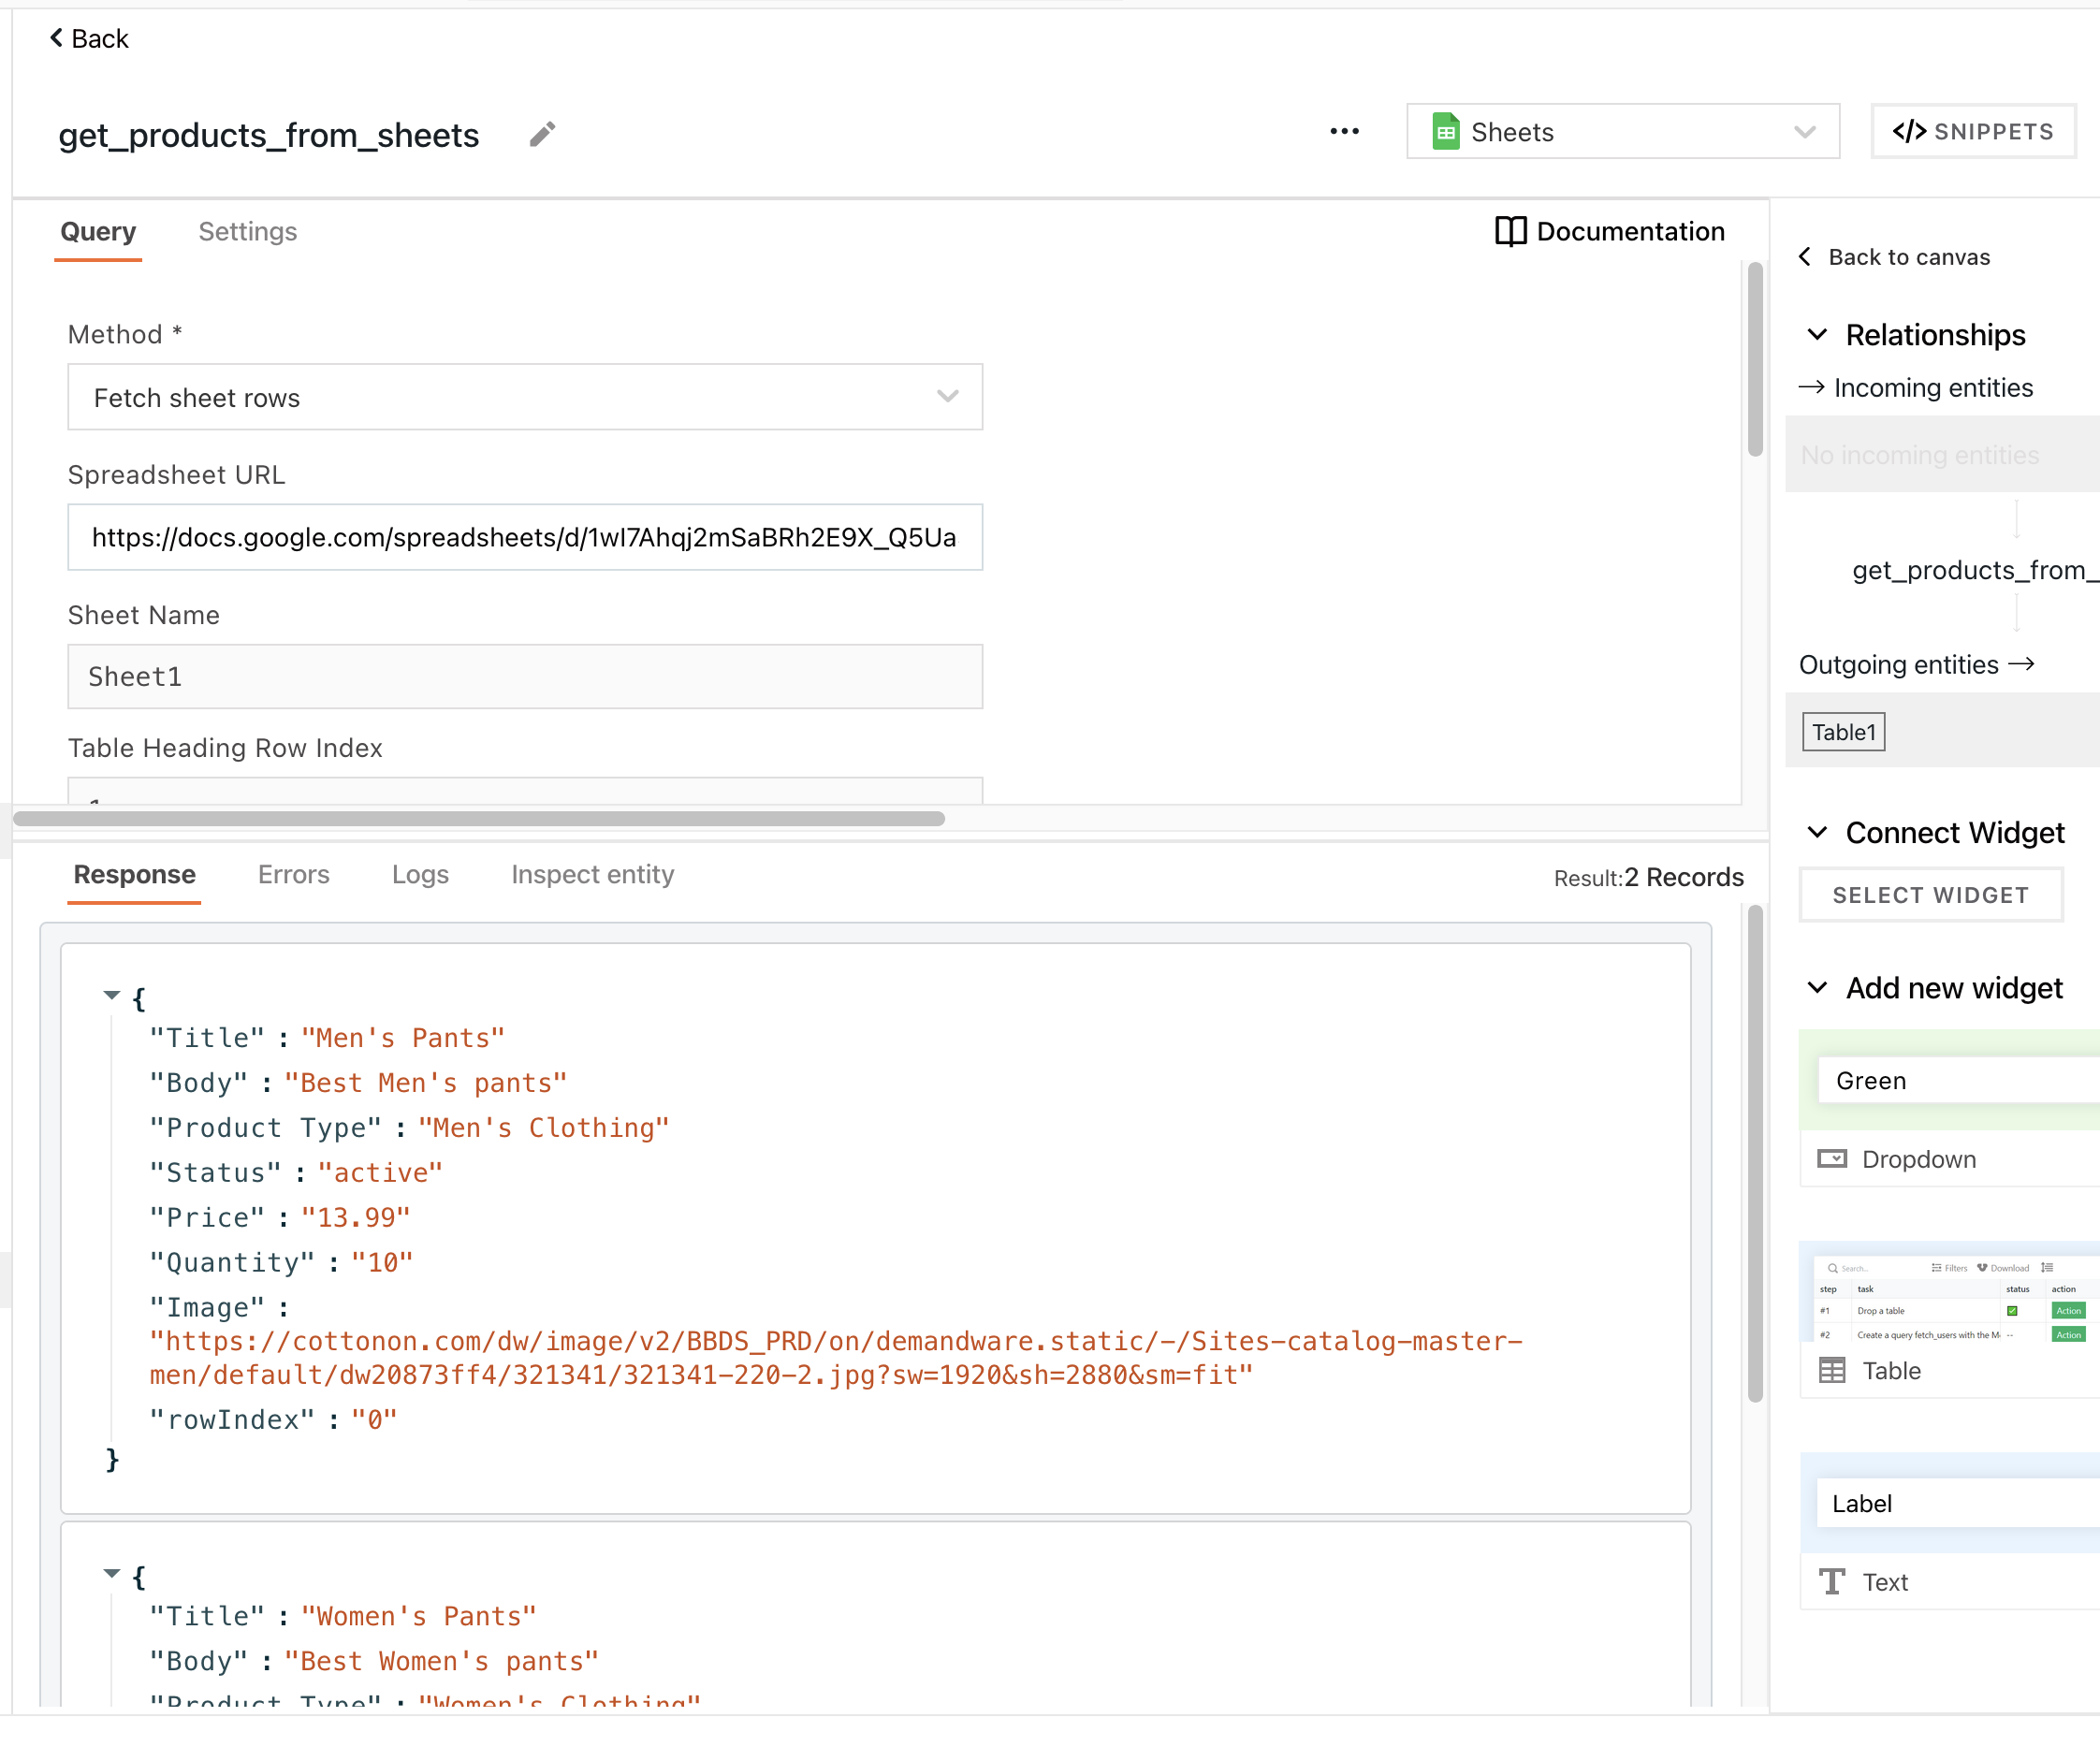
To get started, create a new page and under Datasource > Create New, click on Google Sheets. Authorize the datasource and create a new API that we’ll call get_products_from_sheets.
You can use this sample sheet as a reference for the Spreadsheet URL config. Here’s a sample configuration:
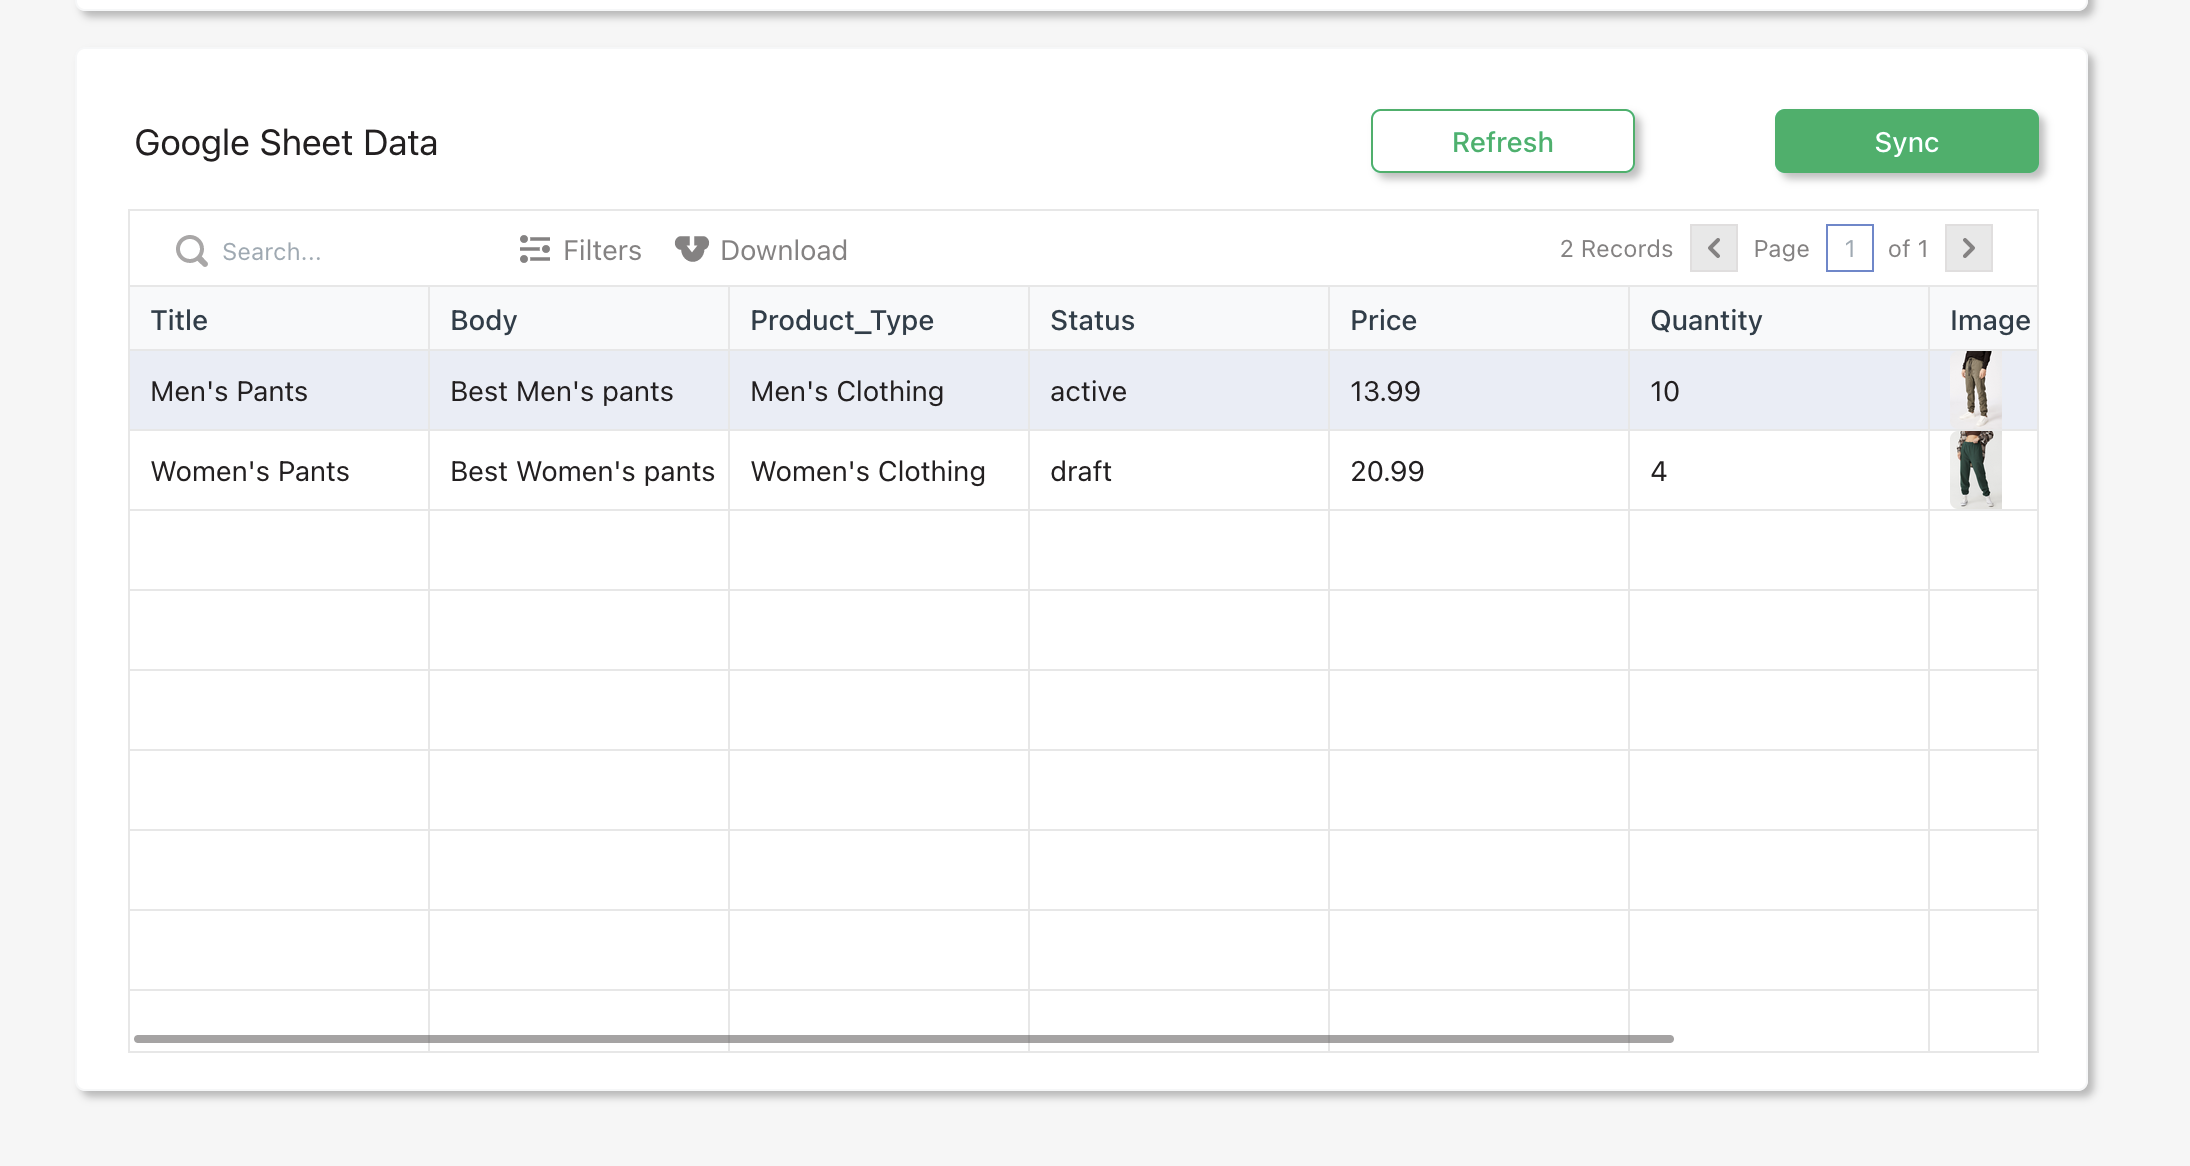
Now, you can build UI widgets to display the data returned as we did for the product list. In this sample, I used a table widget:
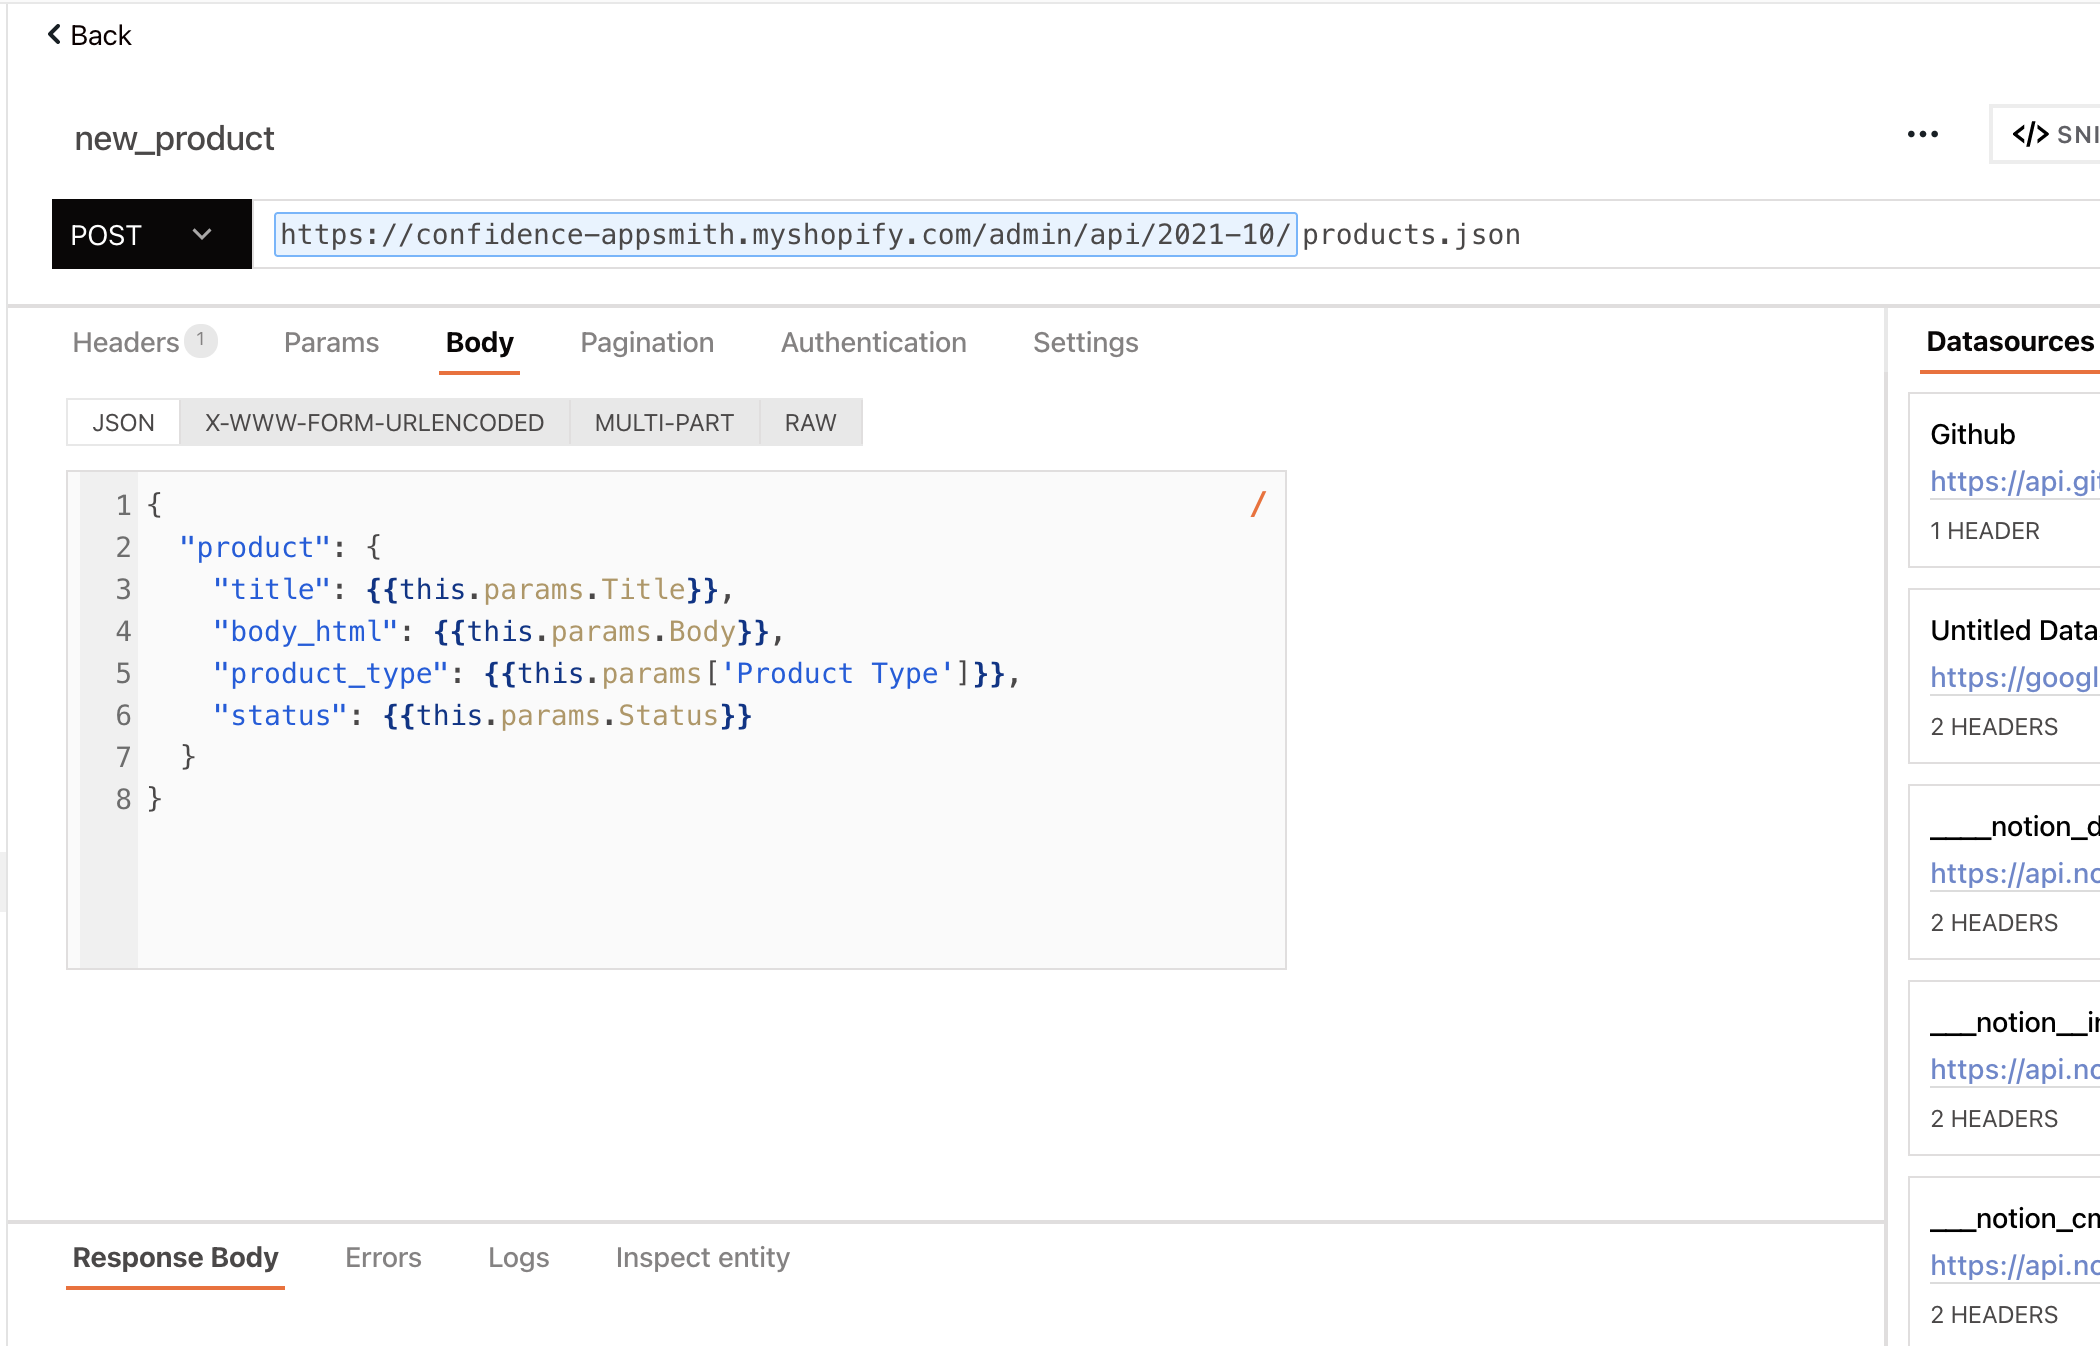
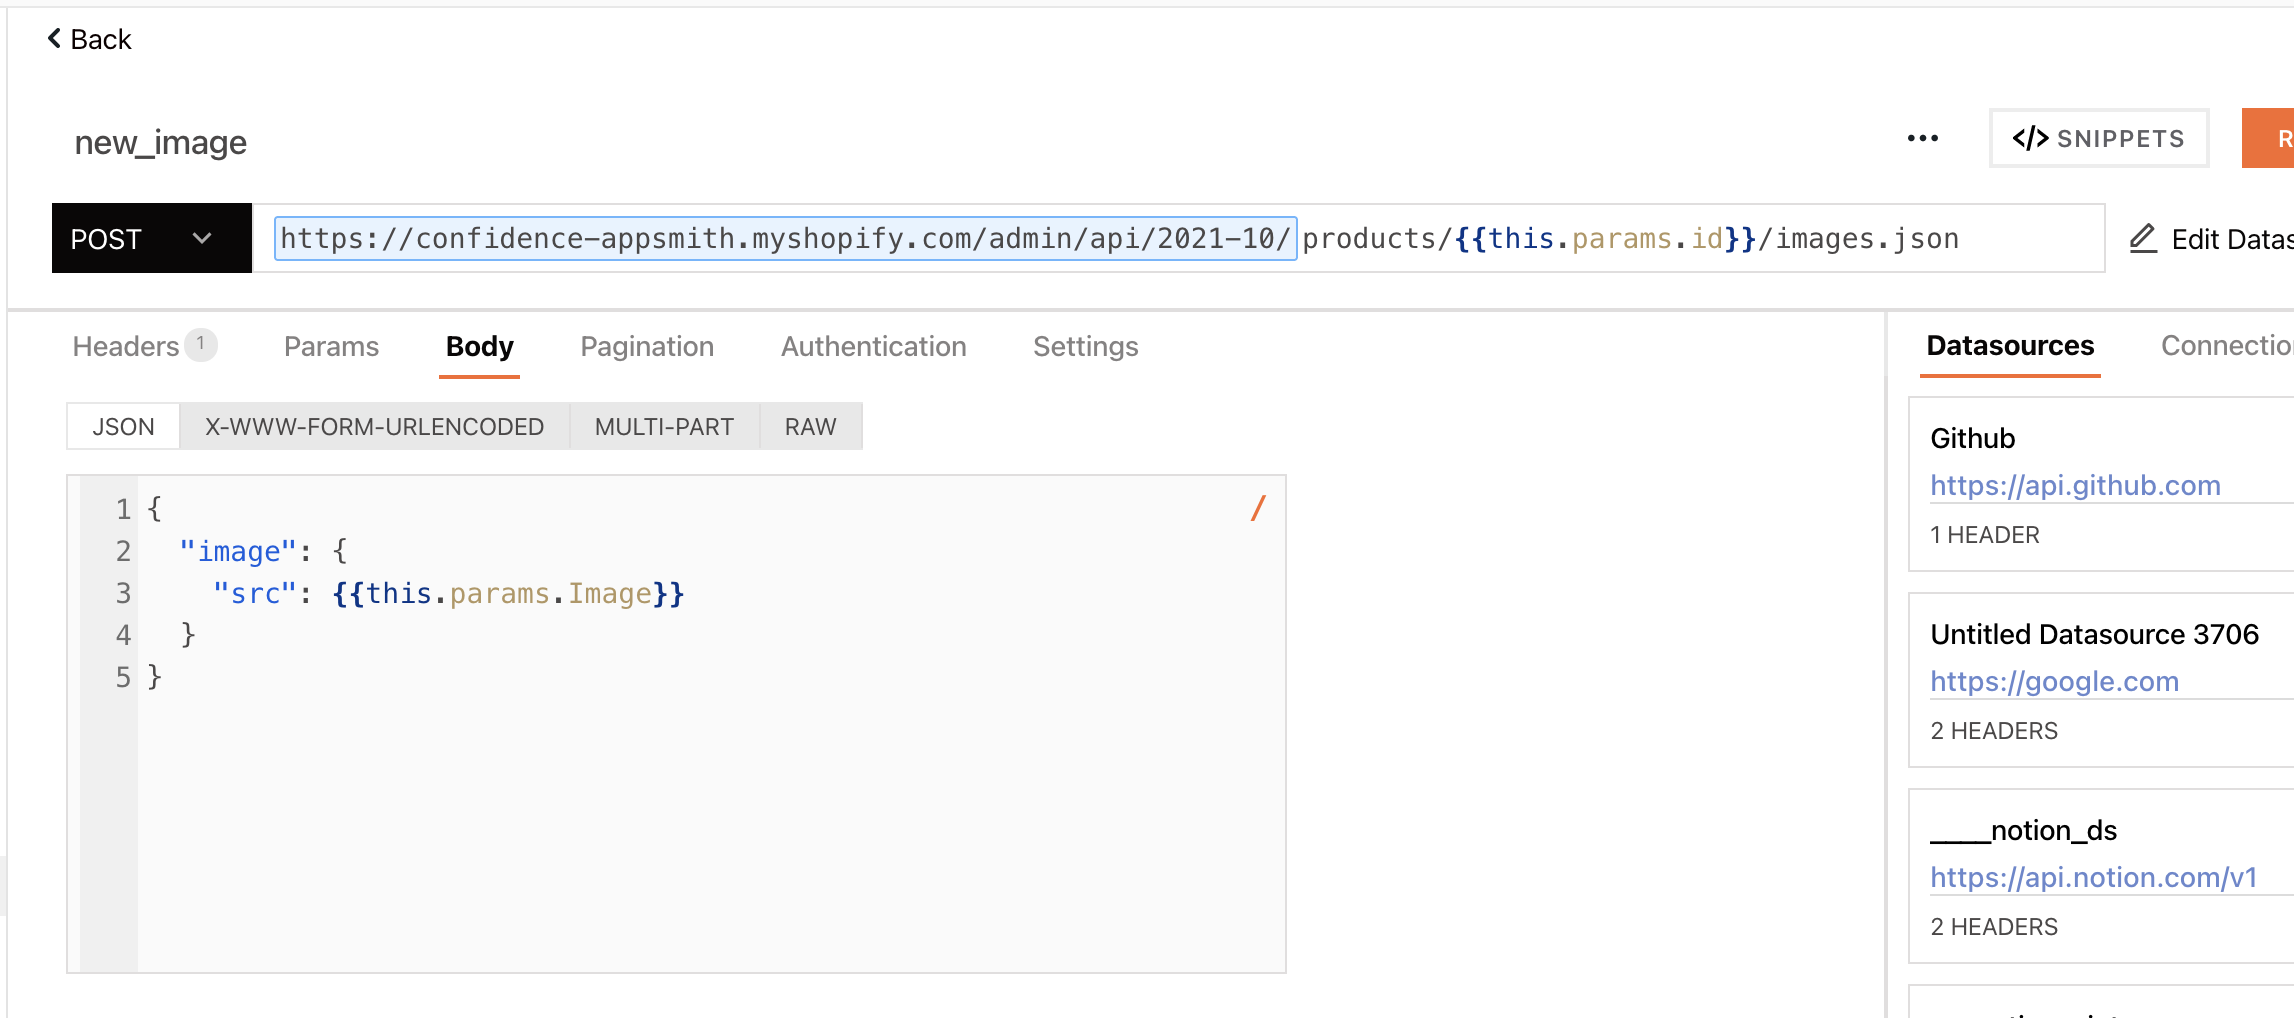
When the Sync button is clicked, we loop through the items and create each product by making a couple of API calls. Also, notice here that we have parameters passed to the API calls as the third arguments:
{{
    (() => {
      get_products_from_sheets.data.forEach((i) => {
        new_product.run(
          (res, i) => {
            new_image.run(
              () => {},
              () => {},
              { ...i, id: res.product.id }
            );

            new_price.run(
              () => {},
              () => {},
              { ...i, id: res.product.variants[0].id }
            );

            new_track_inventory.run(
              (res, i) =>
                new_inventory.run(
                  (res, i) => showAlert('Added: '+i.Title, 'success'),
                  () => {},
                  i
                ),
              () => {},
              { ...i, id: res.product.variants[0].inventory_item_id }
            );

          },
          () => {},
          i
        );
      });
    })();
}}
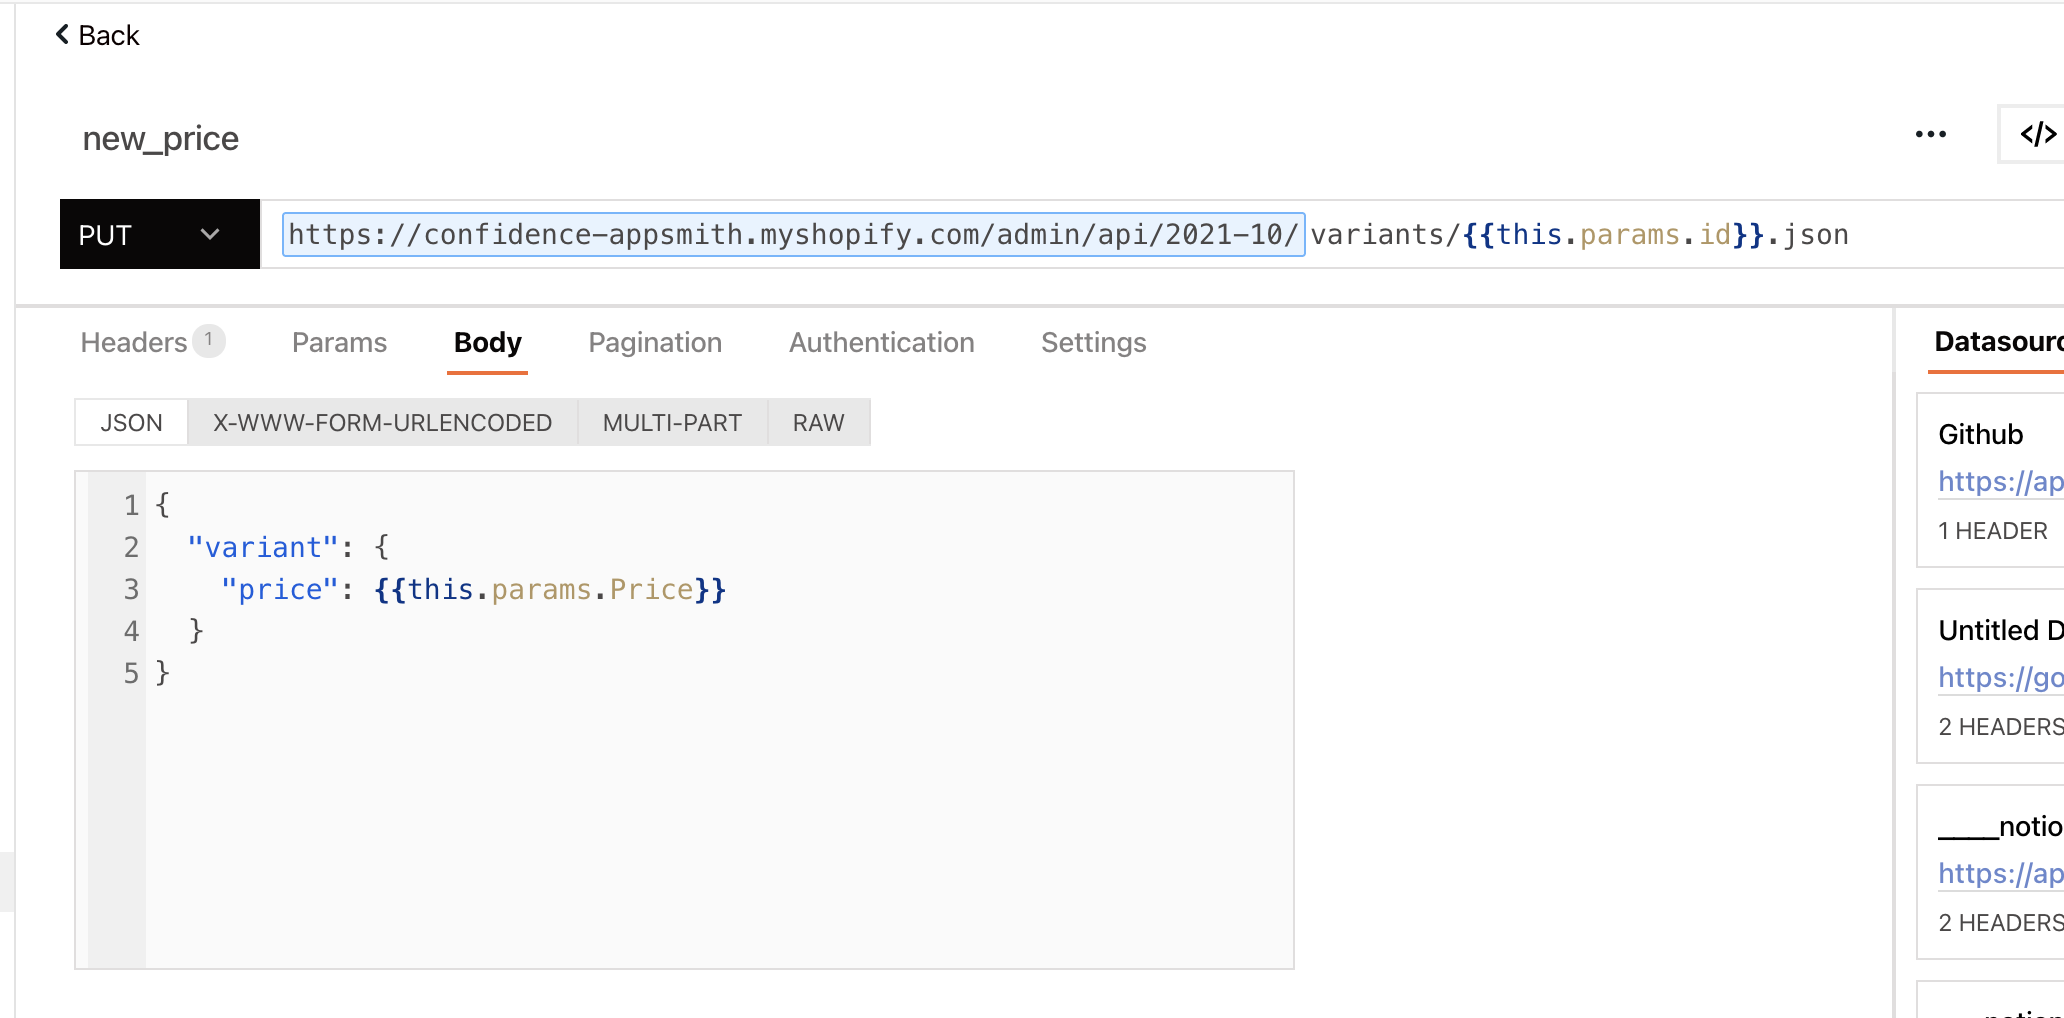
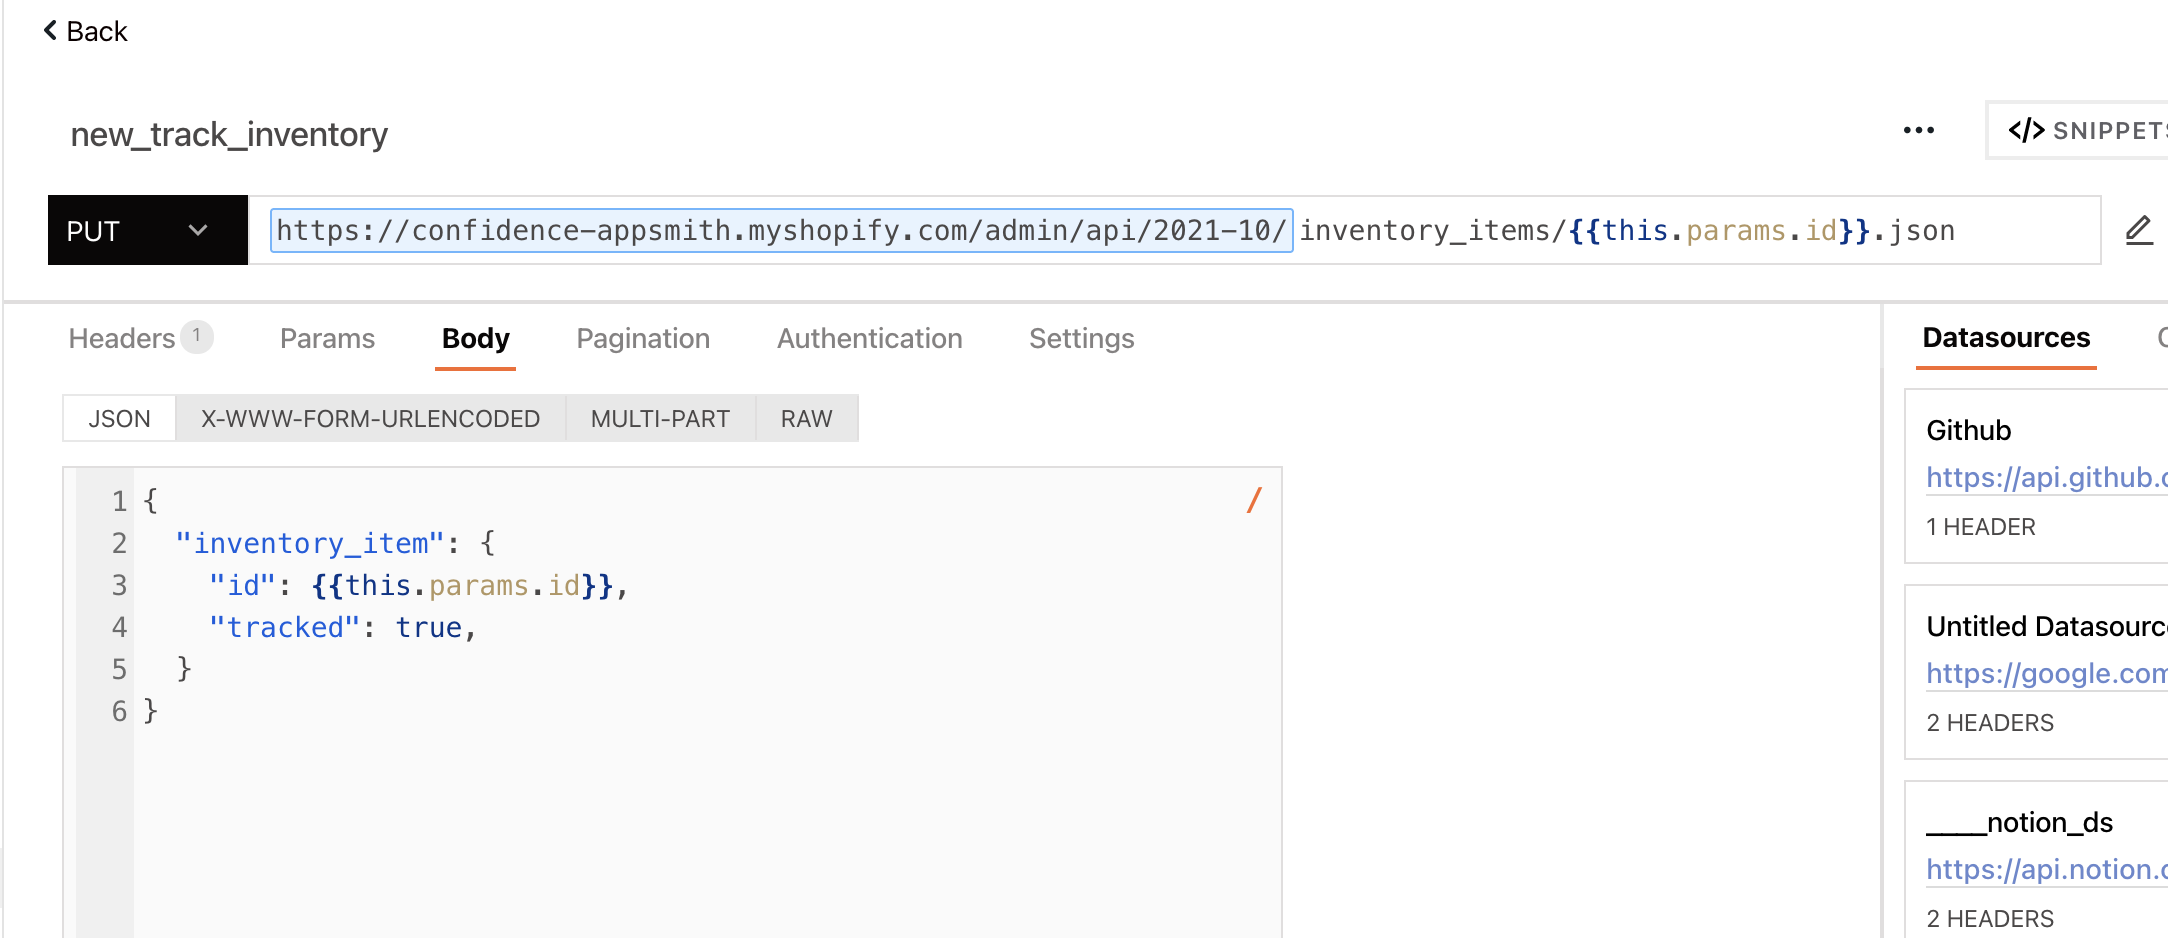
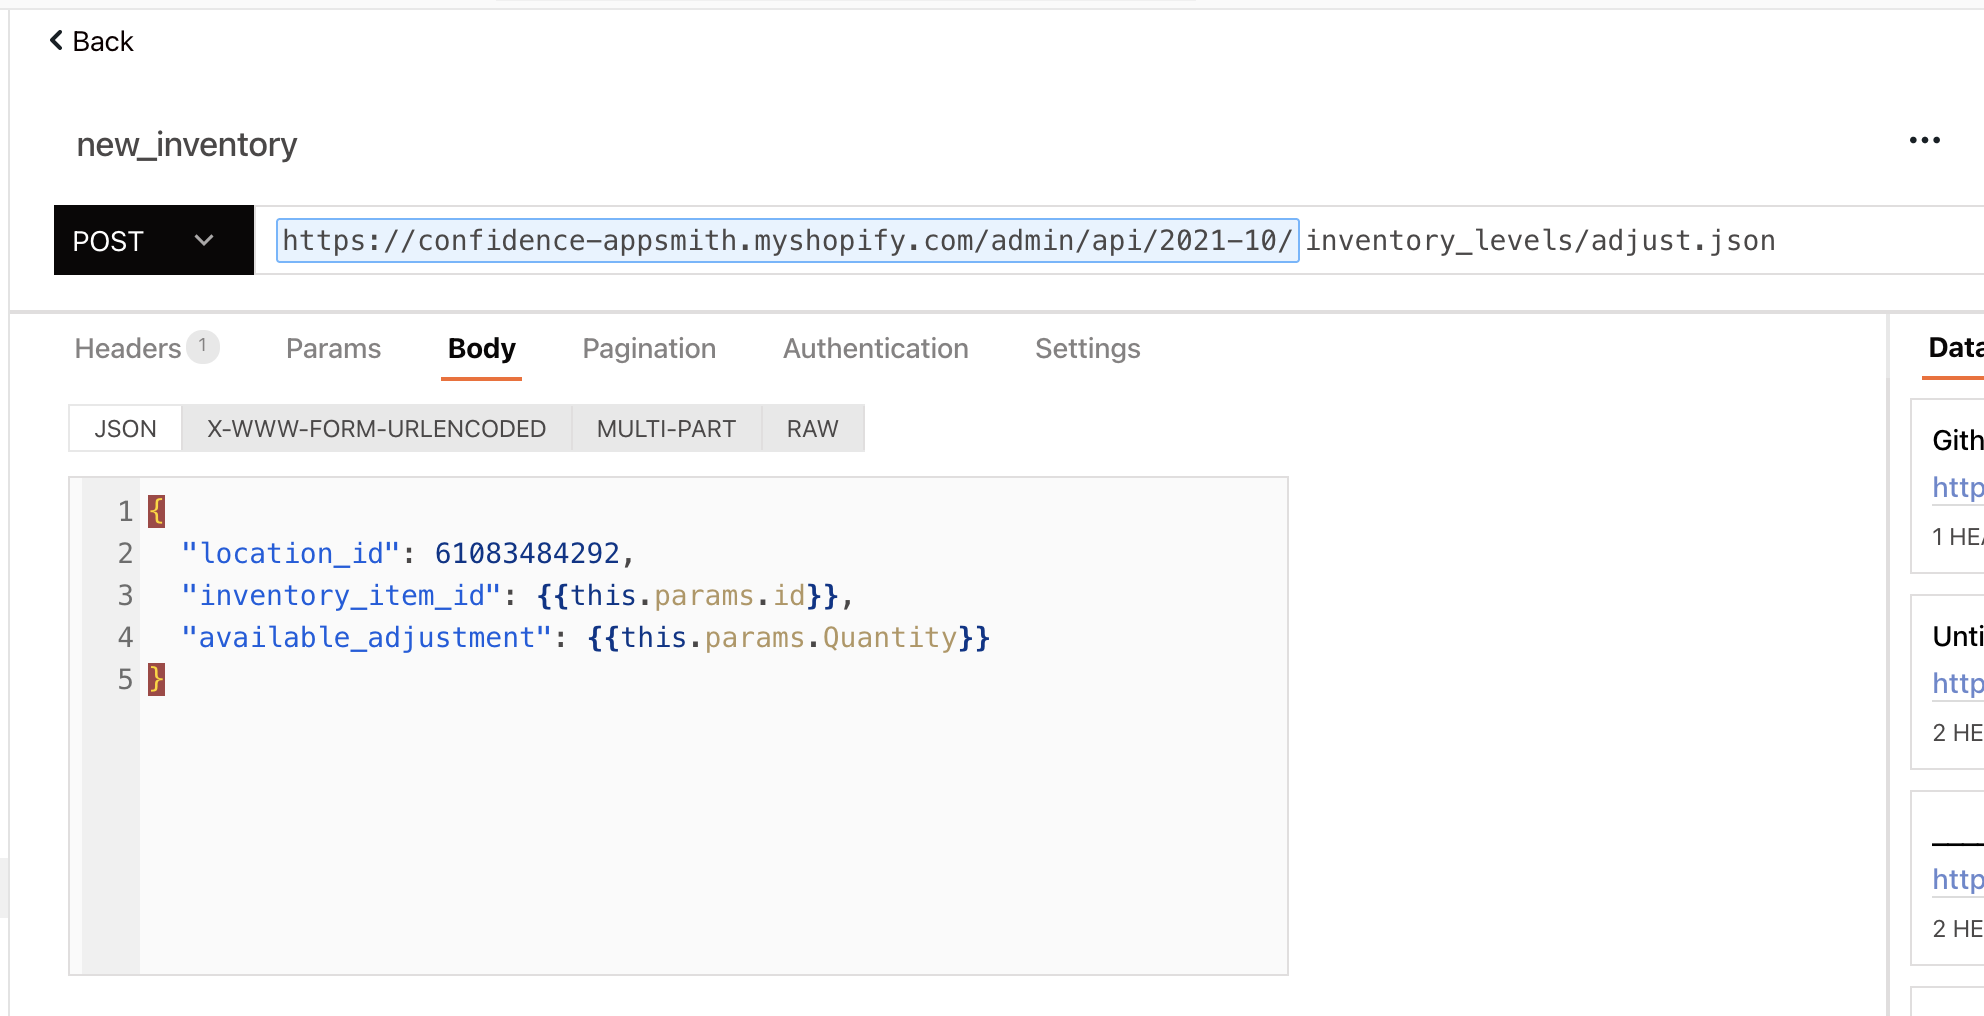
And here’s a snapshot of each of the queries call:
You can learn more about these resources/endpoints in the official Shopify docs.
What’s next?

Congratulations, you did it!
So far, we’ve implemented the core functionalities such as viewing, updating, and bulk import of products. But you can expand on this and add additional services i.e., payment with Stripe.
The floor is all yours! We’d love to see what you add next. By the way, give us a star any time you visit github.


