

Build a Growth Dashboard Using Appsmith, Orbit, and Slack

Proper feedback and community management is a significant part of building the organic reach of products, especially open source products. So, marketing teams might decide to build customized apps that contain valuable metrics. Products like Orbit allow us to get live data from our community forums to view them more concisely.
In this tutorial, you’ll be building an internal growth dashboard, where we’ll be able to display valuable metrics, including monitoring a Slack group and viewing existing members of the channel. The goal is to display specific growth metrics that allow the marketing team to make valuable decisions.
First, we’ll be learning how to connect our Slack directly to Orbit, where we can view our information, activities, and members on their dashboard. Then, we’ll use Orbit’s REST API to view the data on our Appsmith dashboard.
This is useful in cases where we want to view our Slack data in a custom Appsmith app outside something like Orbit, mainly when the dashboard includes other external community data, not data from just the Slack channel.
Getting Started with Orbit
We’ll [signup to Orbit] (https://app.orbit.love/) and create our Orbit’s workspace:
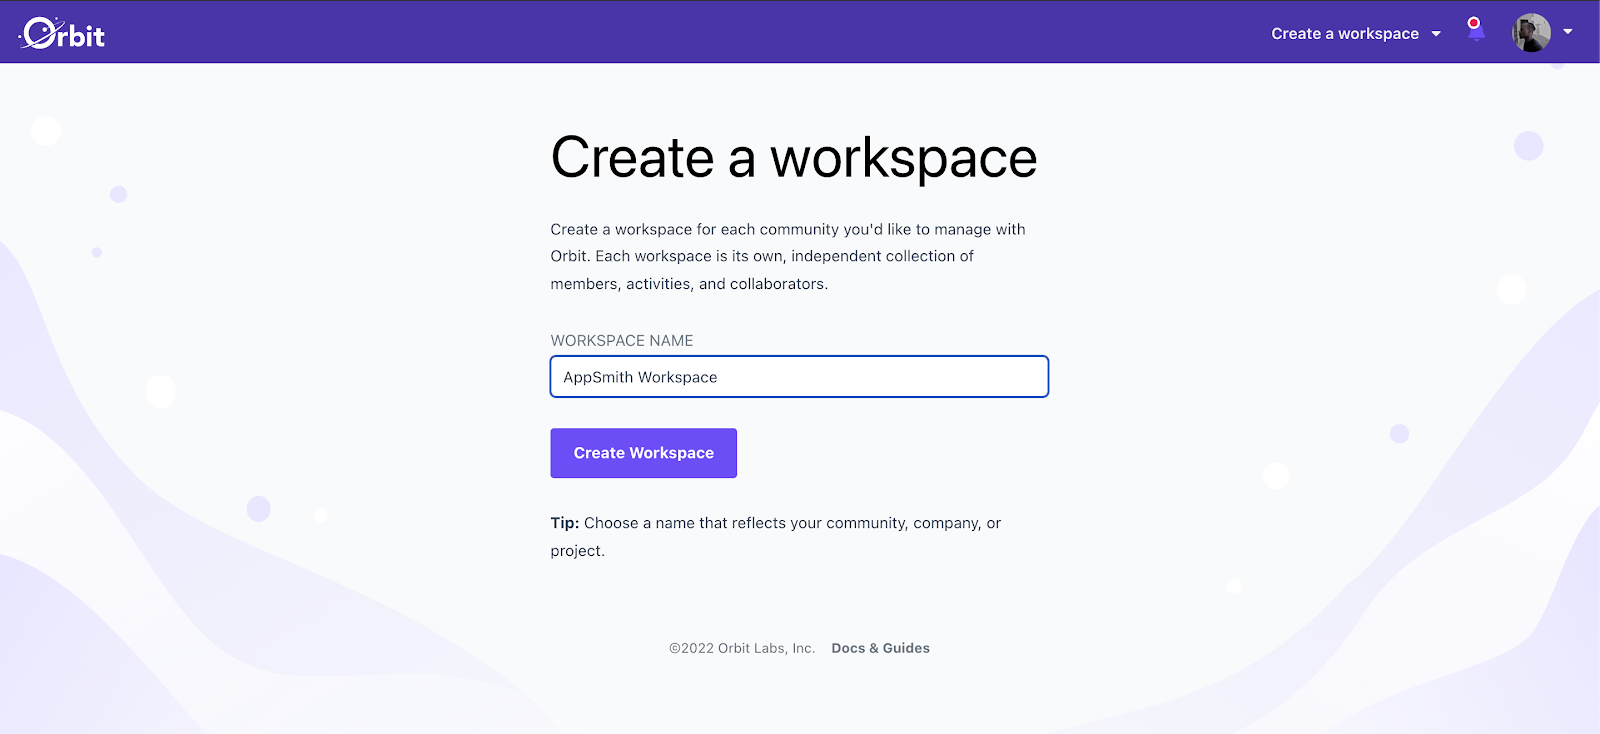
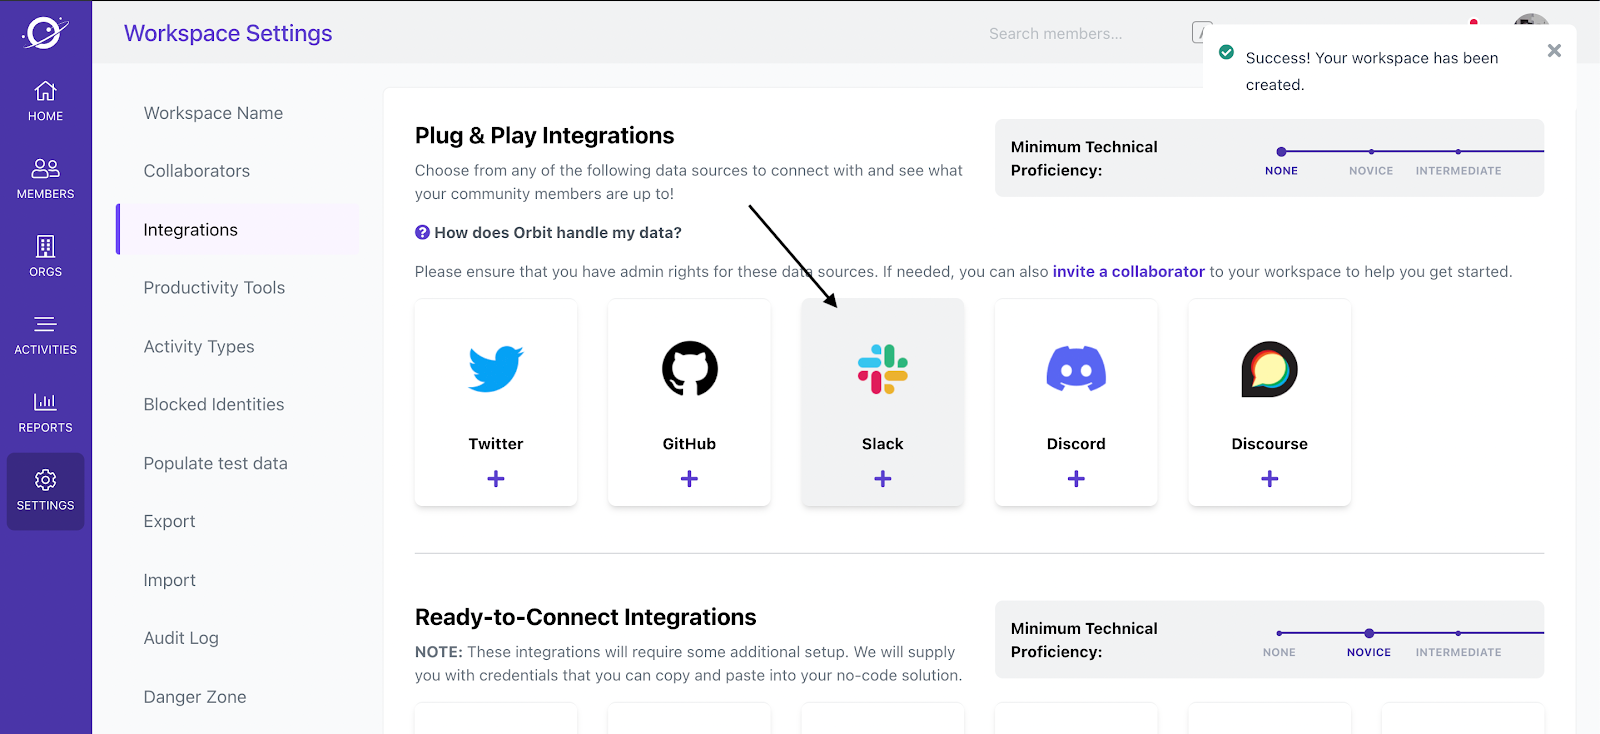
Once we’ve created the workspace, we can now integrate our Slack community to orbit.
You can now open the Slack workspace you just connected with Orbit.
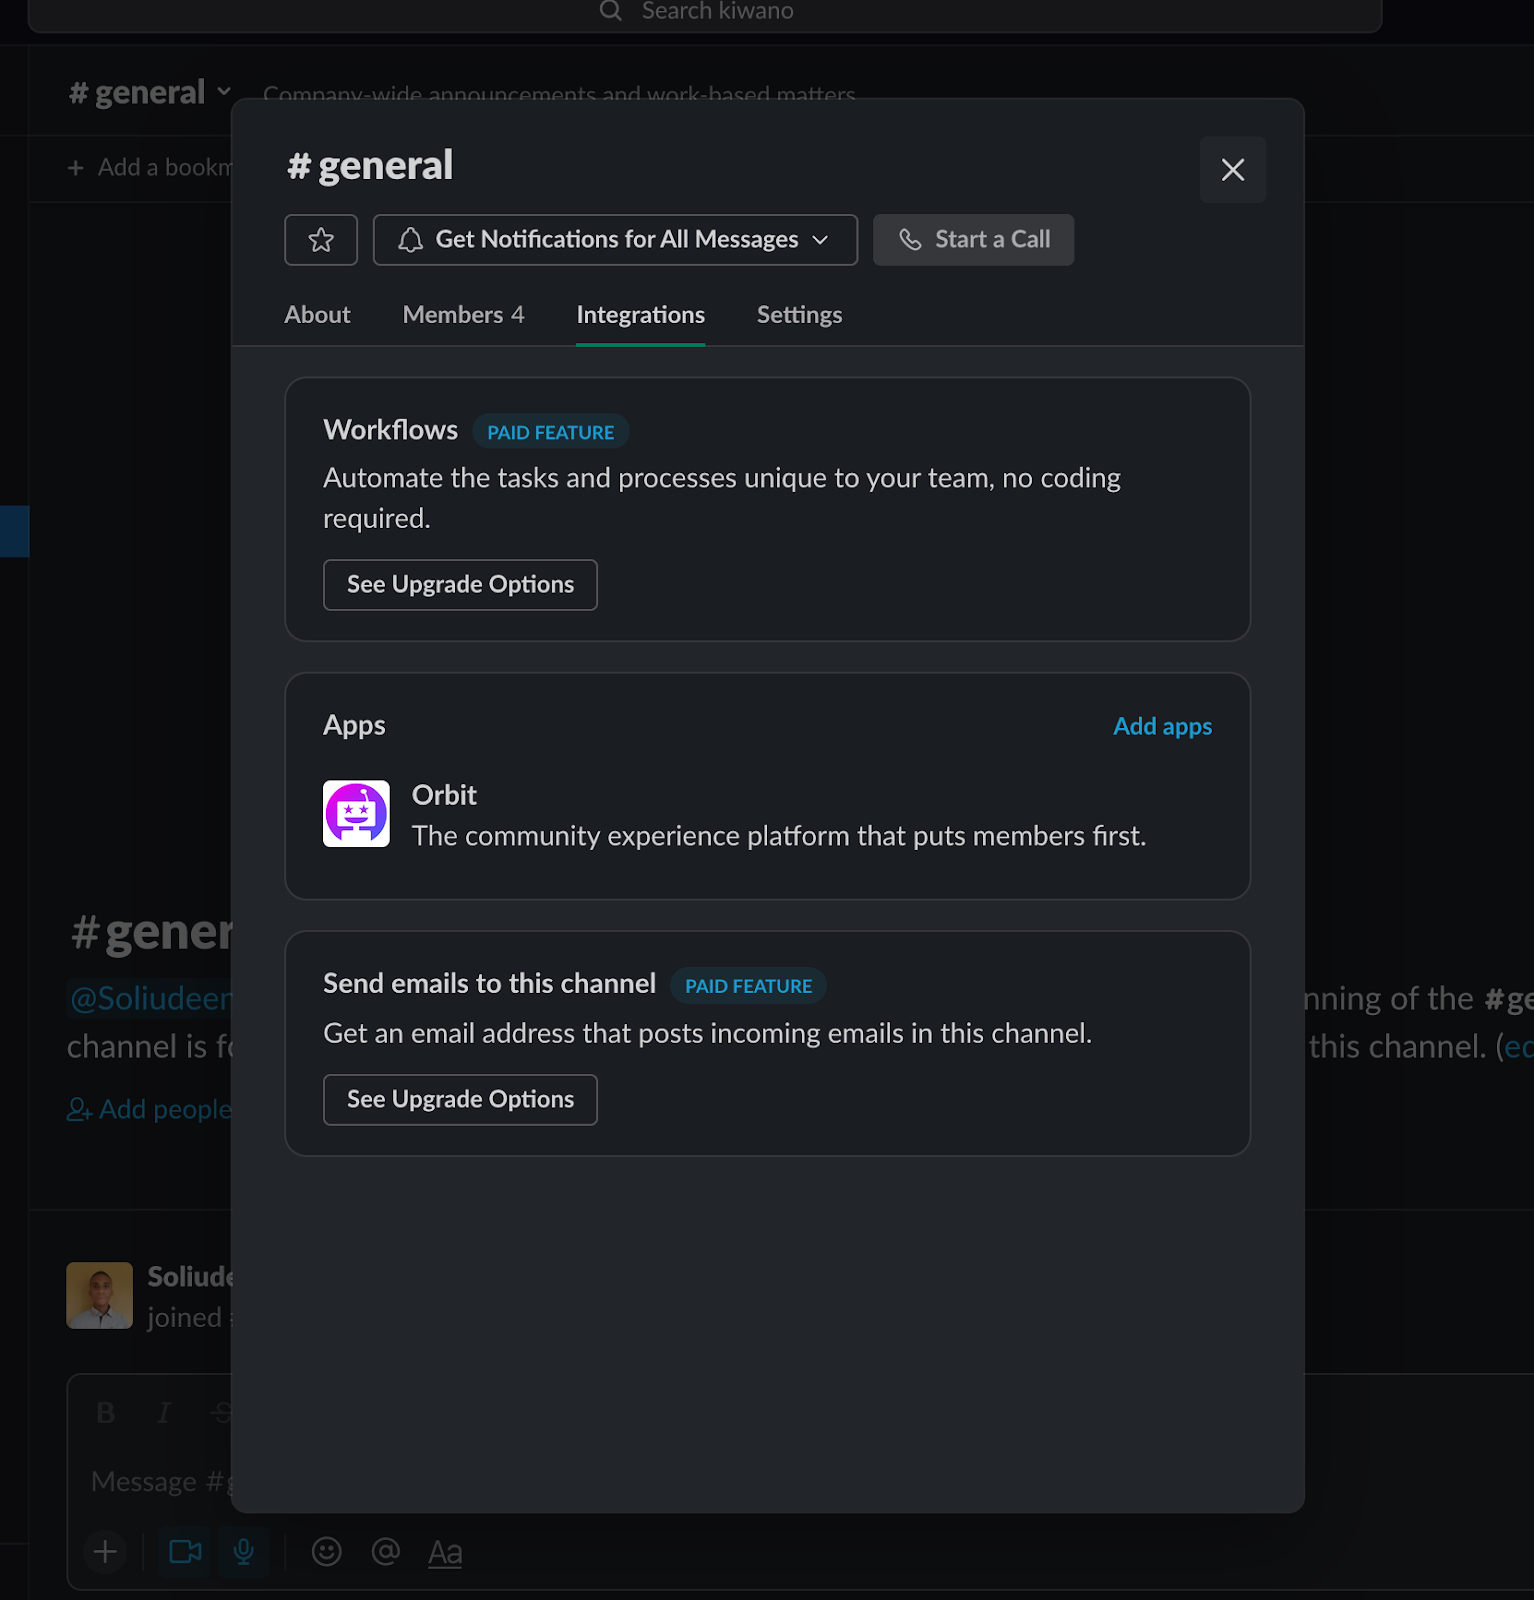
Go into your channel and open the Channel Details menu by clicking on the top-left channel name. Then, we’ll open the integration panel and click on “add apps.”
We’ll then see a bunch of apps where you’ll select Orbit.
The Orbit integration is now added to our #general channel! This automatically imports all messages and profiles (up to one year). Plus, it will listen for any new activities, including messages, thread replies, etc.
A message will automatically appear in the channel you just added, saying, “Orbit was added to #channel by you.”

To add the Orbit integration to more channels, we need to repeat the same steps or take advantage of the message shown above: Clicking on the name or icon of “Orbit” in that message will open a menu, from which you can add the integration to more channels with a click.
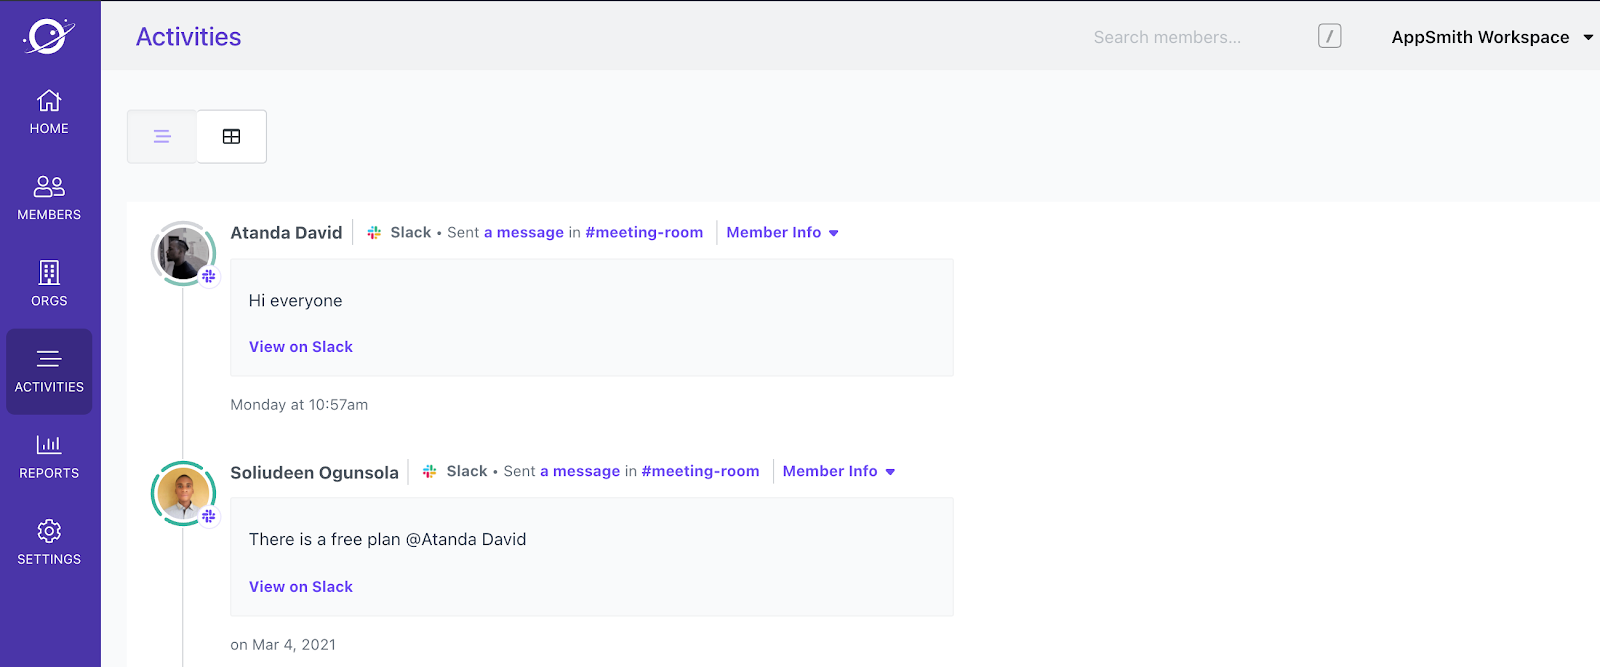
We’ve successfully connected Slack to orbit and can view all activities on our Orbit dashboard.
 Setting Up Our Orbit API
Orbit offers RESTful APIs that we’ll use to pull our Slack data into our dashboard. The specific data pulling is the list of members from this Slack channel.
Here’s the endpoint:
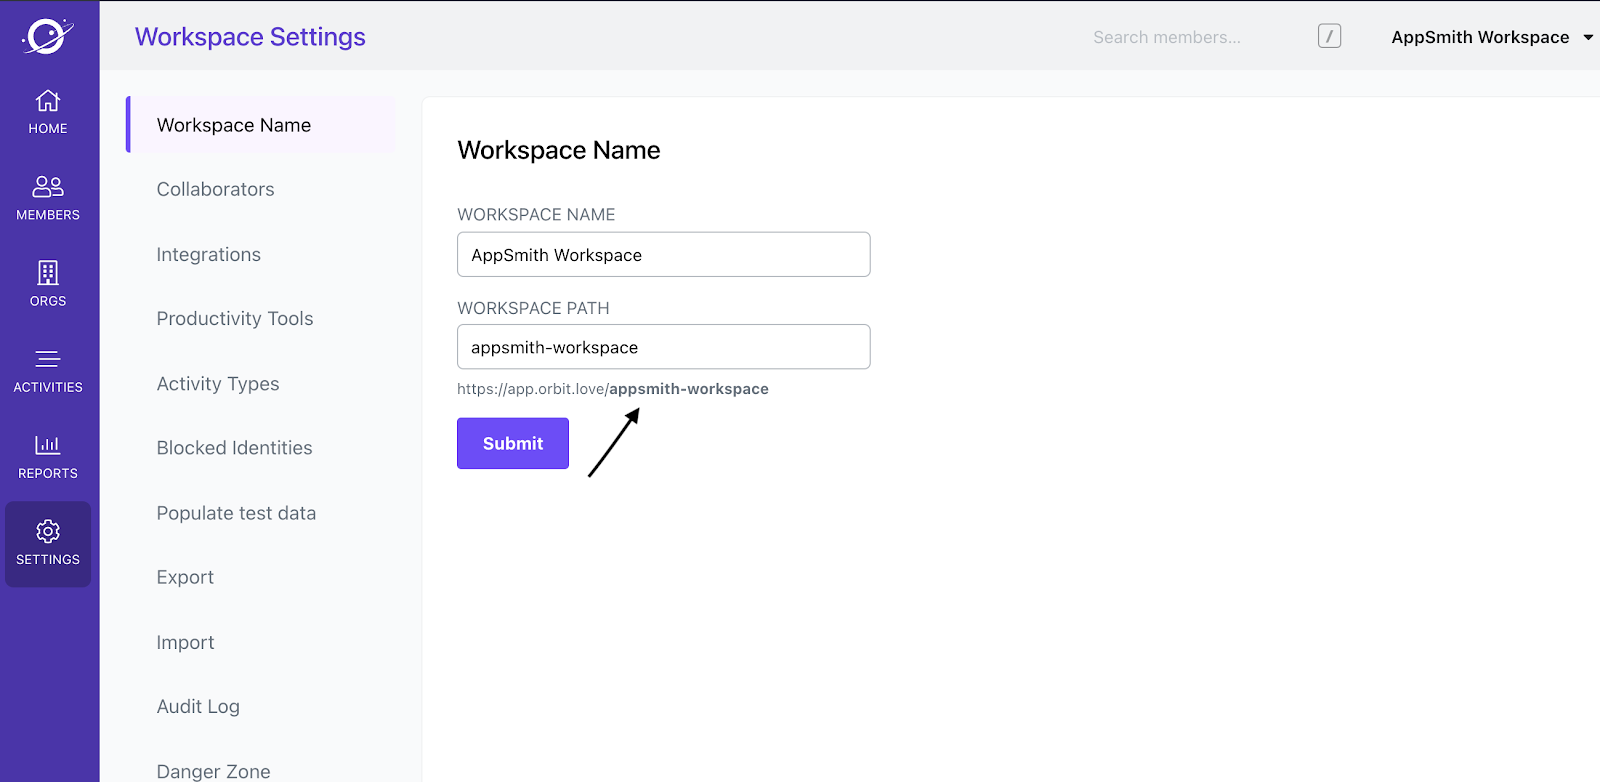
https://app.orbit.love/api/v1/{workspace_slug}/members
Note: You can can check the docs for more endpoints and use-cases.
You can find the workspace_slug under the workspace settings. It’s the text in bold below:
Setting Up Appsmith
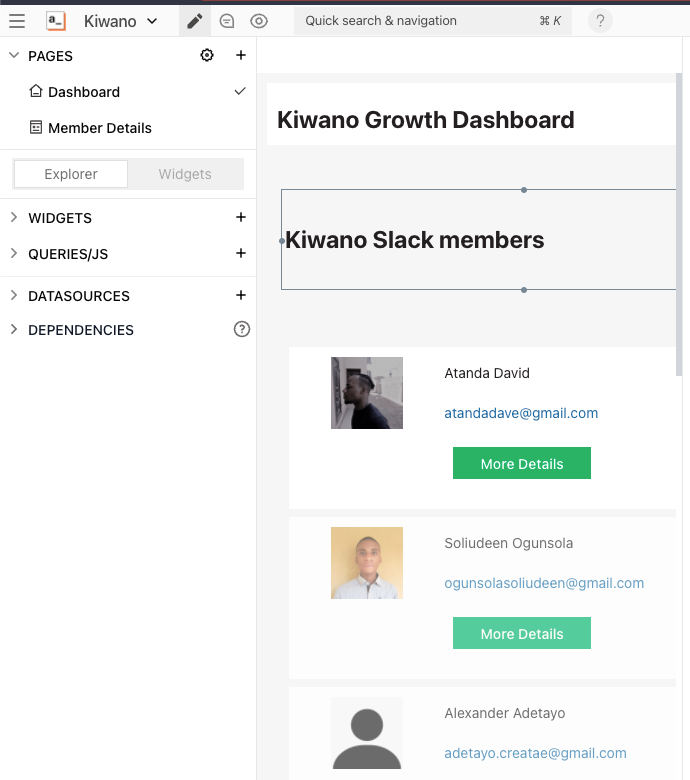
Let’s sign up to Appsmith and create our first app. On our first page we’ll add the container and text widgets to act as the header. Then, we’ll also add the list widget.
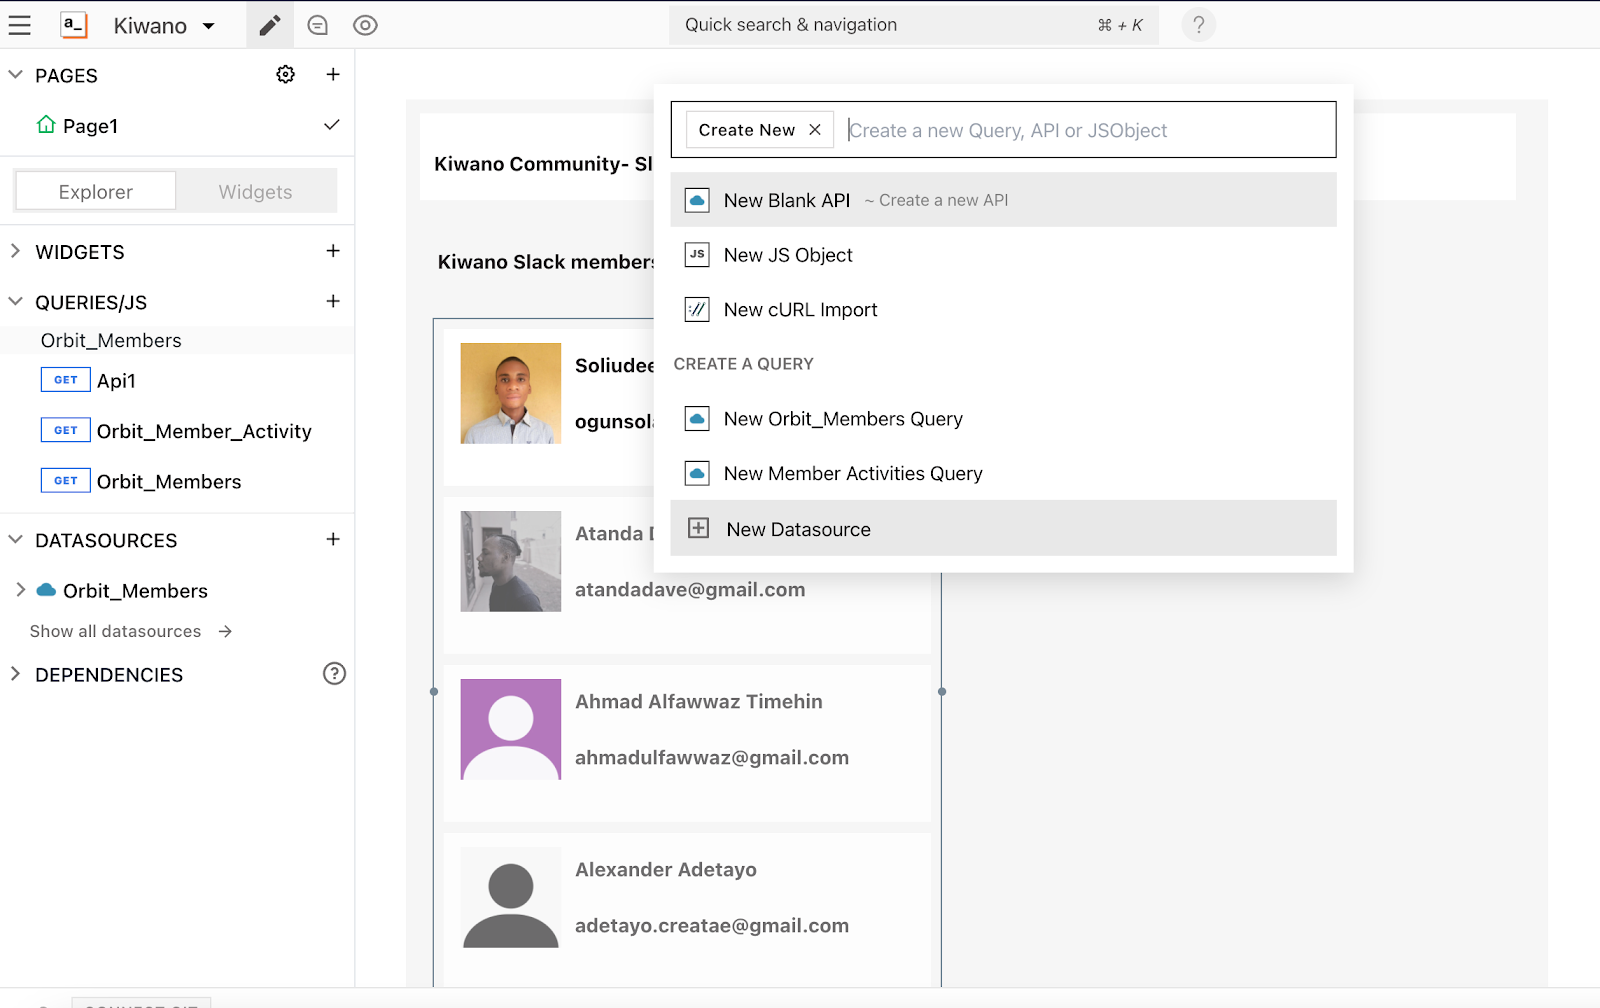
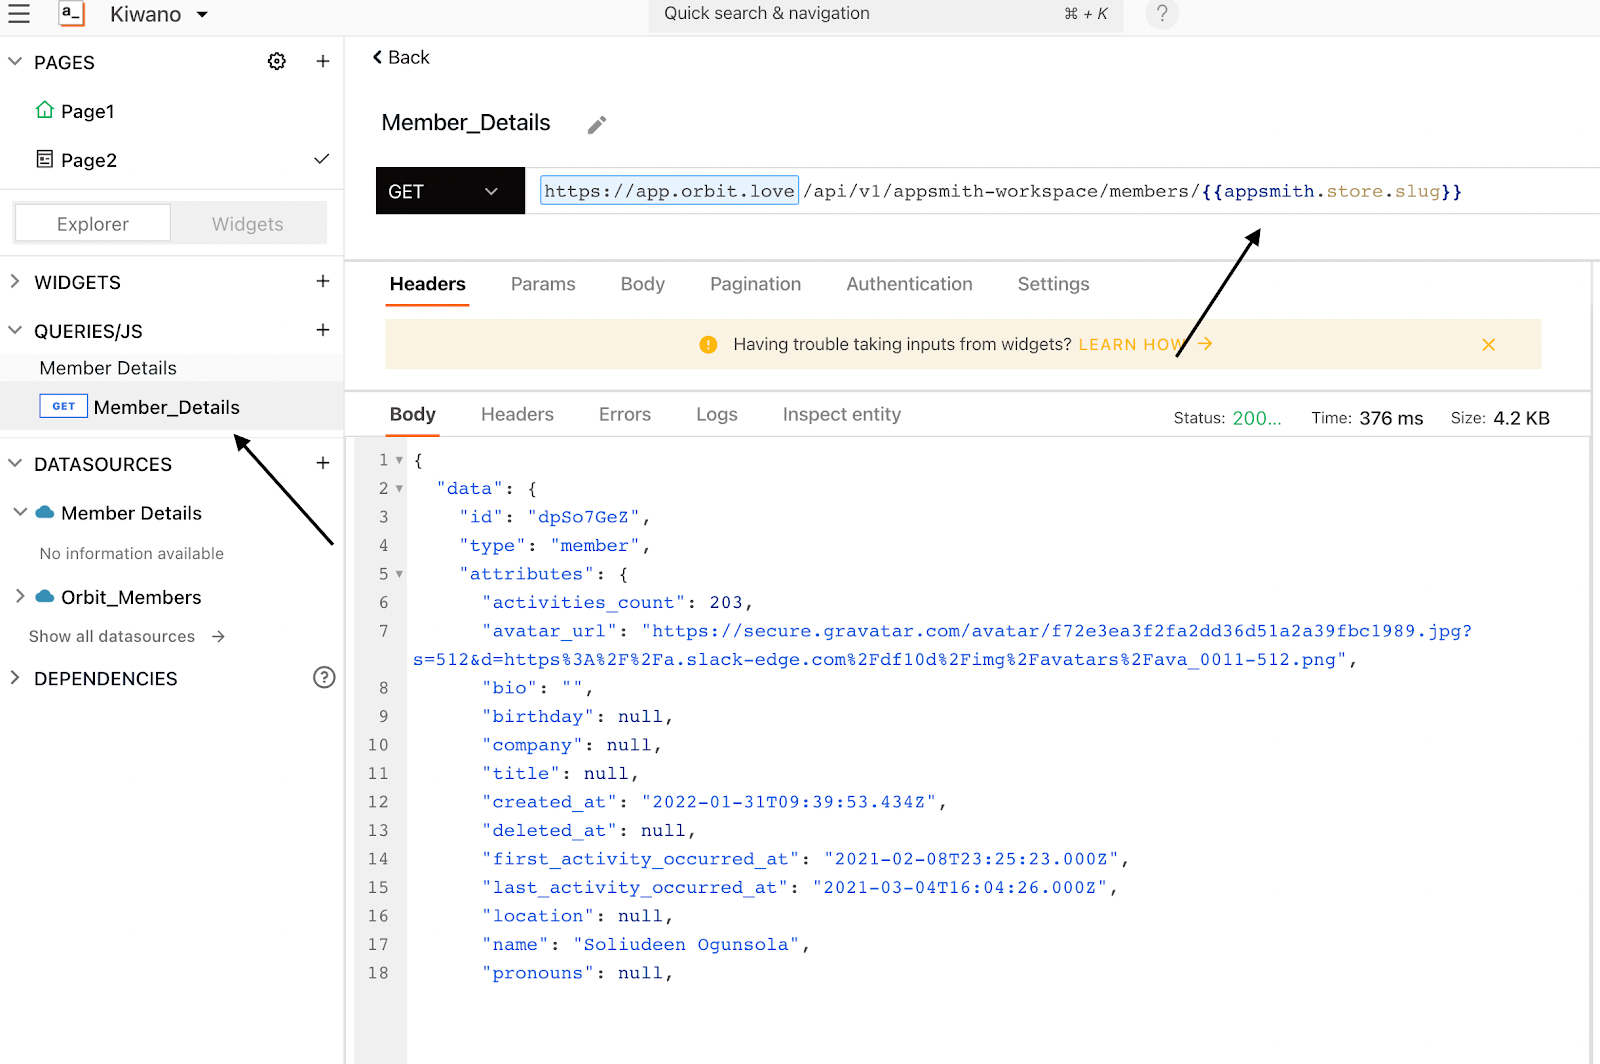
Now, we’ll go under QUERIES/JS dropdown on the left and create a new Datasource.
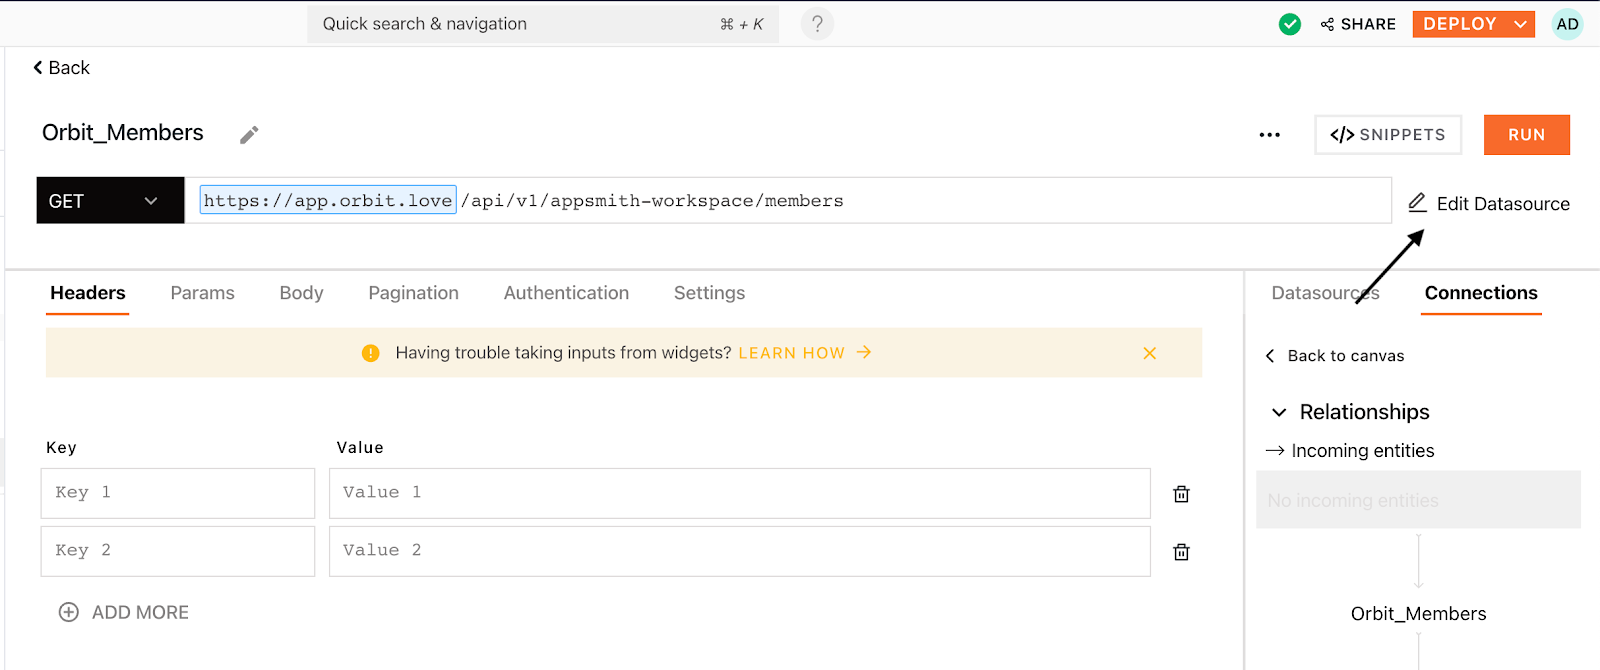
Set the API request to GET and add the endpoint. You’ll have to add your {workspace-slug} to the endpoint, as explained earlier. Once that’s done, we’ll click Edit Datasource, and it’ll take us to a page where we’ll add our header token.
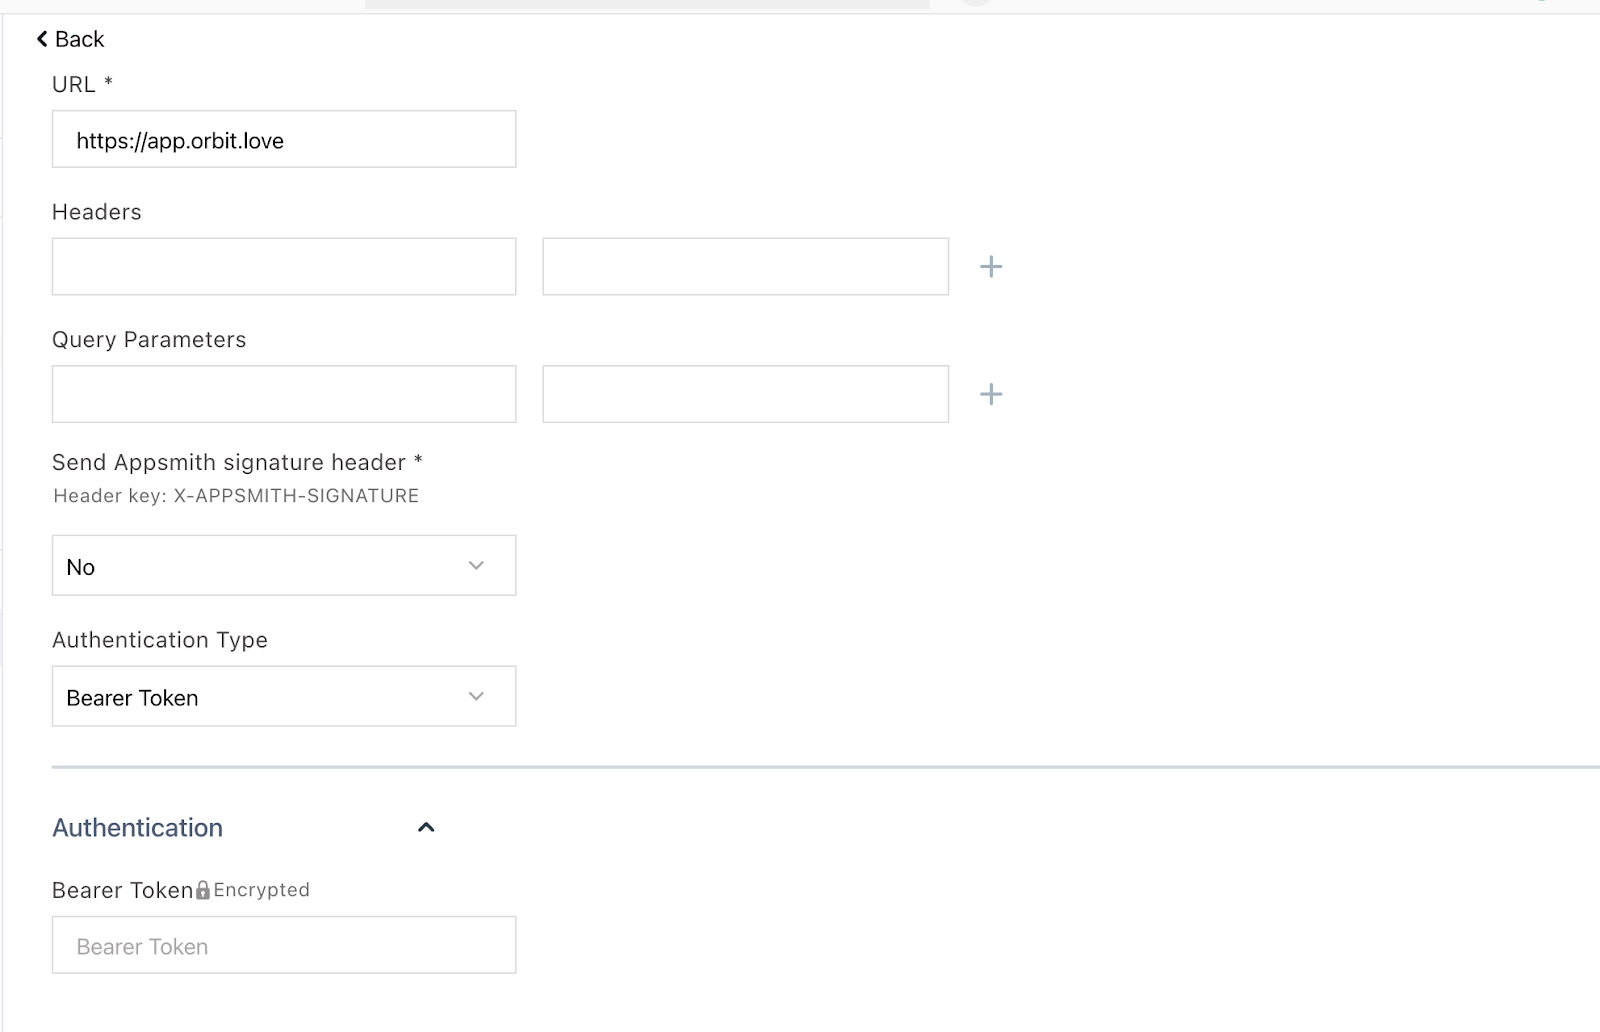
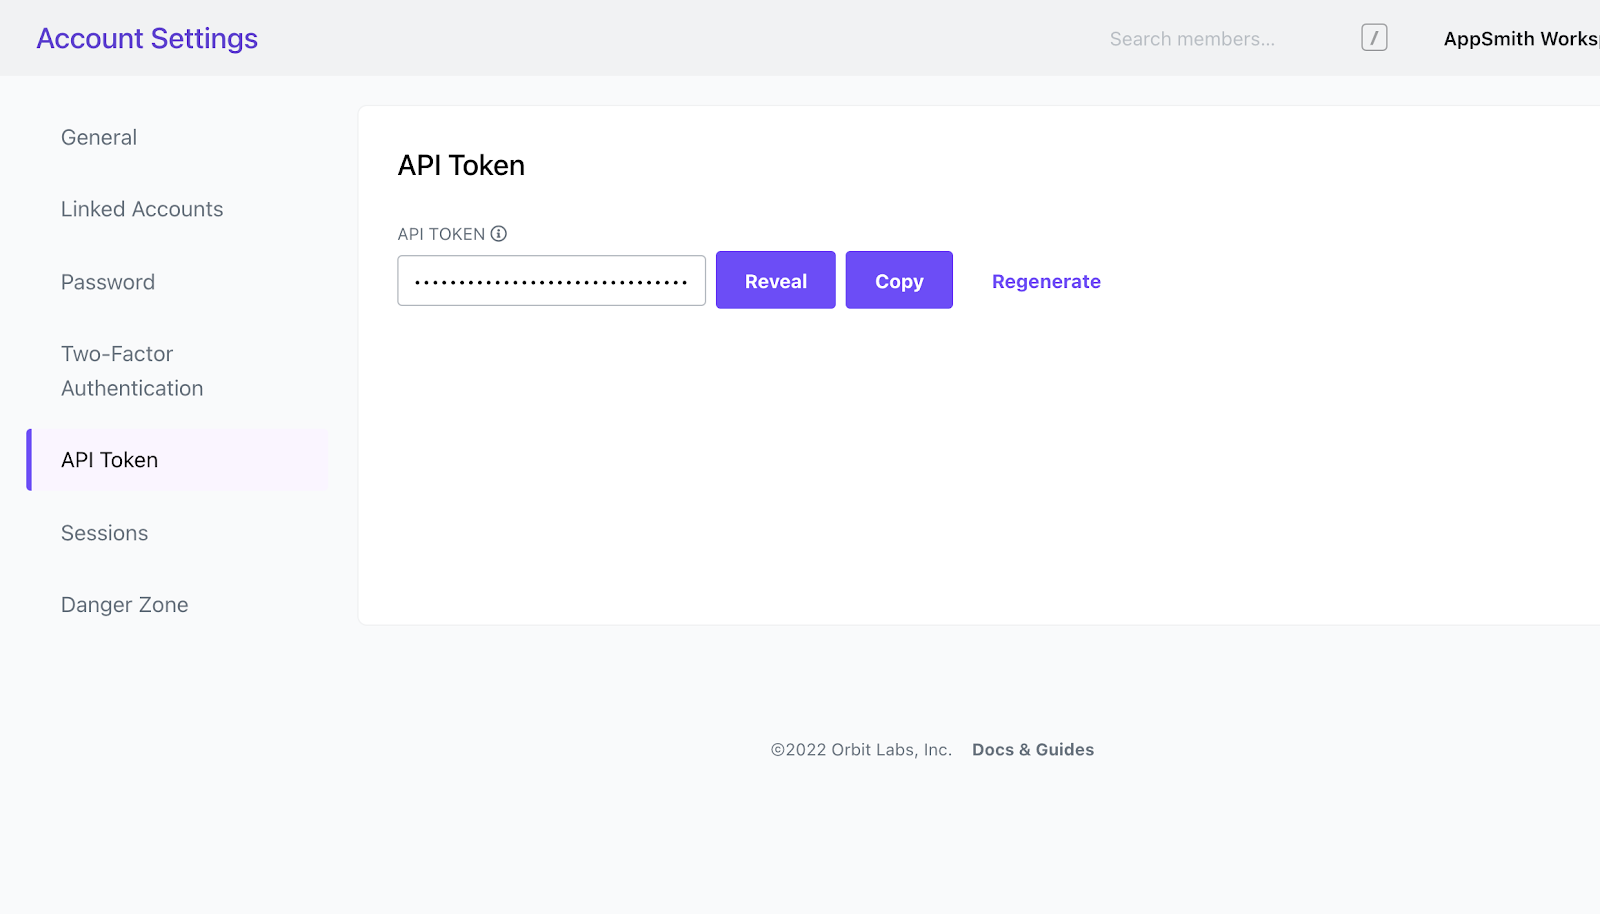
Scroll down to the Authentication section of the page, down to the Bearer Token input, and add your Orbit’s API token. You can find that on the settings page. Note that you won’t add Bearer as a prefix, just the token. (that’ll be done automatically)
Let’s go back to our API datasource page and test it again
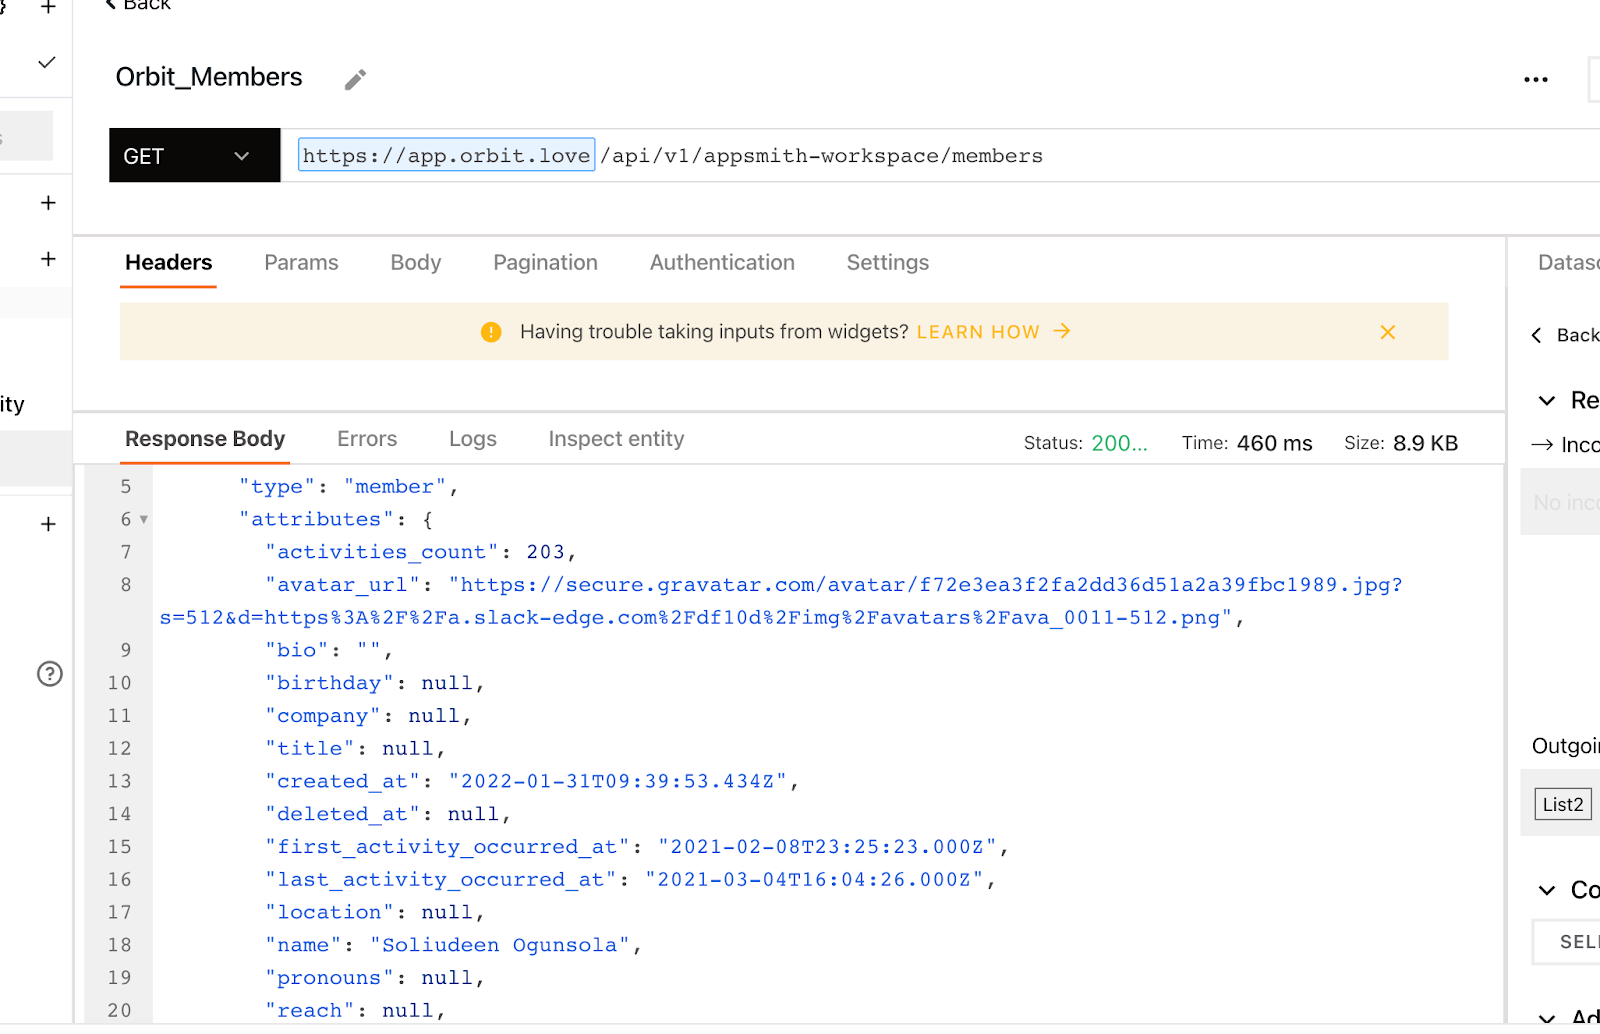
We now have everything functioning as it should, and the API provides the appropriate response. Look at the left and open a new page:
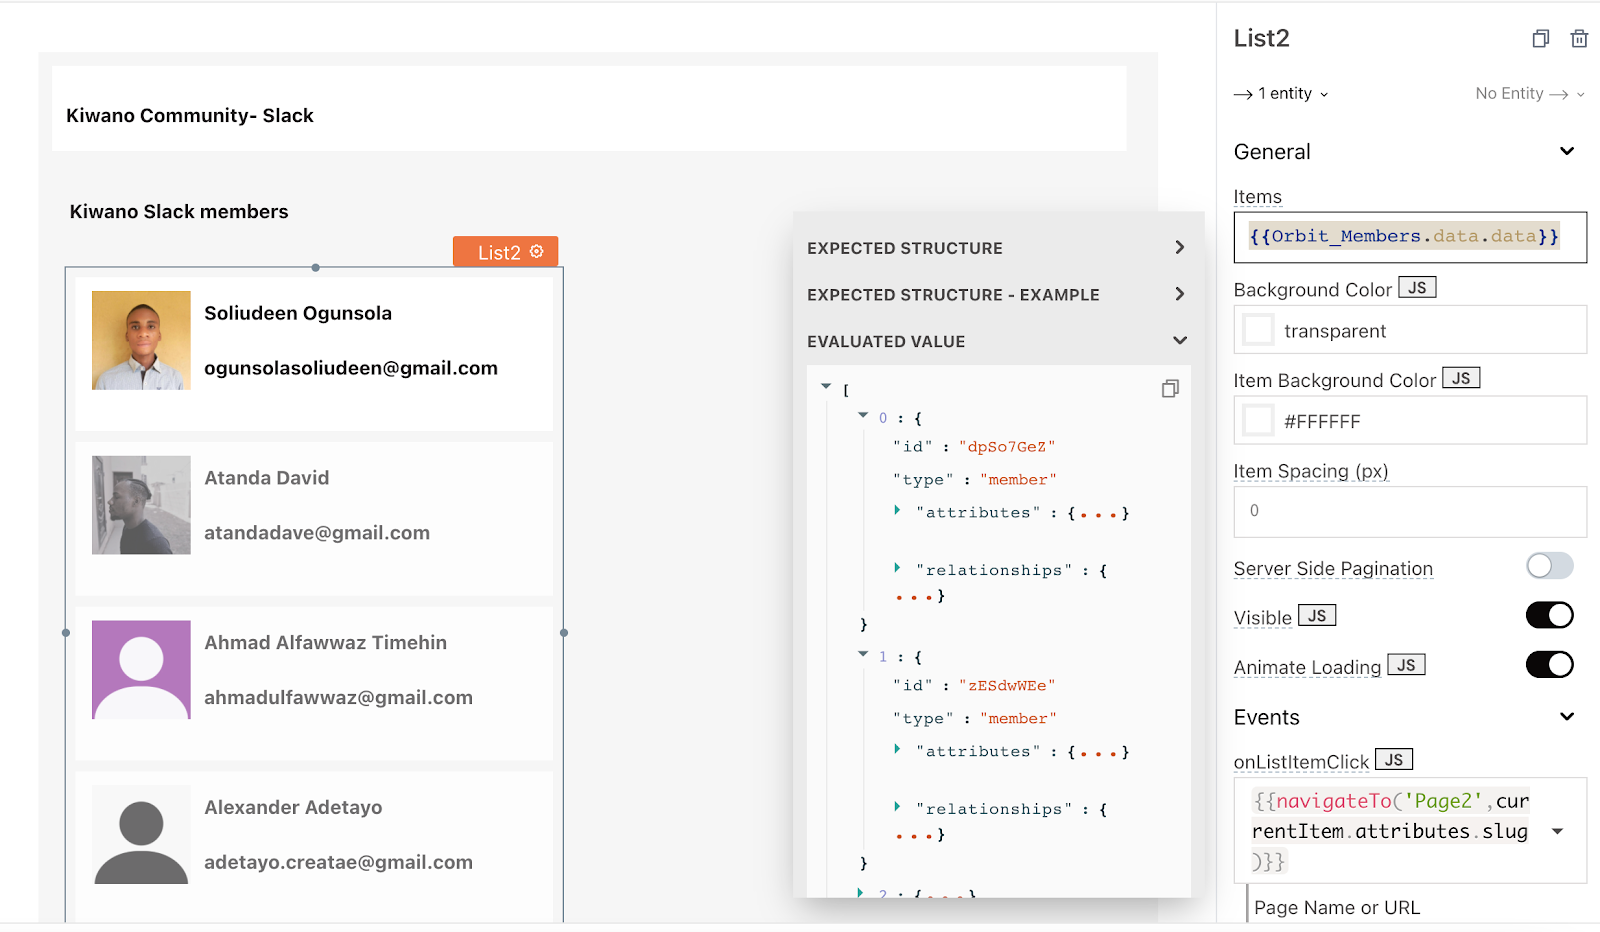
Once we select the list widget, we go to the left and see all related options. Under items, we’ll get the response preview by adding the name of the API: Orbit_Members.data.data.
{{Orbit_Members.data.data}}
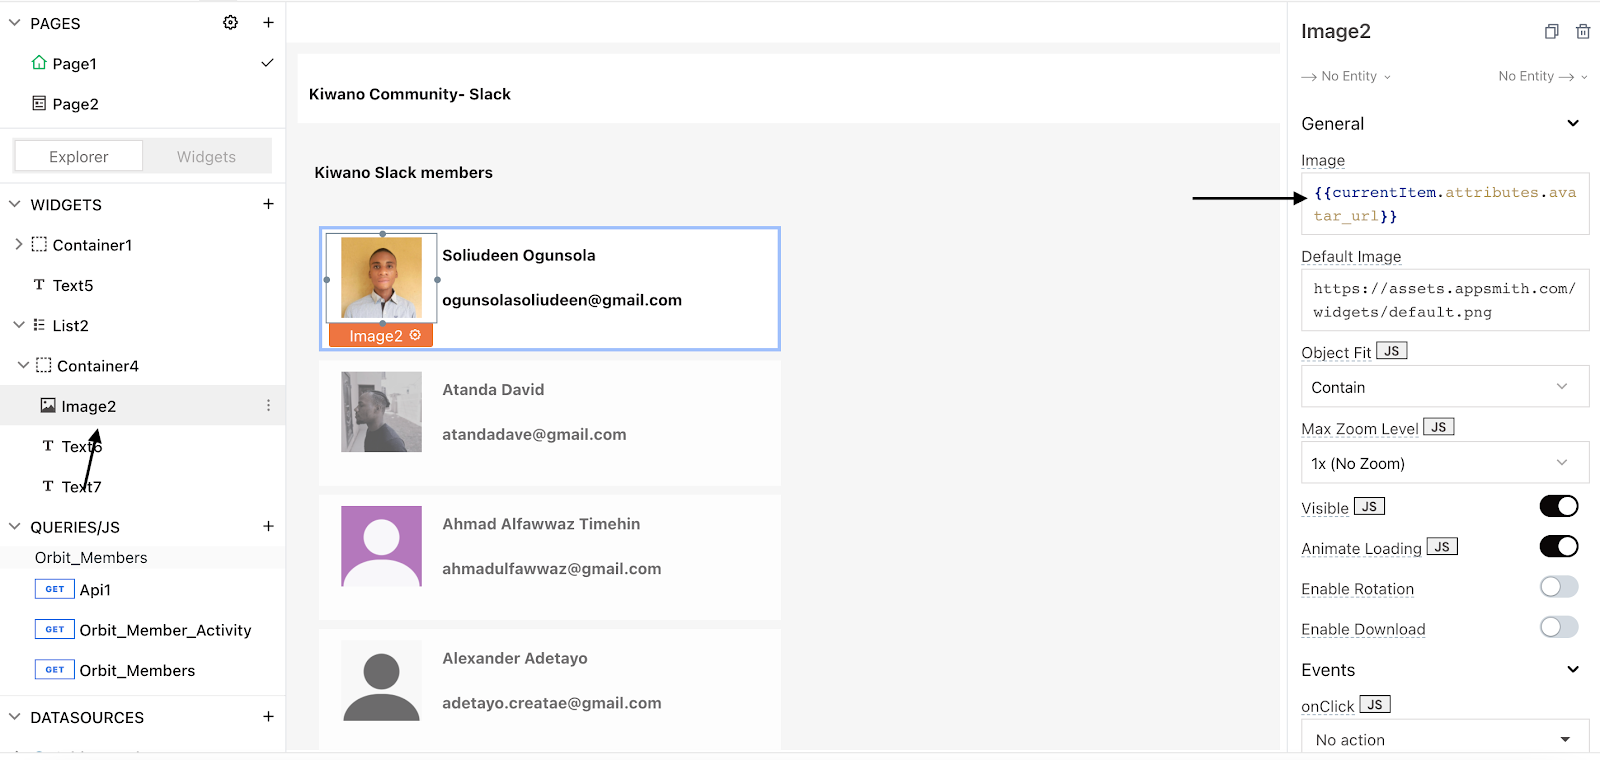
Similarly, you’ll add an image widget inside the List item. On the right, we’ll use currentItem to refer to the current API in question. So it’ll be currentItem.attributes.avatar_url.
 In the same vein, we add the name and email to the List item with
 {{currentItem.attributes.name}} and {{currentItem.attributes.email}}. If we do this correctly, we should have a similar screen to the one we have above.
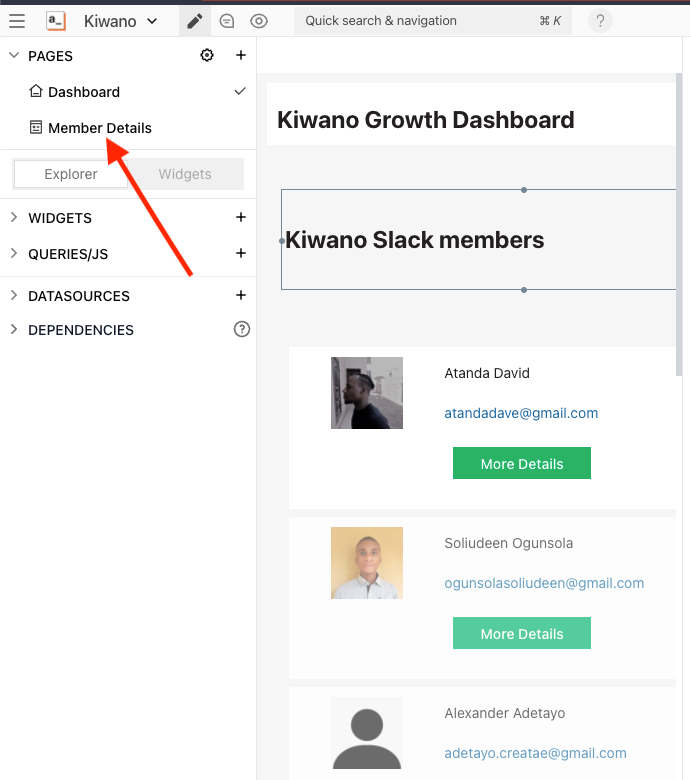
Displaying Member Details
First, we’ll create a new page called Member Details
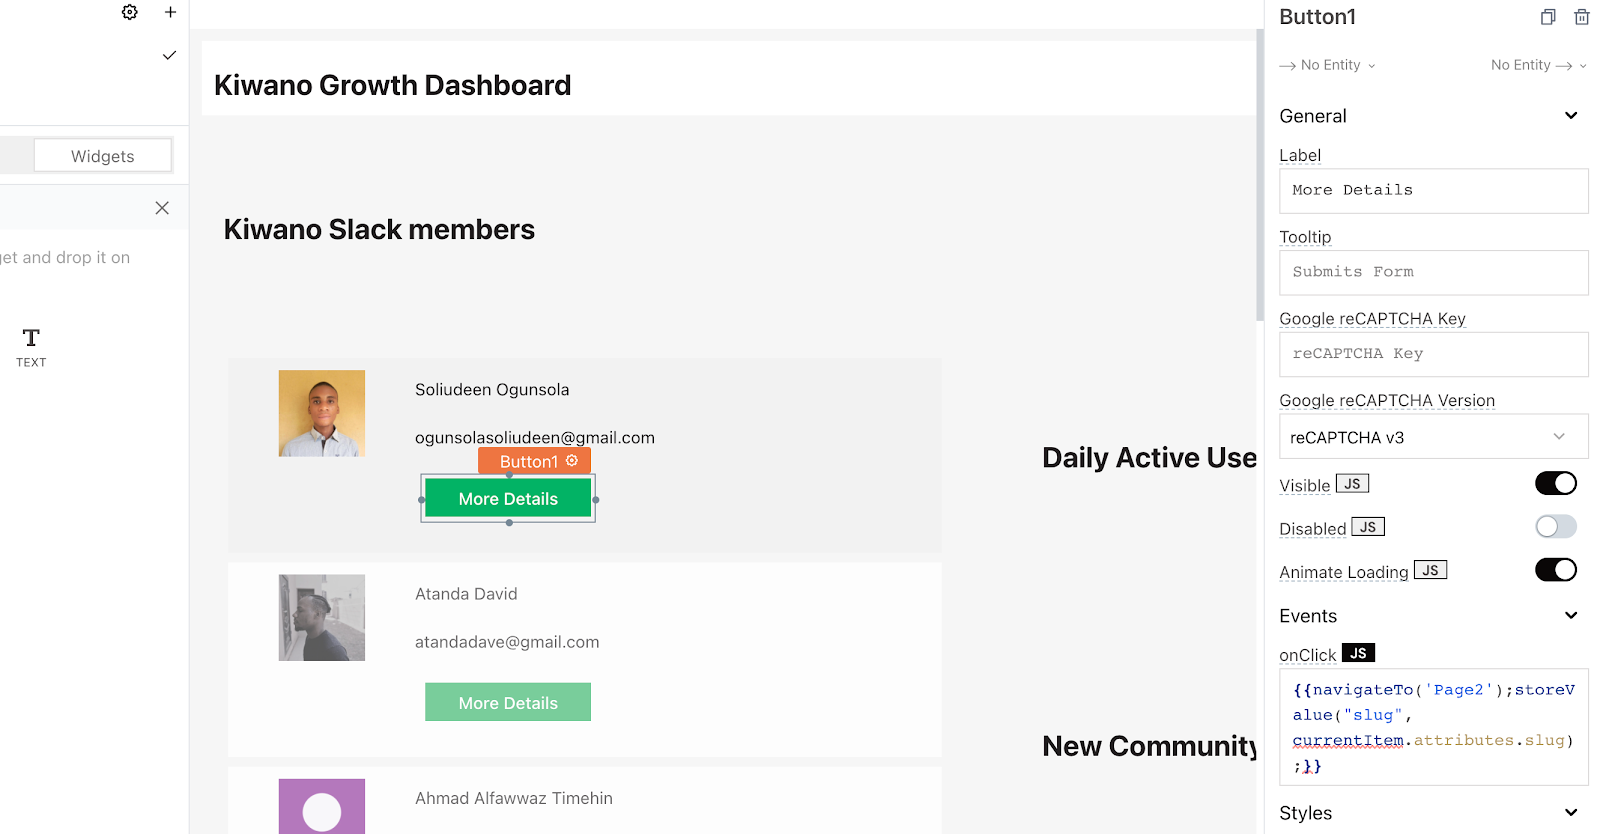 We’re now going to add a button to each user that navigates us to a new page (Member Details). While navigating, we’ll save the user’s slug as a store value, and send it as a query param to the next page.
The aim is to use that slug to make another request on the new page. This request displays that particular user’s details. Under Member Details, we’ll name that request Member_Details and get our slug value from Appsmith.value.slug. This allows us pull the data for that single member that was selected on the Dashboard page.
Let’s go back to Member Details and display our data.
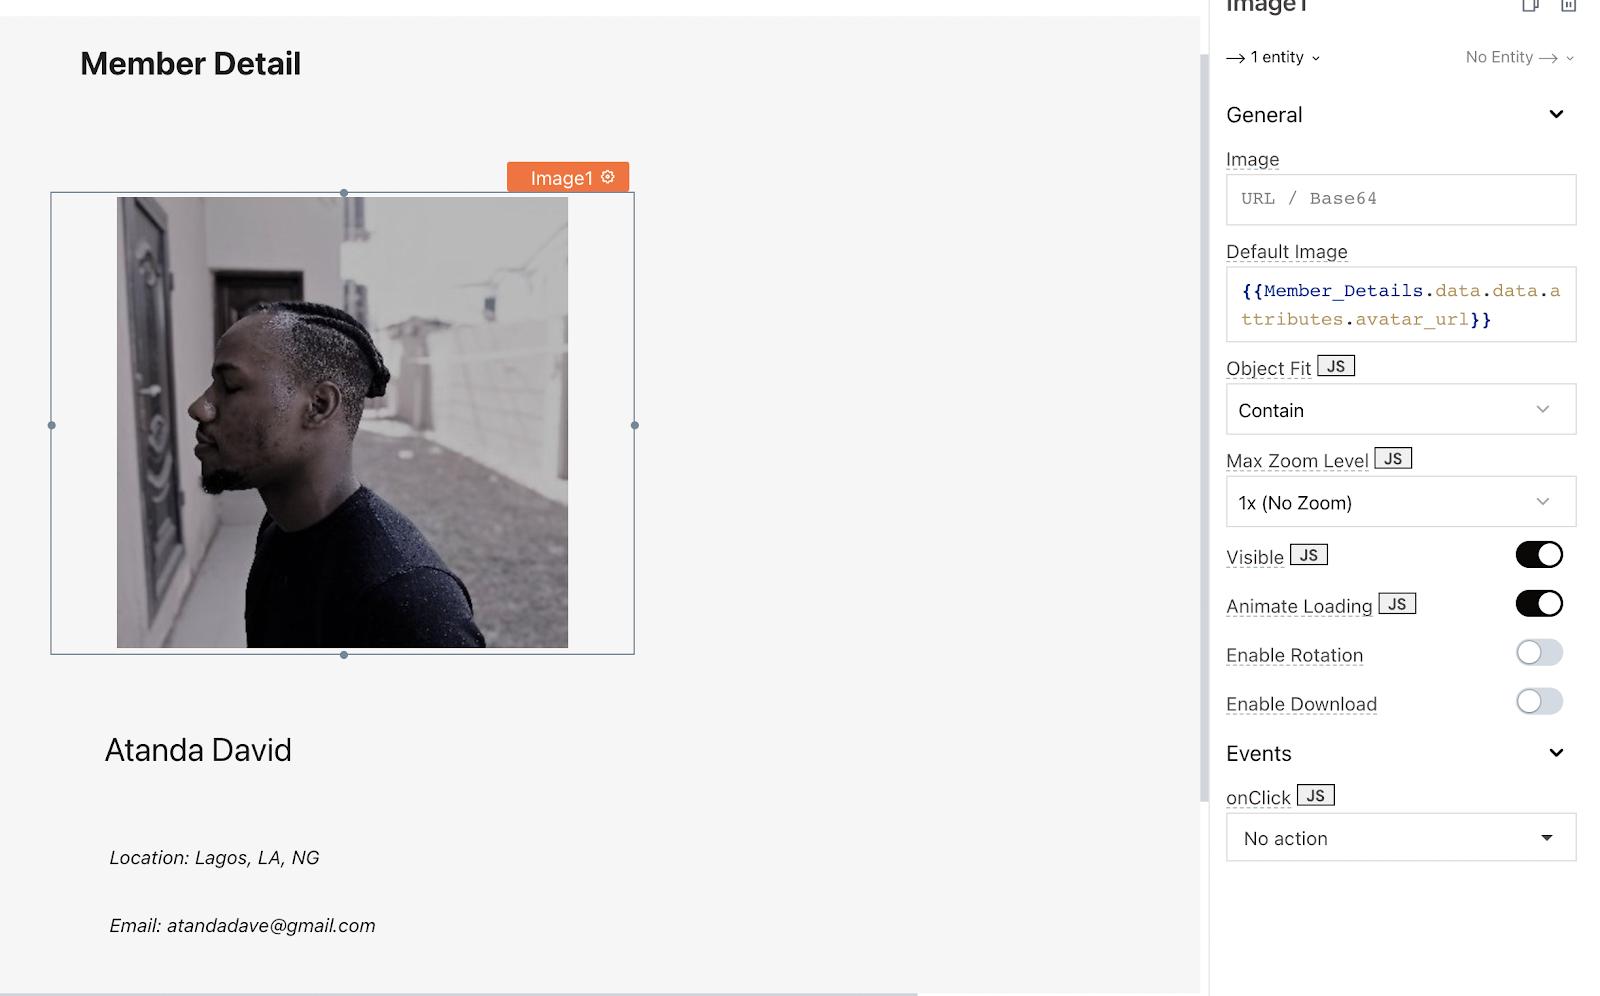
First, we add an image component to display the picture and use {{Member_Details.data.data.attributes.avatar_url}} to get our image URL from the Member_Details DataSource we created.
We also use {{Member_Details.data.data.attributes.location}} and {{Member_Details.data.data.attributes.avatar_email}} to display our location and email respectively.
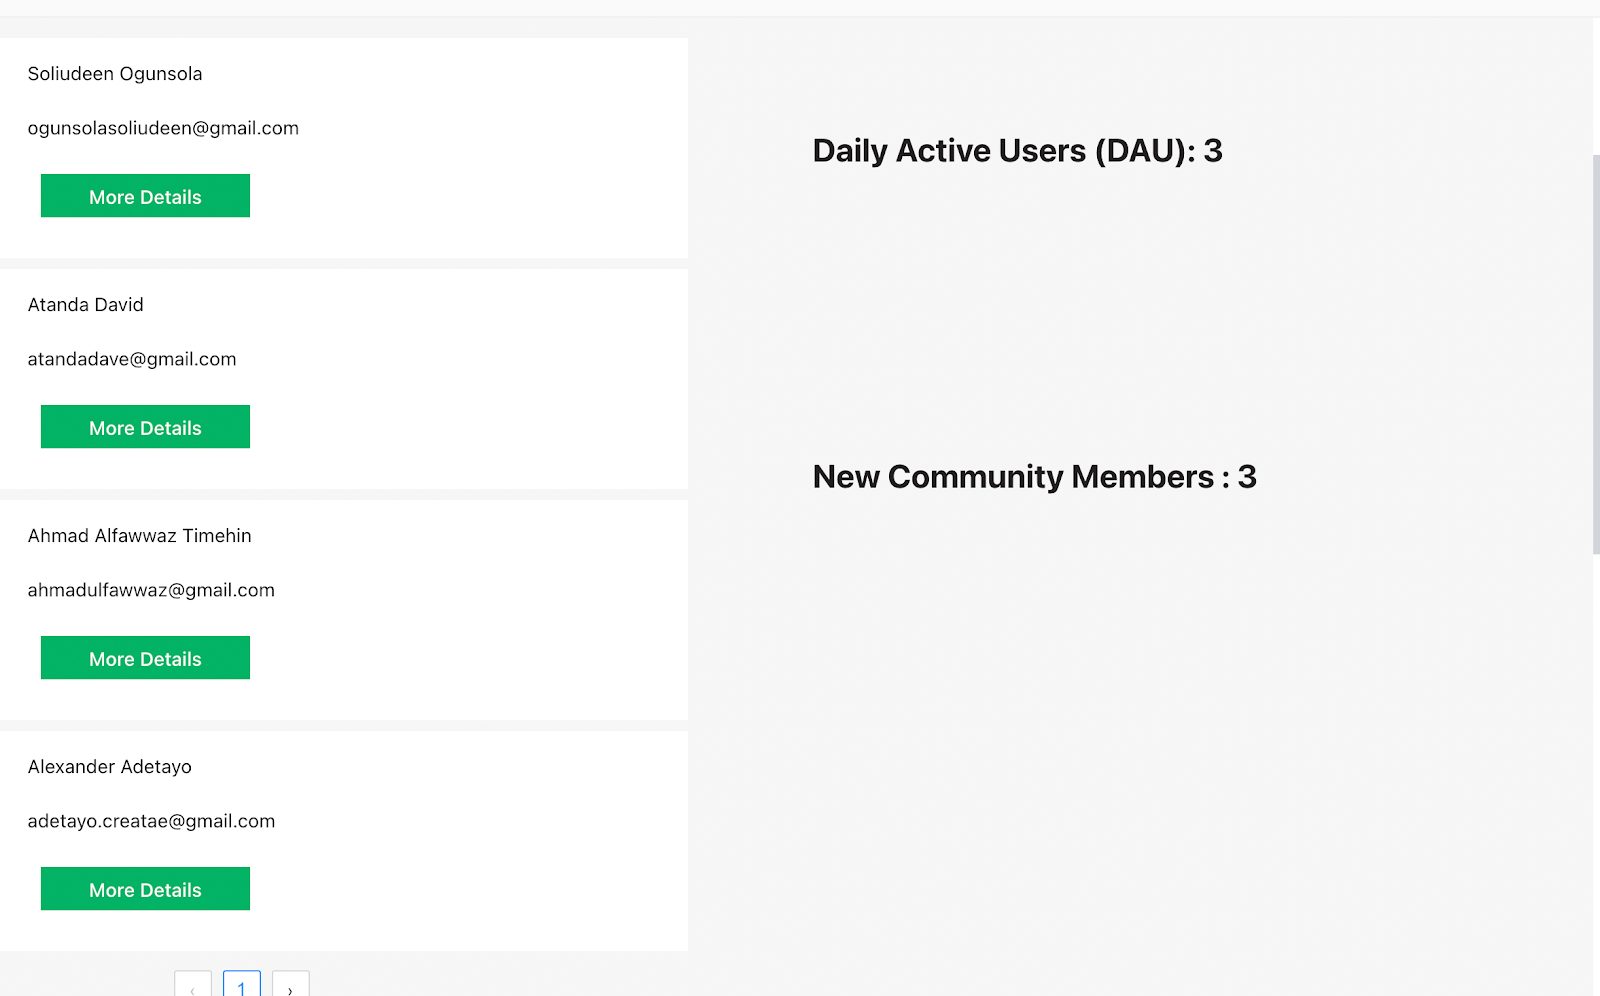
Next, we’ll manually add other data to our dashboard. These include our Daily Active Users (DAU) and New Community Members.
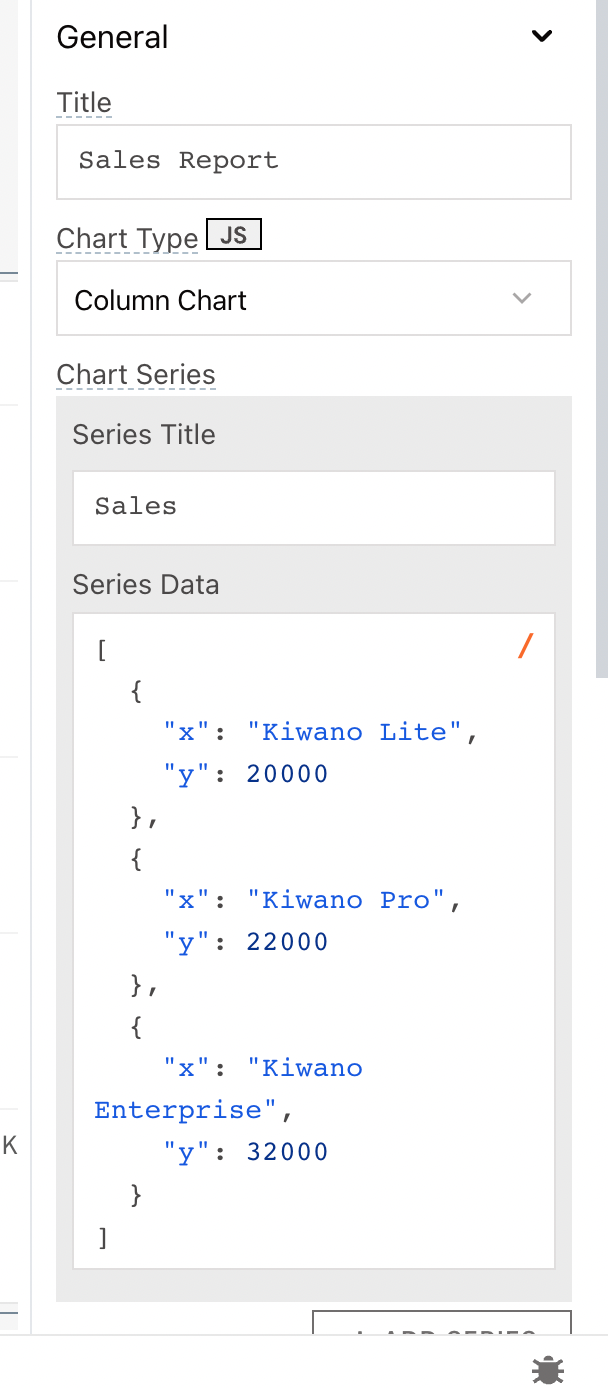
Sales Report
There’s a sales report graph that helps us display our sales data.
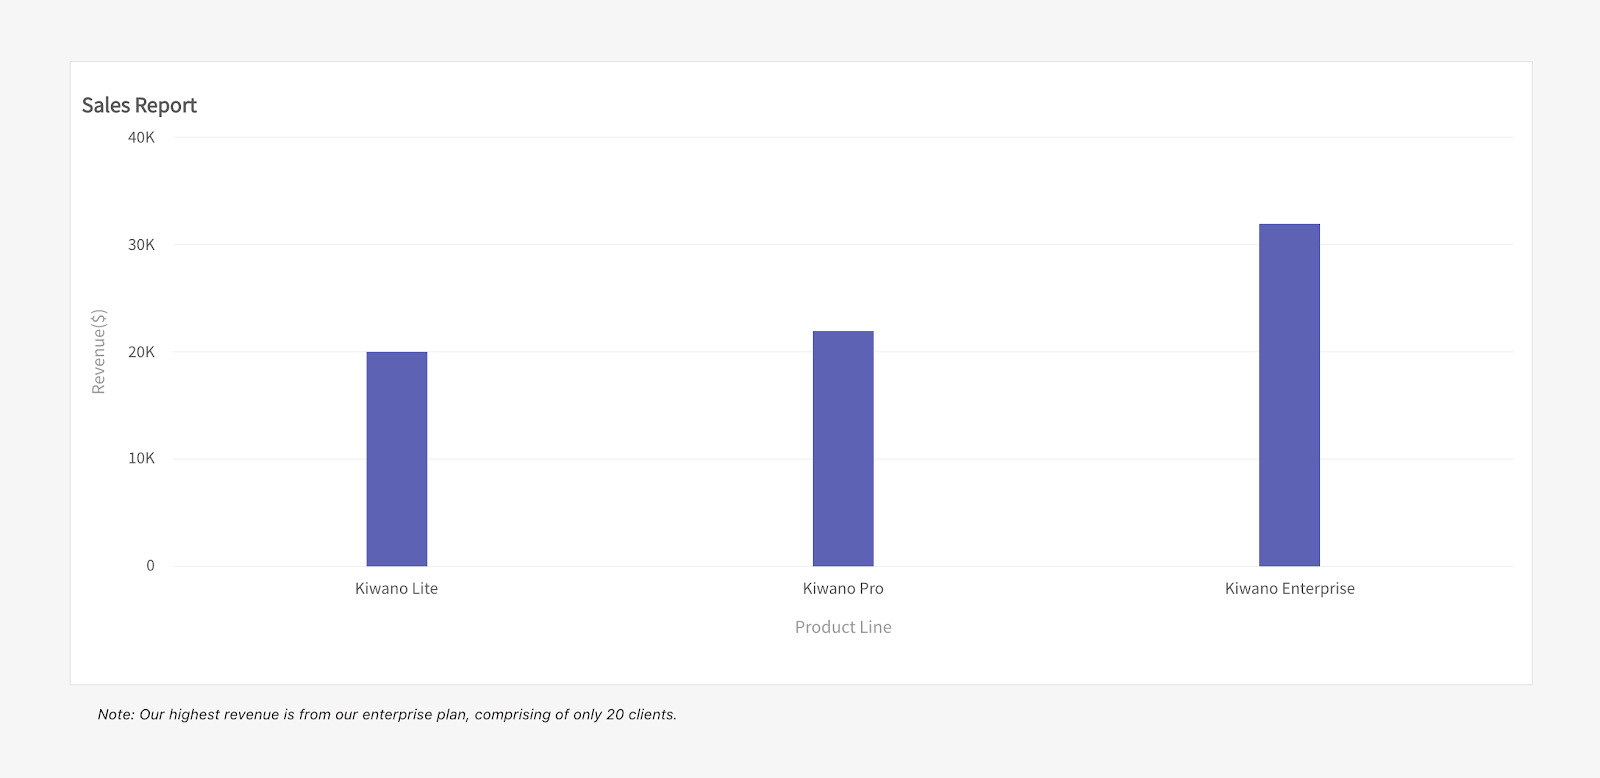
In this case, we’re manually adding our data as an array.
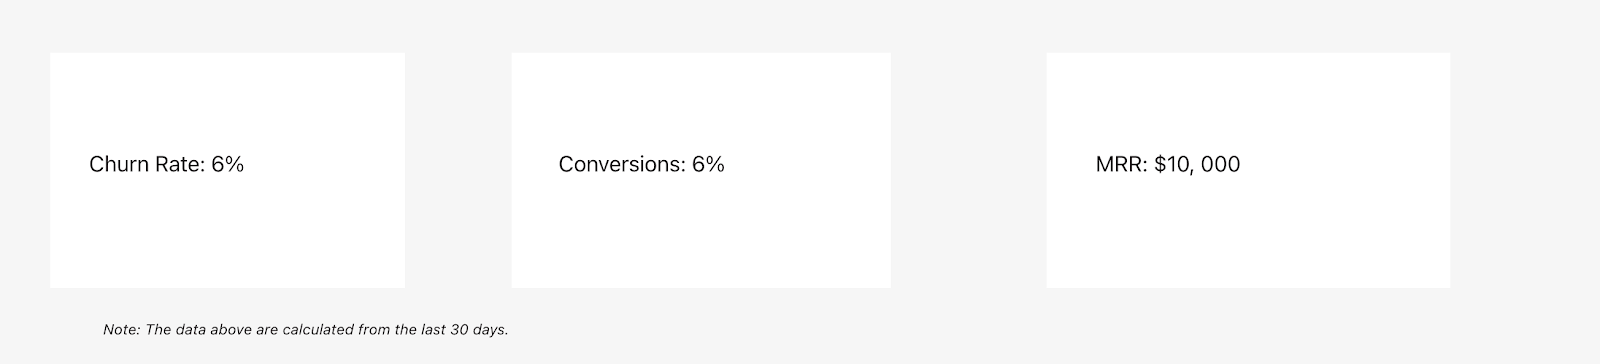
Finally, we’ll hardcode other important data like churn rate, conversions, and our MRR.
Deployment
Now that our Appsmith app is complete, what’s next? Deploying our shiny new app for other team members to use. Here’s the link to our application.
There’s also a tutorial below that shows you how to deploy with digital ocean. https://www.youtube.com/watch?v=6fitHGX2G4E& https://youtu.be/6fitHGX2G4E
Conclusion
In this article, we’ve covered how to create a growth dashboard with Appsmith and Orbit‘s REST APIs. This shows us how to use low-code tools to optimize time and valuable resources when building internal tools in your company.
Orbit and Appsmith complement each other when it comes to monitoring community platforms like Slack, Discord, Discourse, etc. With Orbit, you get access to direct feedback and necessary information without spending engineering time building infrastructure from scratch. While Appsmith lets you focus on creating a visual dashboard with metrics, using minimal effort to implement and maintain.
Beyond using Orbit as a datasource, we can make use of custom REST APIs, Airtable, Supabase, Backendless, etc. Also, you can add other third-party integrations like intercom, email, or even add Zapier into your application. Appsmith can be customized into any form to fit your technical use-case.
If you have blockers or issues using Appsmith, you can always jump into our community Discord server to ask questions. Plus, you can connect with other Appsmith users.
Also, feel free to check other Appsmith tutorials using similar services like Cube, SnowflakeDB, Hasura, etc.


