

A simple front-end for your MariaDB datasource

There are many parts to building an app, and designing UI elements can take up most of a developer’s time when building from scratch. However, with Appsmith, it’s possible to create a fully functional and custom frontend in minutes. A vast array of pre-built UI components that is widgets are available to help you build good-looking applications. Connecting data sources with Appsmith takes a few minutes, and you can quickly build tools on top of the database of your choice. For example, you can create admin panels to manage product catalogues, read content data from your database and use that to populate your e-commerce website, and then write more data and update your existing orders in the database. There are so many possibilities!
In this blog, I will teach you how to build a frontend that can connect to MariaDB as a datasource.
MariaDB Server is one of the most popular open-source relational databases. It’s made by the original developers of MySQL and guaranteed to stay open source. It is part of most cloud offerings and the default in most Linux distributions. It is built upon the values of performance, stability, and openness.
Getting Started: Connecting MariaDB on Appsmith
On Appsmith, it’s pretty straightforward to establish a connection with any datasource, including MariaDB; be it on cloud, self-hosted version or local environment.
What we need to make the connection are the endpoint, database name, and user credentials. With this in mind, let’s get started.
- Create a new account on Appsmith (it’s free!), if you are an existing user, log in to your Appsmith account.
- Create a new application under the dashboard under your preferred organization.
- On your Appsmith application, click on the
+icon next to Datasources on the left navigation bar under Page1 - Next, click on the Now, navigate to the Create New tab and choose MySQL datasource, you’ll see the following screenshot:
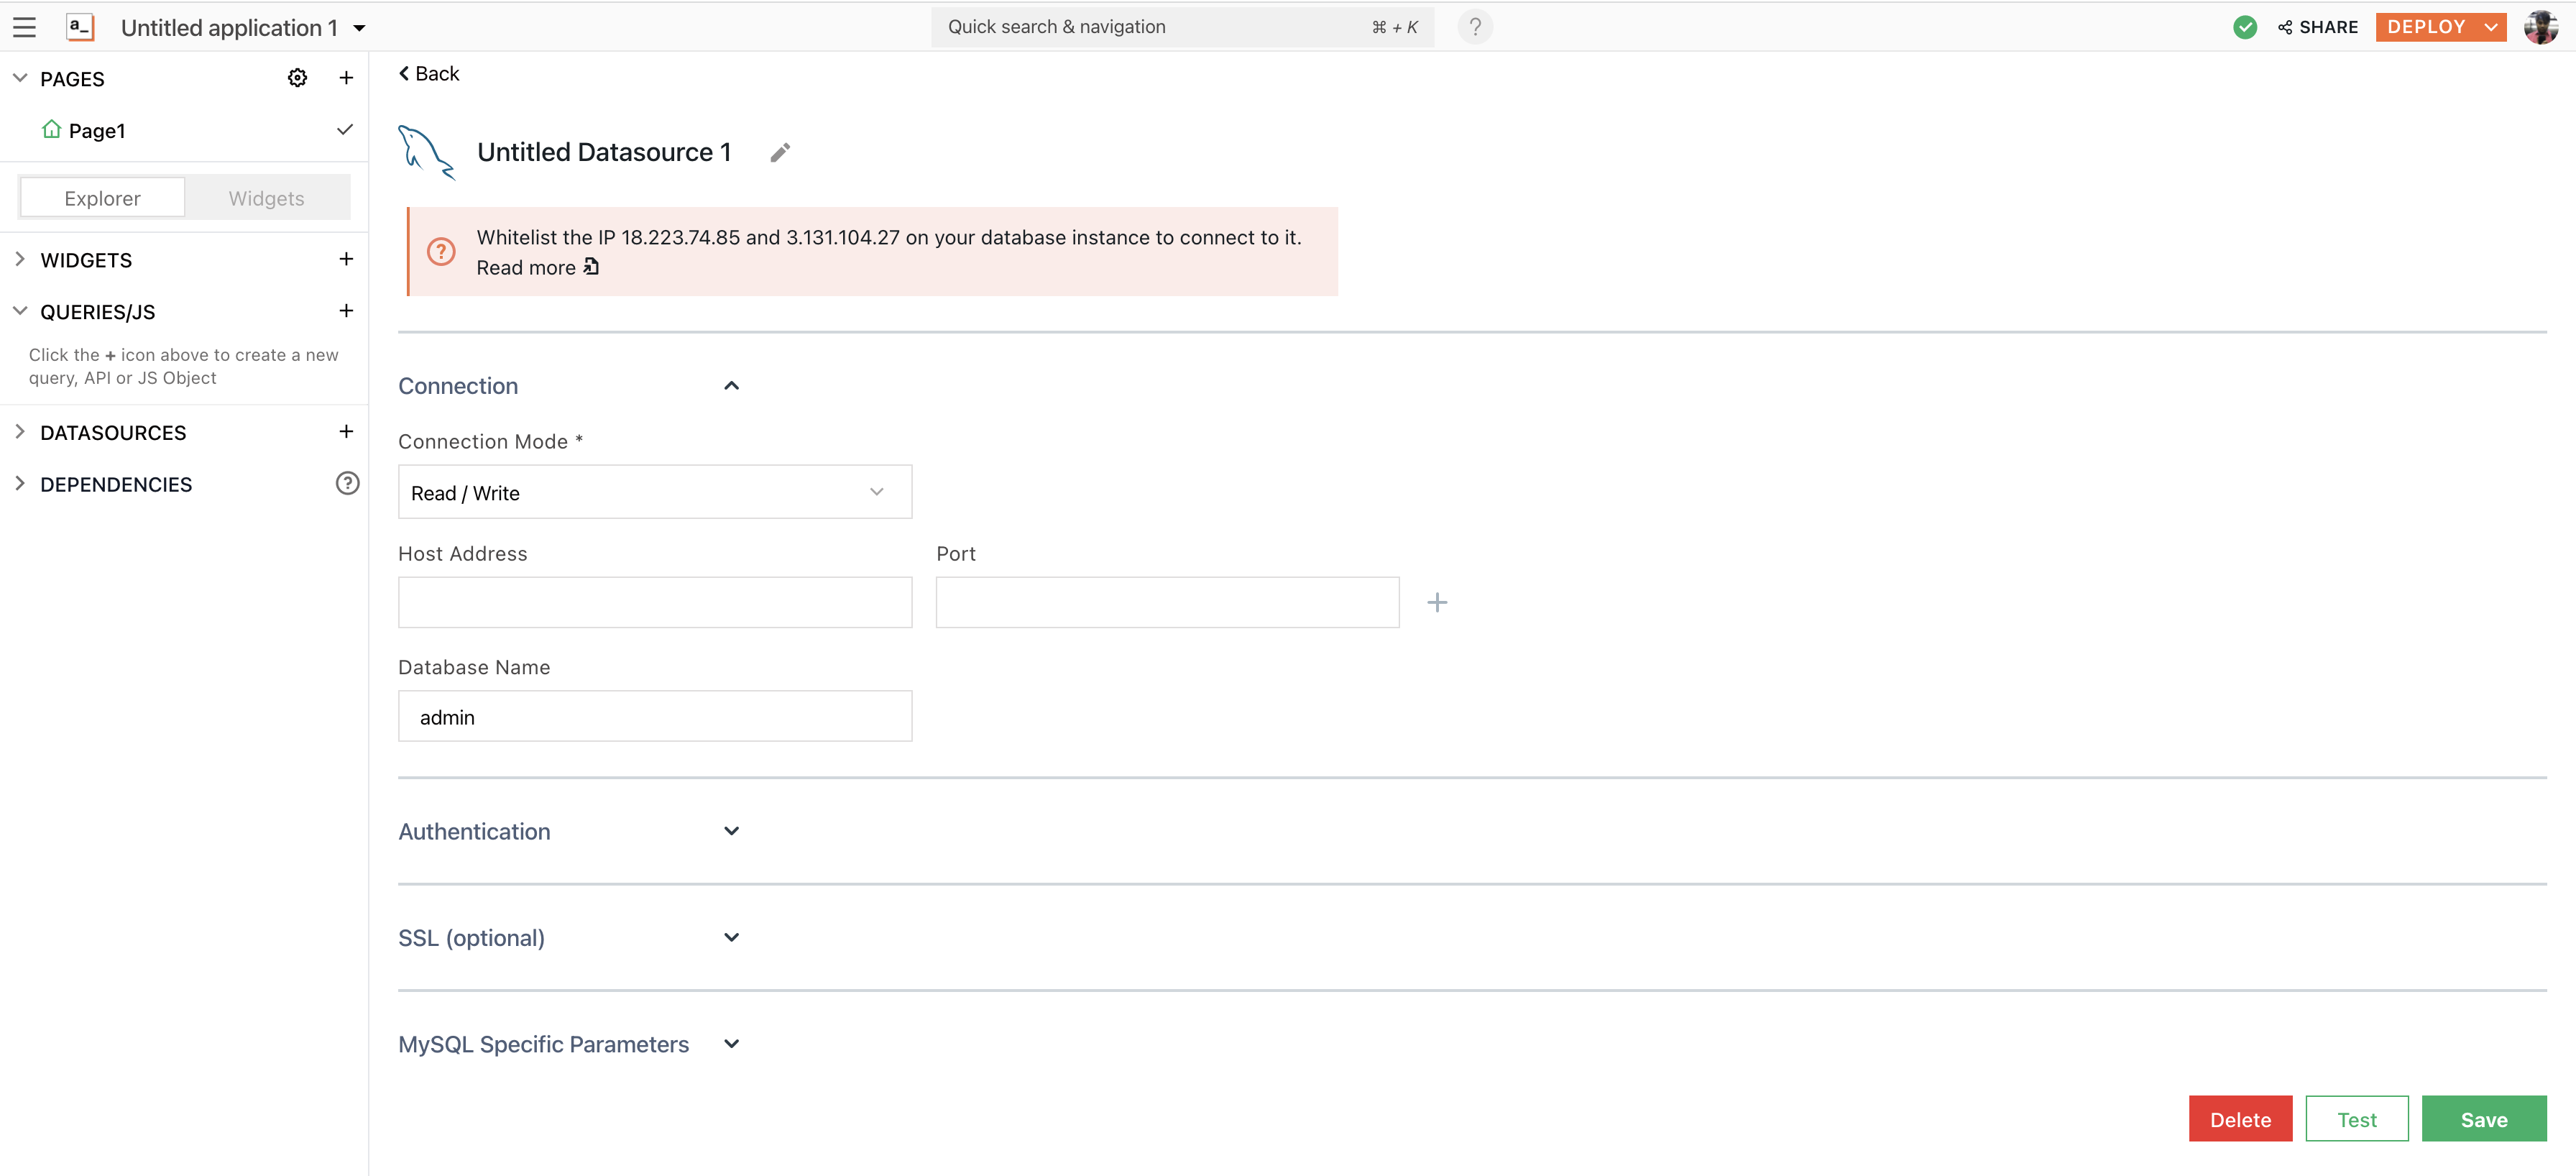
- When you’re using MariaDB on a hosted service, all these details can be found under the configuration settings. For this example, I’m using a free MariaDB RDS on Amazon Web Services (AWS).

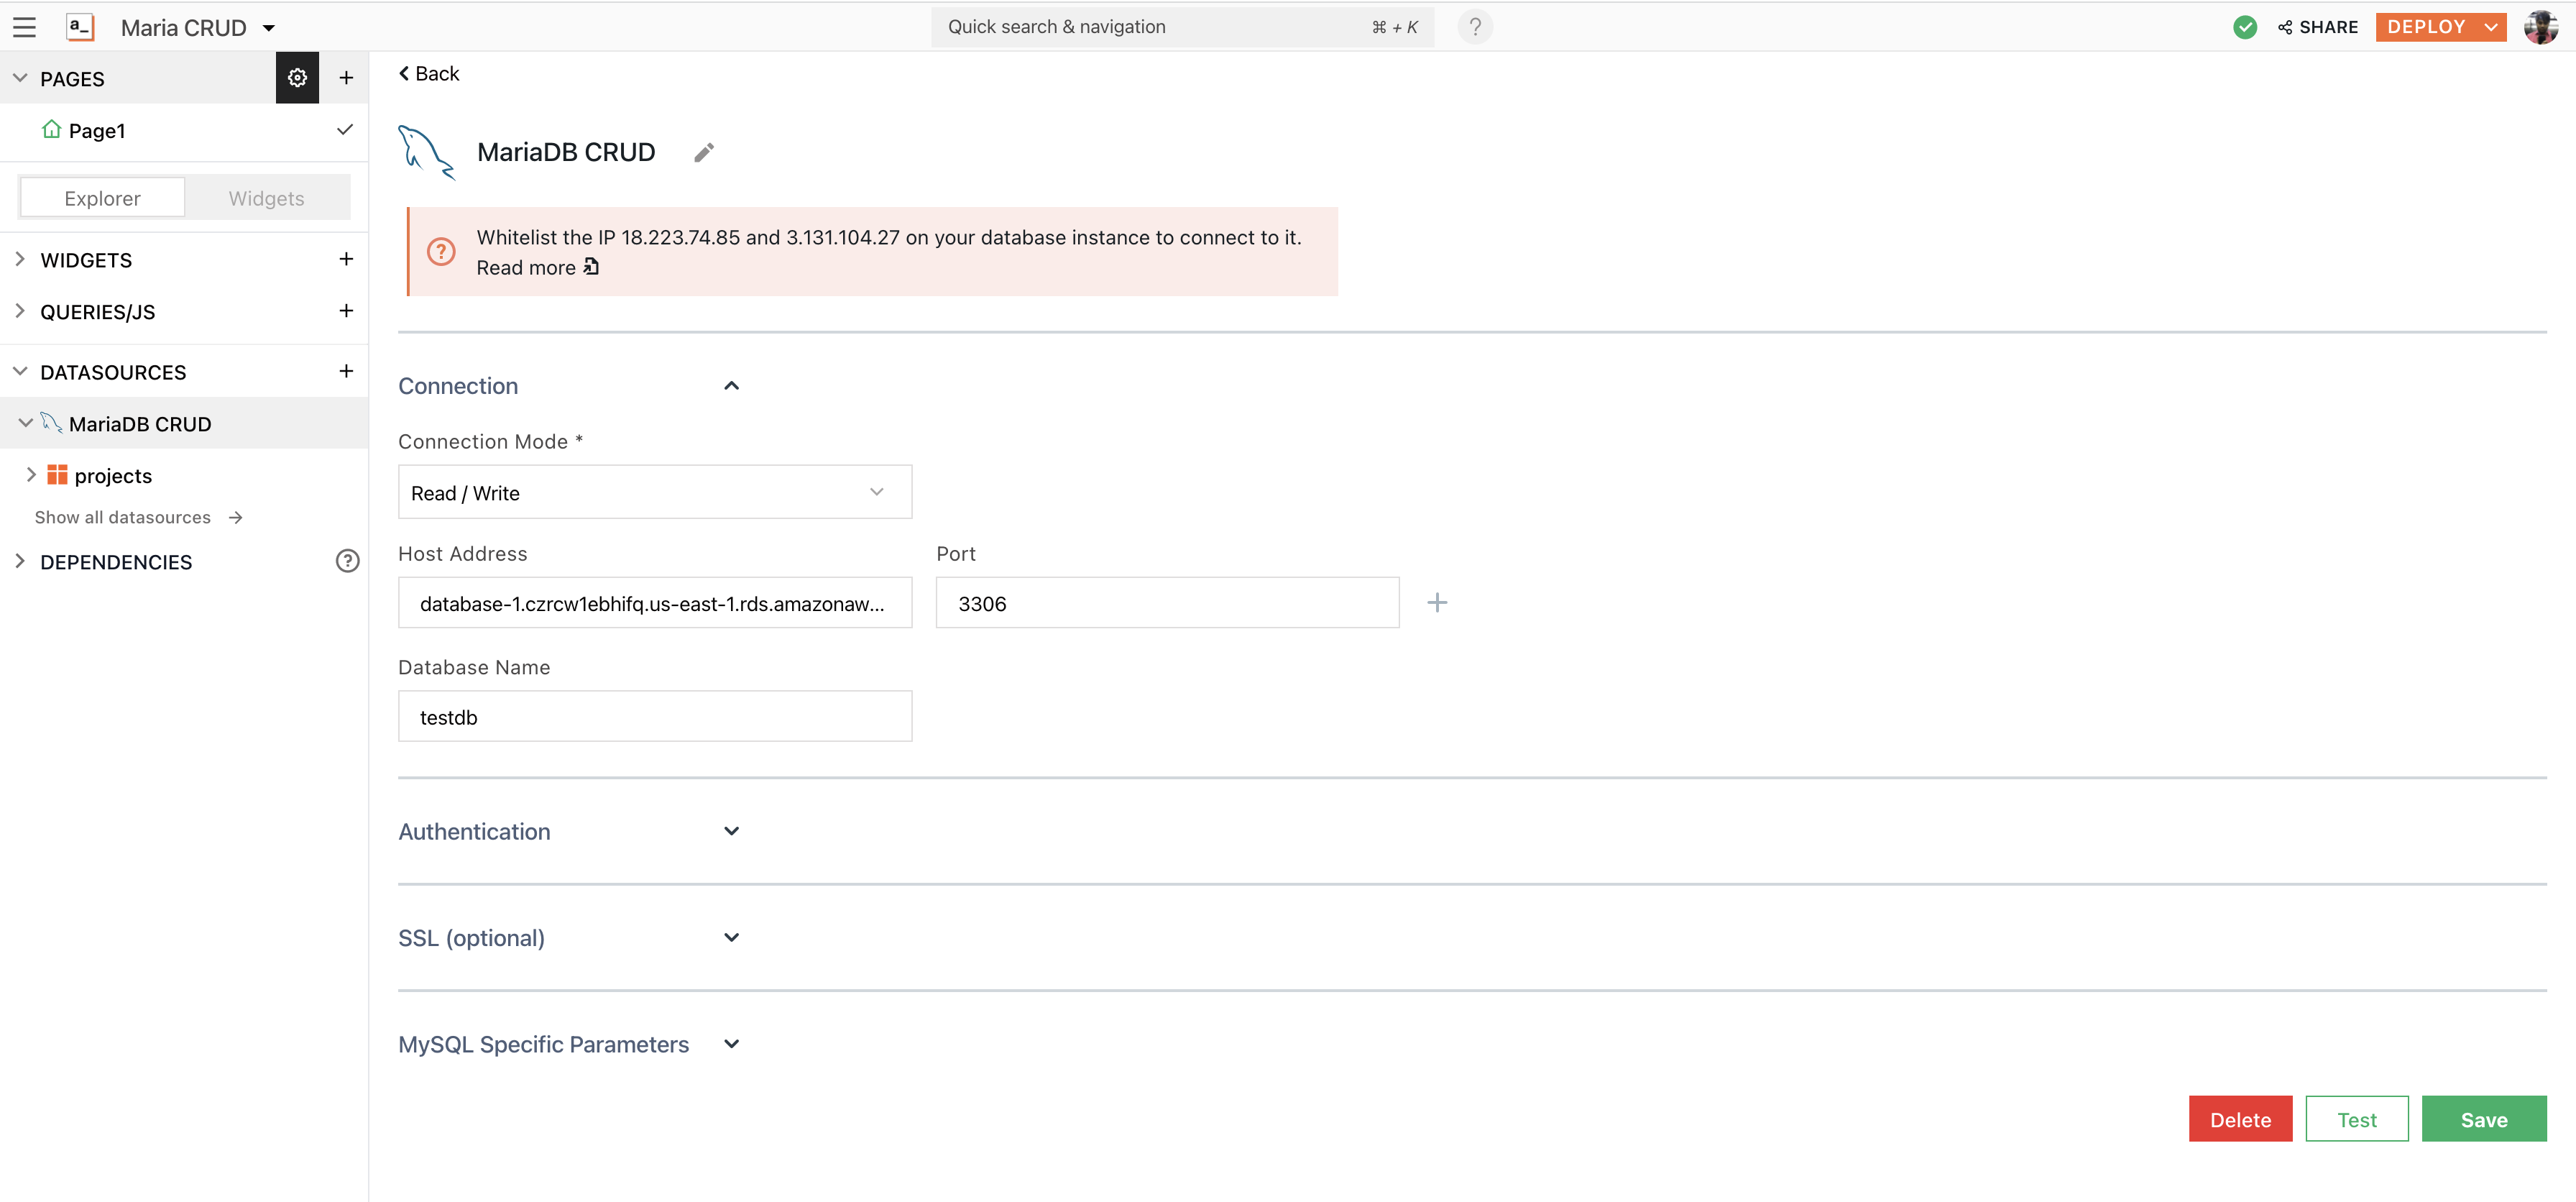
- Rename the Datasource to MariaDB CRUD by double-clicking on the existing one.
Here’s what the configuration would look like:
- Next, click on the
Testbutton at the bottom right of the screen. This will help you with understanding whether your configuration is valid or not. If it returns a successful message, hit the ‘Save’ button to establish a secure connection between Appsmith and MariaDB.
Creating a New Table on MariaDB
We are done with the basic configuration. Now, let’s create a new table and seed it to build a fully customisable CRUD app on MariaDB.
Note: After the connection is established, we can see all the (tables) under the connected datasource.
- Click on the + icon next to Datasource and click on Create New + from the MYSQL CRUD we’ve just created.
- This will redirect you to the query pane, where you can write MariaDB SQL queries, now rename the query to seedData, and choose to
createfrom the template and paste the following in the query body:
create table projects(
    project_id int auto_increment,
    project_name varchar(255) not null,
    created_at timestamp default current_timestamp,
    primary key(project_id)
);

INSERT INTO projects (project_name, created_at)
  VALUES ('appsmith', '2022-02-02T19:11:23');
This is a simple SQL query that’ll create a projects table, the idea for us is to build a simple CRUD application, that’ll let us manage open-source projects.
Also, note that we’ve seeded the table with an insert statement where we added the appsmith project.
Alrighty, not that our table is created, let’s get into CRUD.
CRUD on MariaDB with Appsmith
Implementing the Read Operation
First, let’s read our seed data from the database and display it on a beautiful table widget. Follow the below steps:
- Click on the
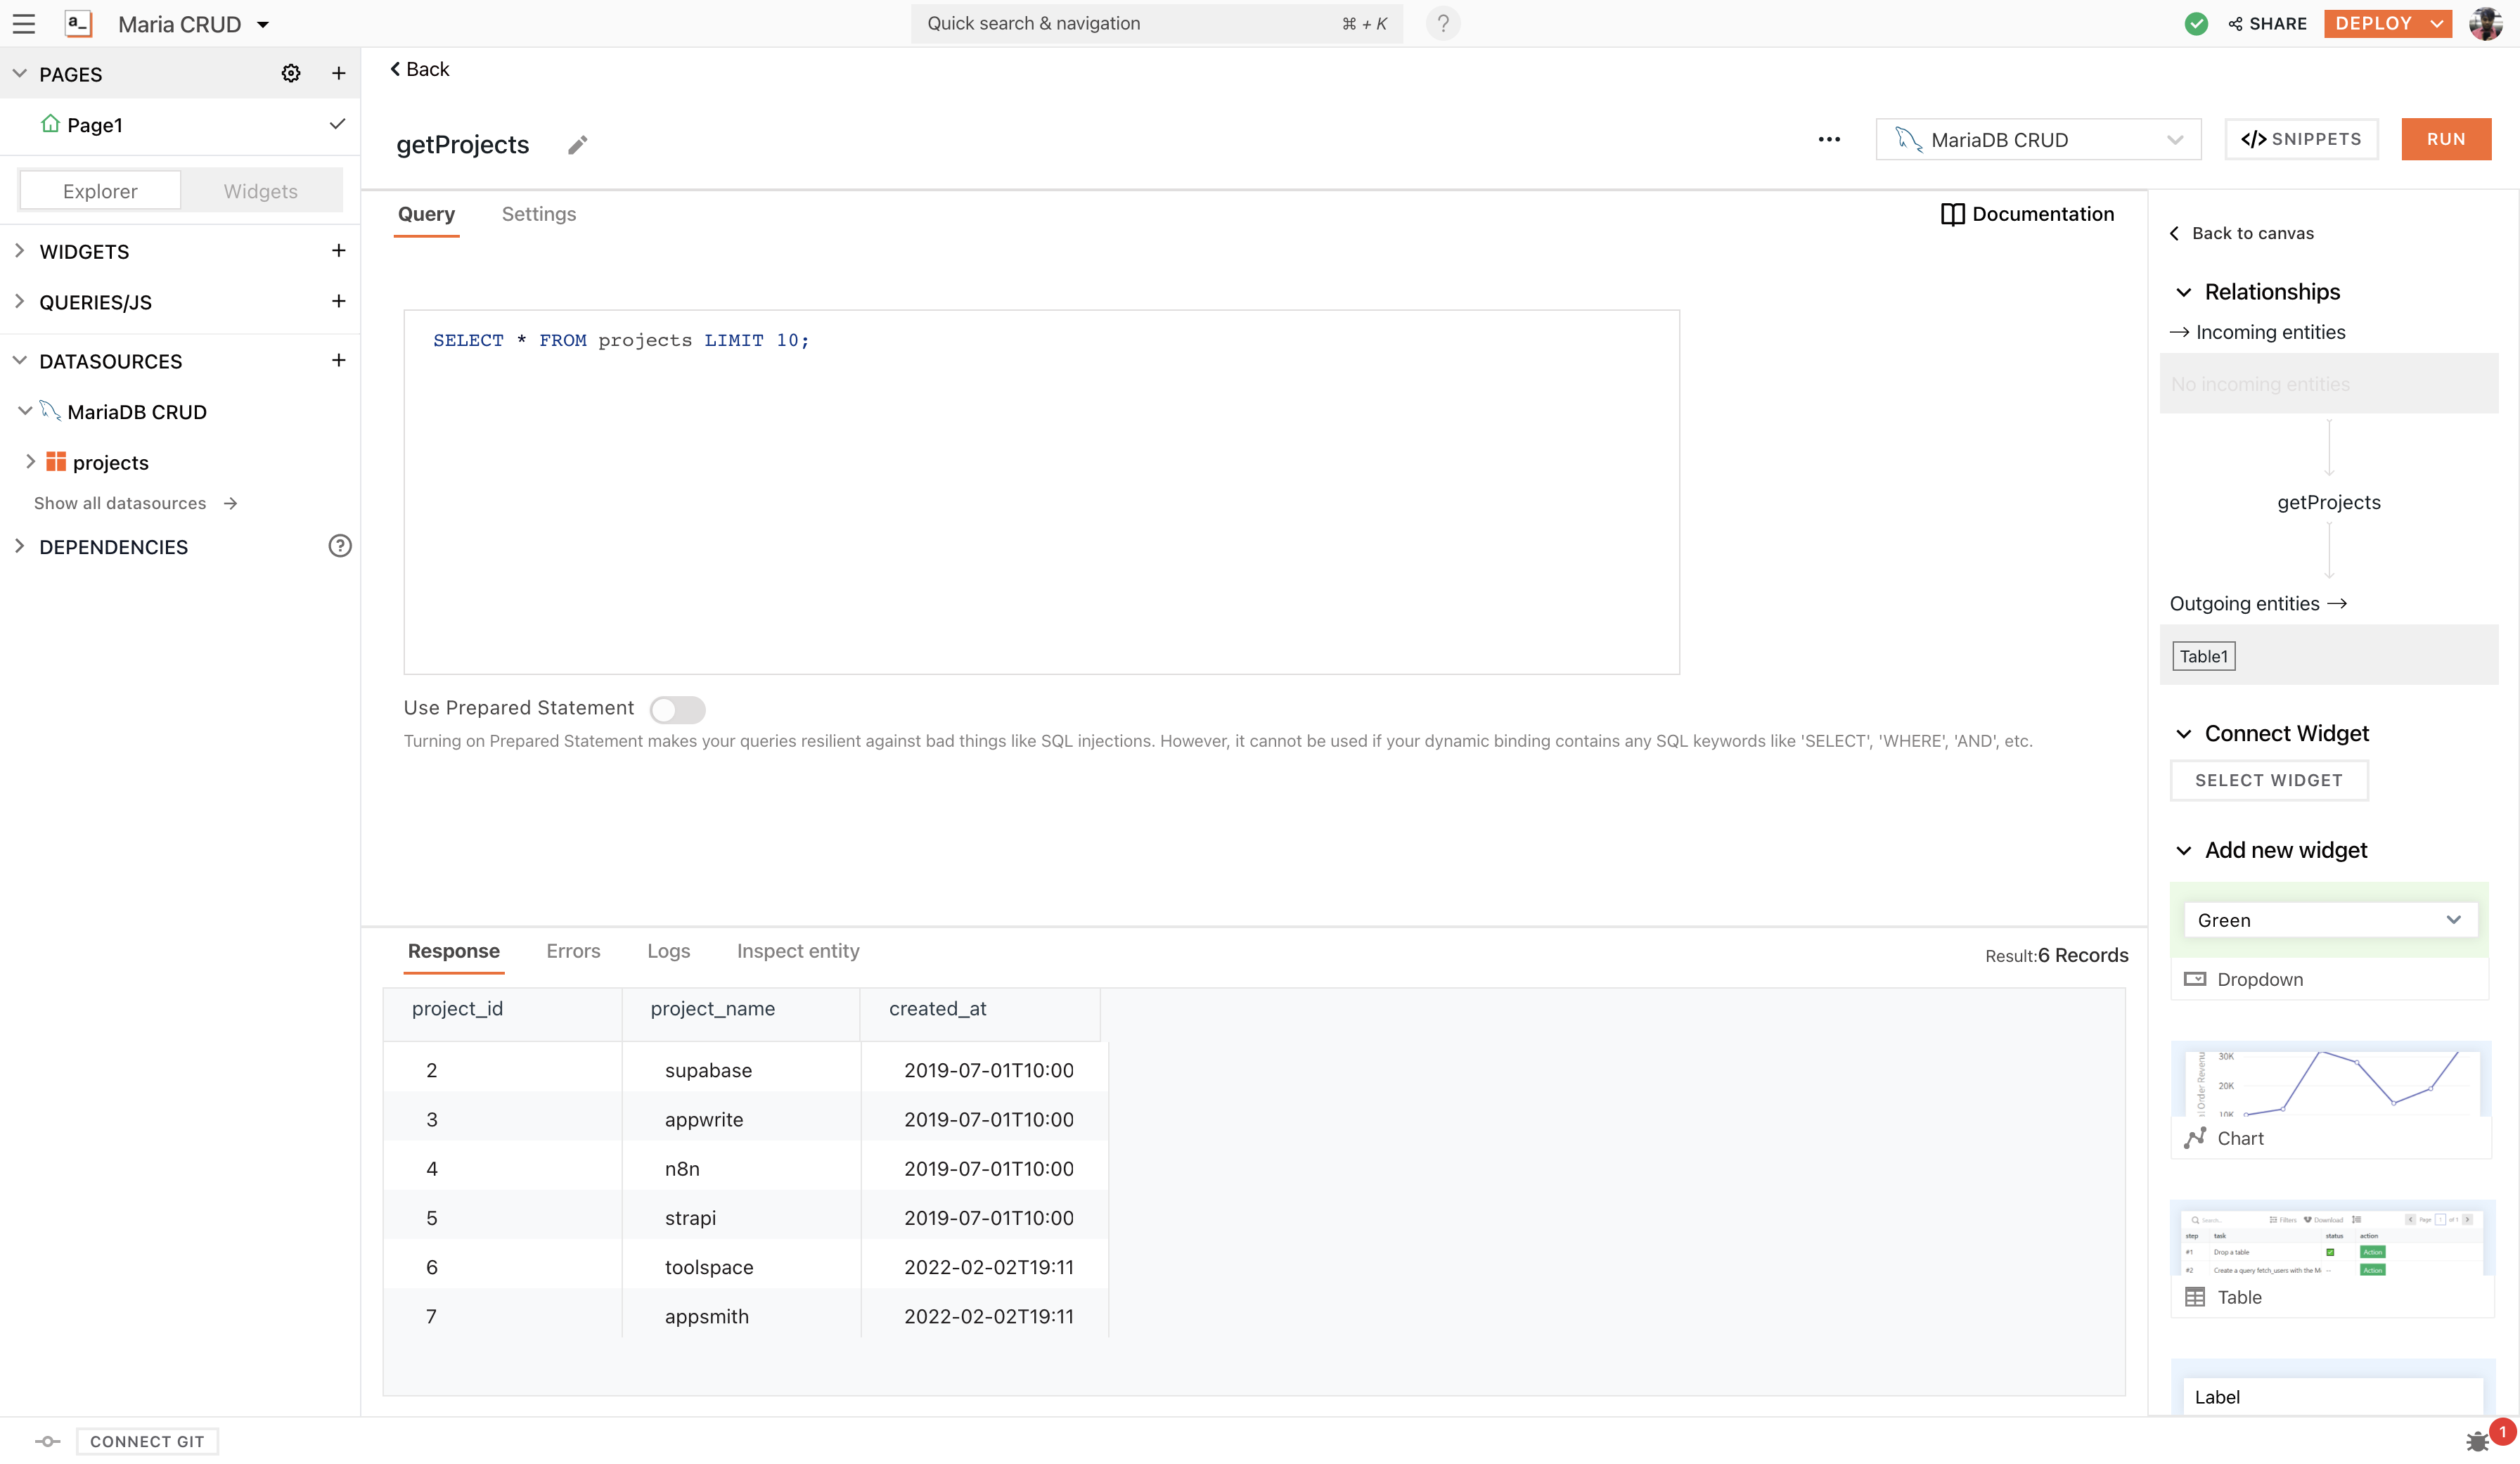
+icon next to the datasources and choose to Create New + from the MariaDB CRUD datasource. - Rename the query to getProjects
- Copy the following SQL script to query all the Projects from the projects table:
SELECT * FROM projects LIMIT 10;
- This is a simple query that returns all the projects present in the sample data item. Hit the RUN button to view all the results.
We now have our query; let's bind this onto the table widget; for this follow the below steps:
- Click the
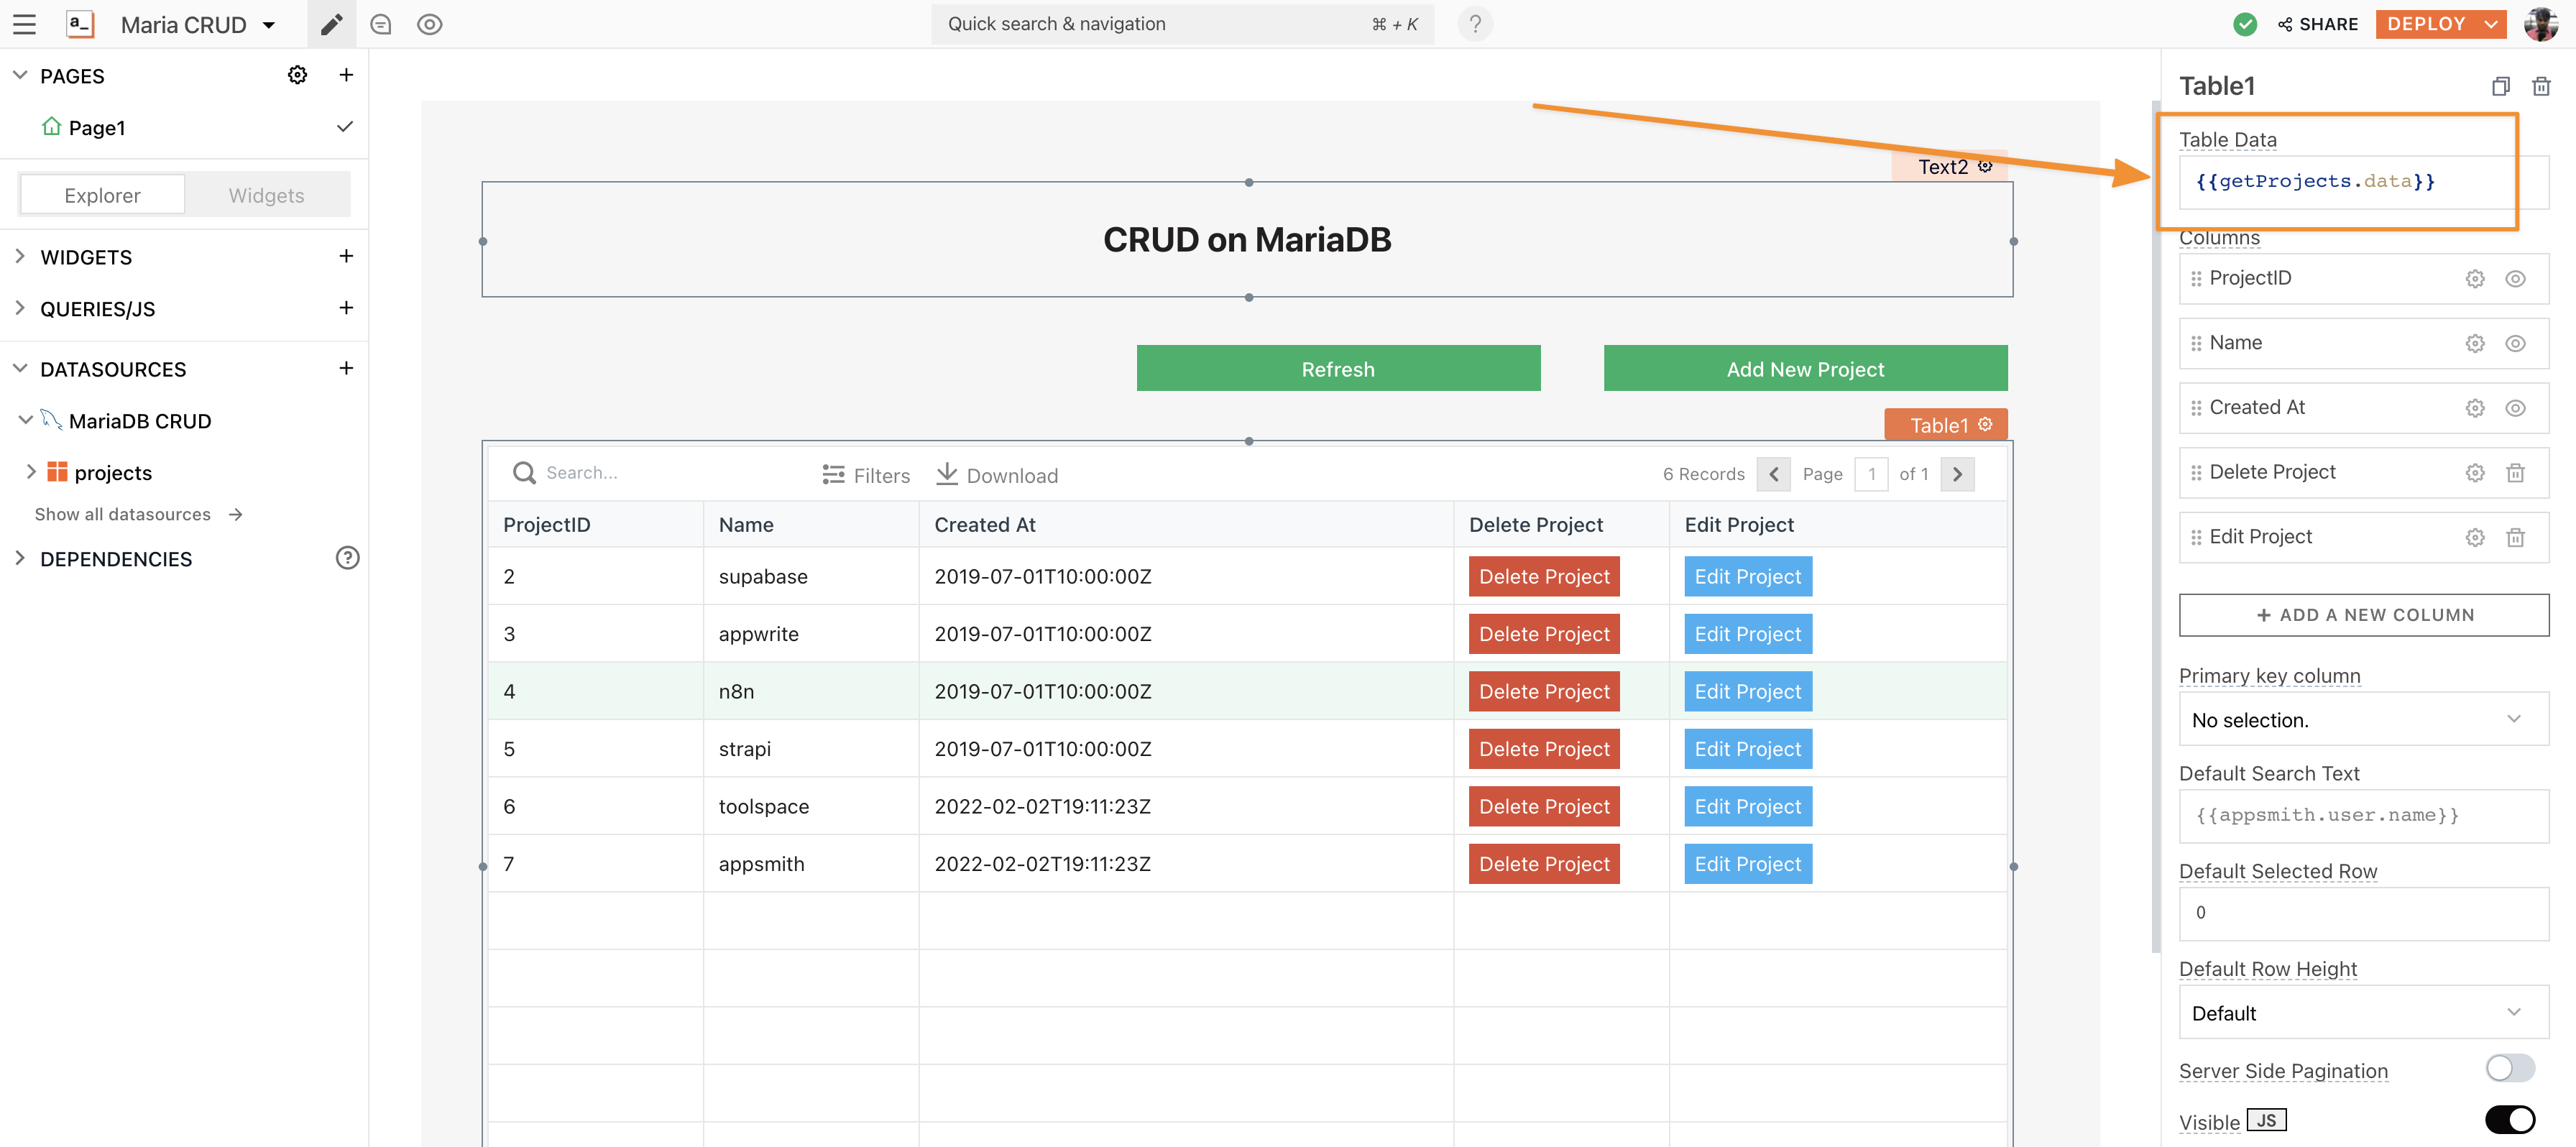
+icon next to widgets on the sidebar, search for the table widget, and drag and drop it onto the canvas. - Configurations to any widget can be made through the property pane. Click on the table widget on the canvas, you will see the property pane docked to the sidebar on the right. Now, under the Table Data property, use the moustache syntax to bind the query:
{{getProjects.data}}
With this, we should see all the data displayed on the table. The column names can be configured and re-organized under the property pane.
Implementing the Create Operation
To add the create operation on MariaDB, let’s make UI.
- Drag and drop a button widget onto the canvas. Open its property pane, set the onClick property to
Open a New Modal, and chooseCreate New. - This will open up a new modal now; let’s drag and drop a few widgets to create a form that we can use to add new projects into our database.
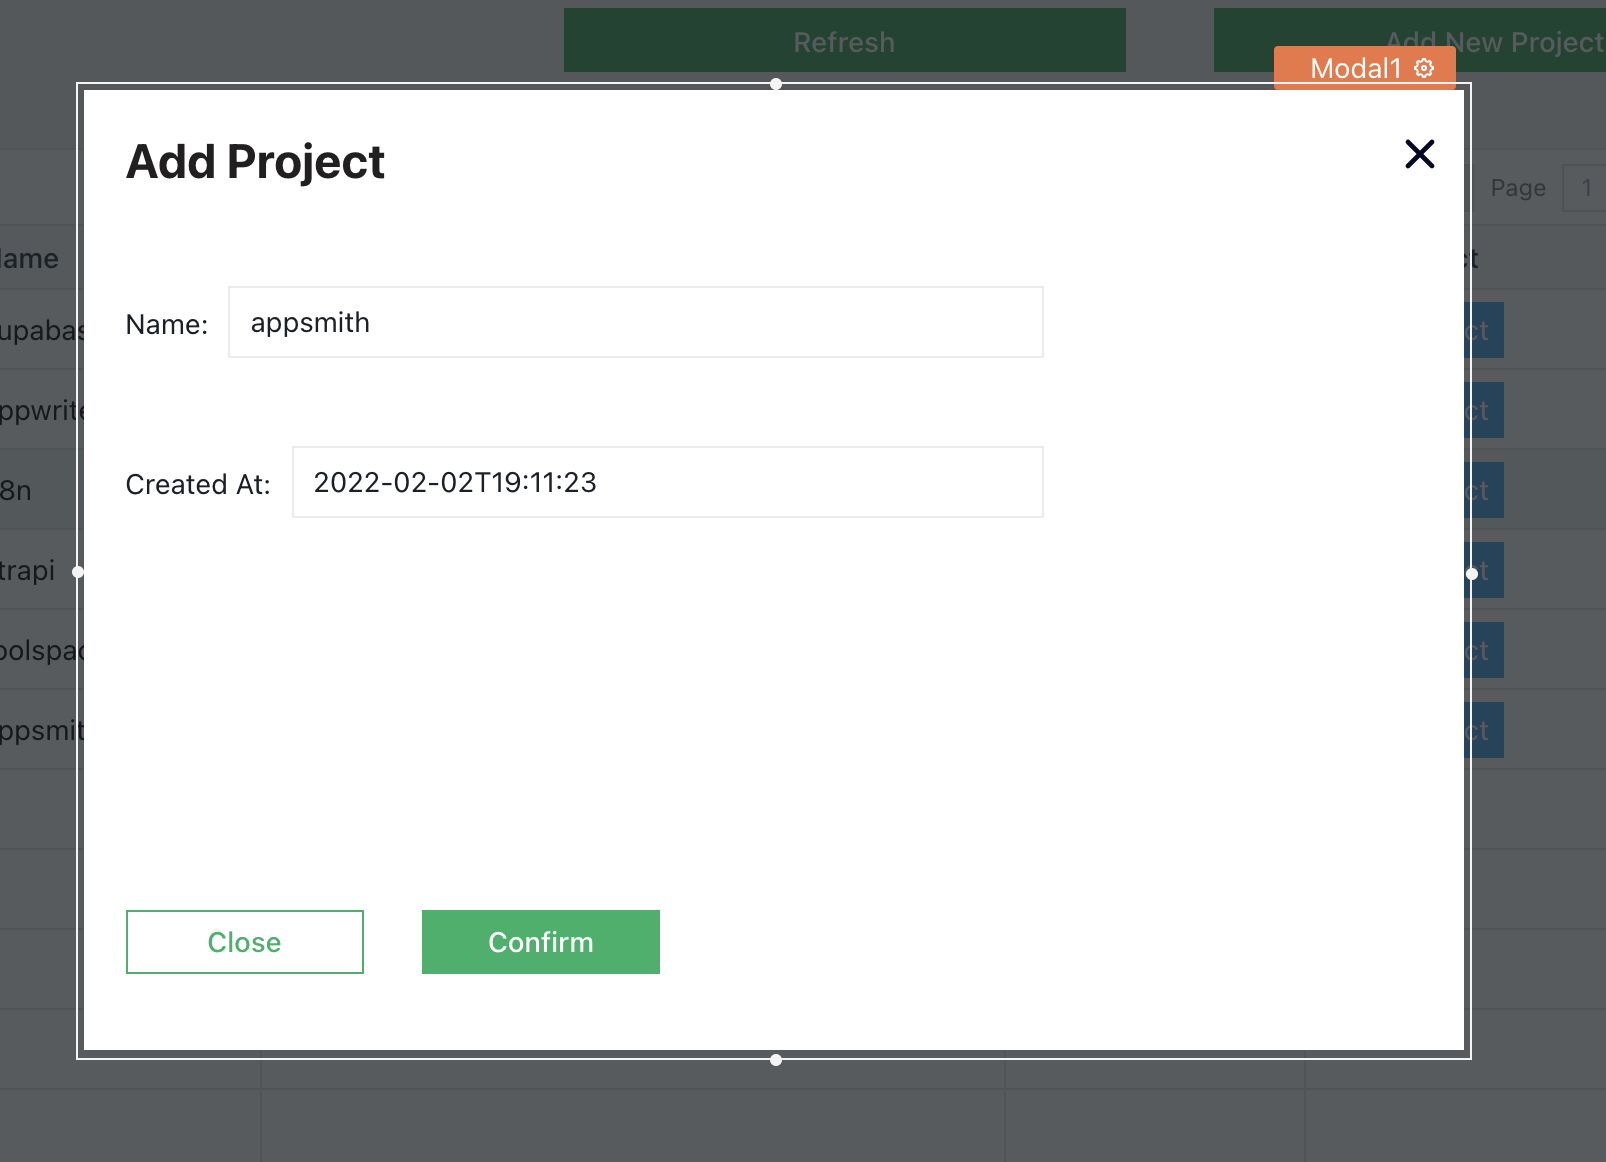
Here, we have two input widgets to add to our project. We can configure the default values, labels, and placeholders by selecting the respective property panes. Now, let’s write the query that lets us create a new project on MariaDB.
Follow the steps below:
- Click on the
+icon next to the datasources and choose to Create New + from the MariaDB CRUD datasource - Rename the query to
createProject - Copy the following SQL script:
INSERT INTO projects (project_name, created_at)
  VALUES ('{{Input1.text}}', '{{Input2.text}}');
Here, we have an insert query that collects all the data from the form widgets we've created. Note that we use the moustache syntax to bind the data from the widgets onto the query body.
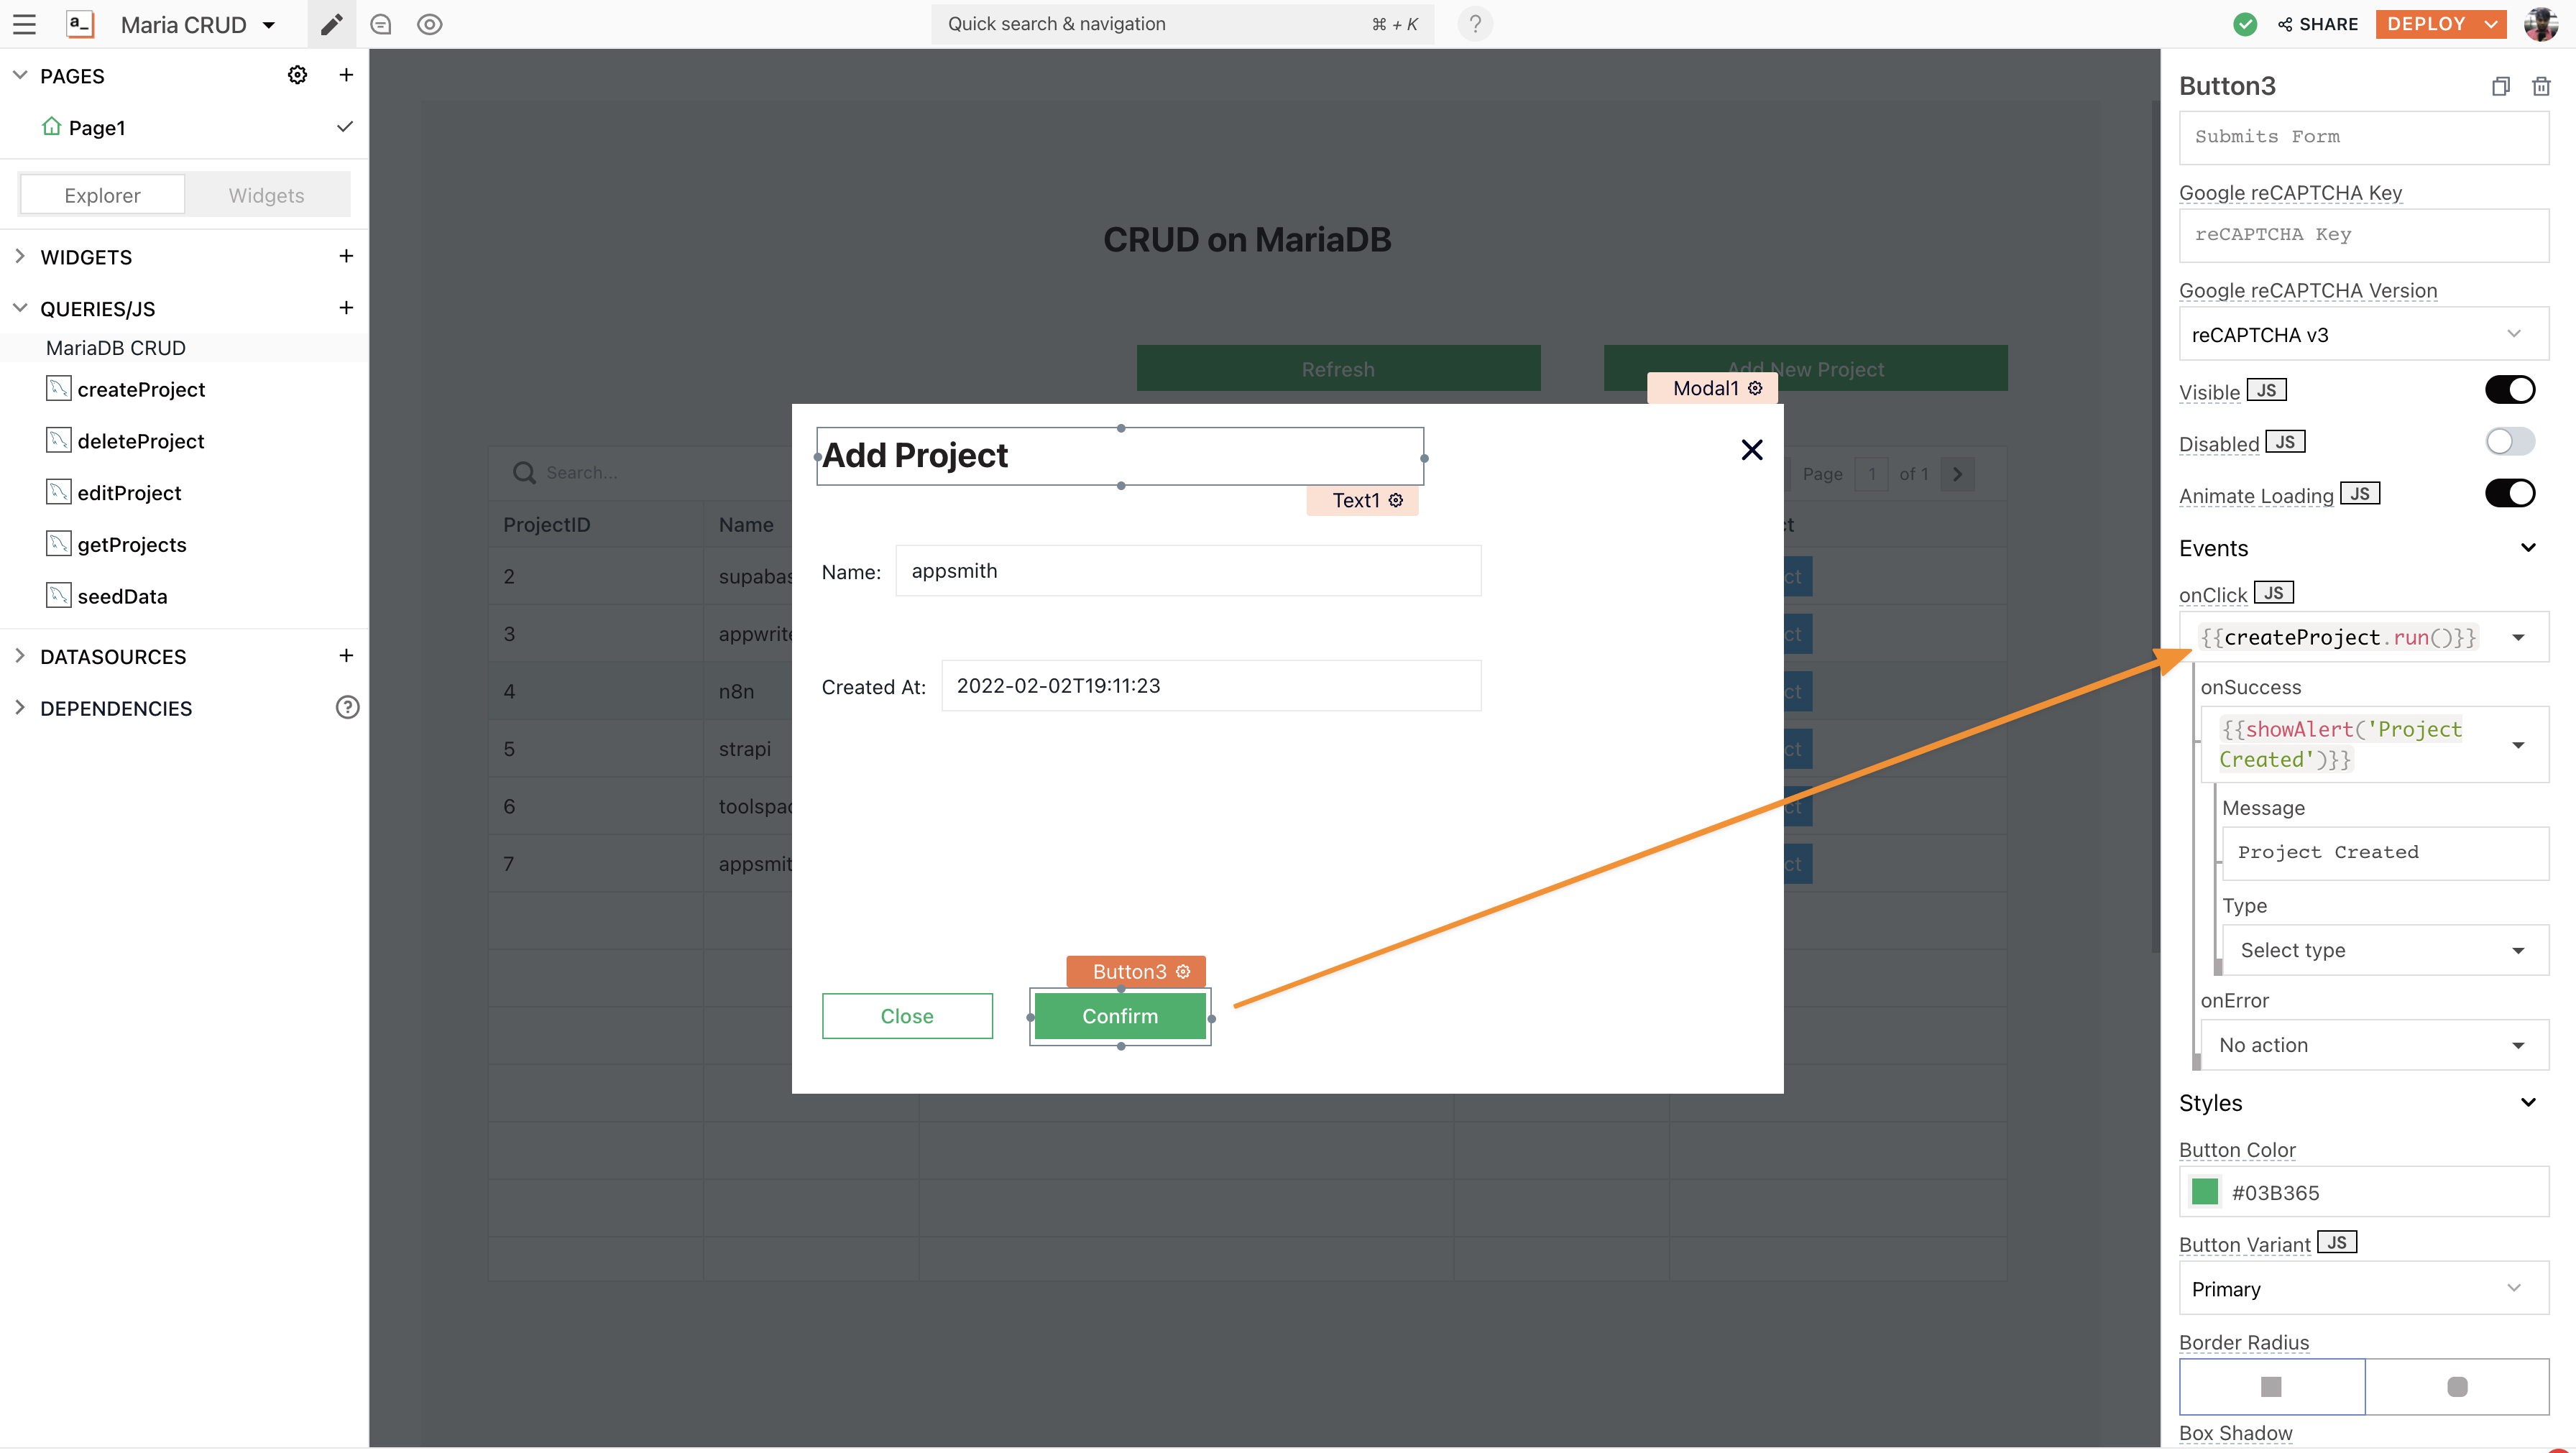
Lastly, we’ll need to configure the submit button; for this, go back to the modal and set the button’s onClick property to execute a query and choose createProject under the events property:
Implementing the Update Operation
The Update operation is quite similar to the create operation. First, let’s build UI by creating a new custom column on the table by clicking on ADD A NEW COLUMN under the columns property.
Now, rename the column to Edit Project, and click on the cog icon next to it, to configure column settings. Under this, we’ll see column-type properties set to a Button type. When clicked, a modal should open up with the necessary fields to update the item.
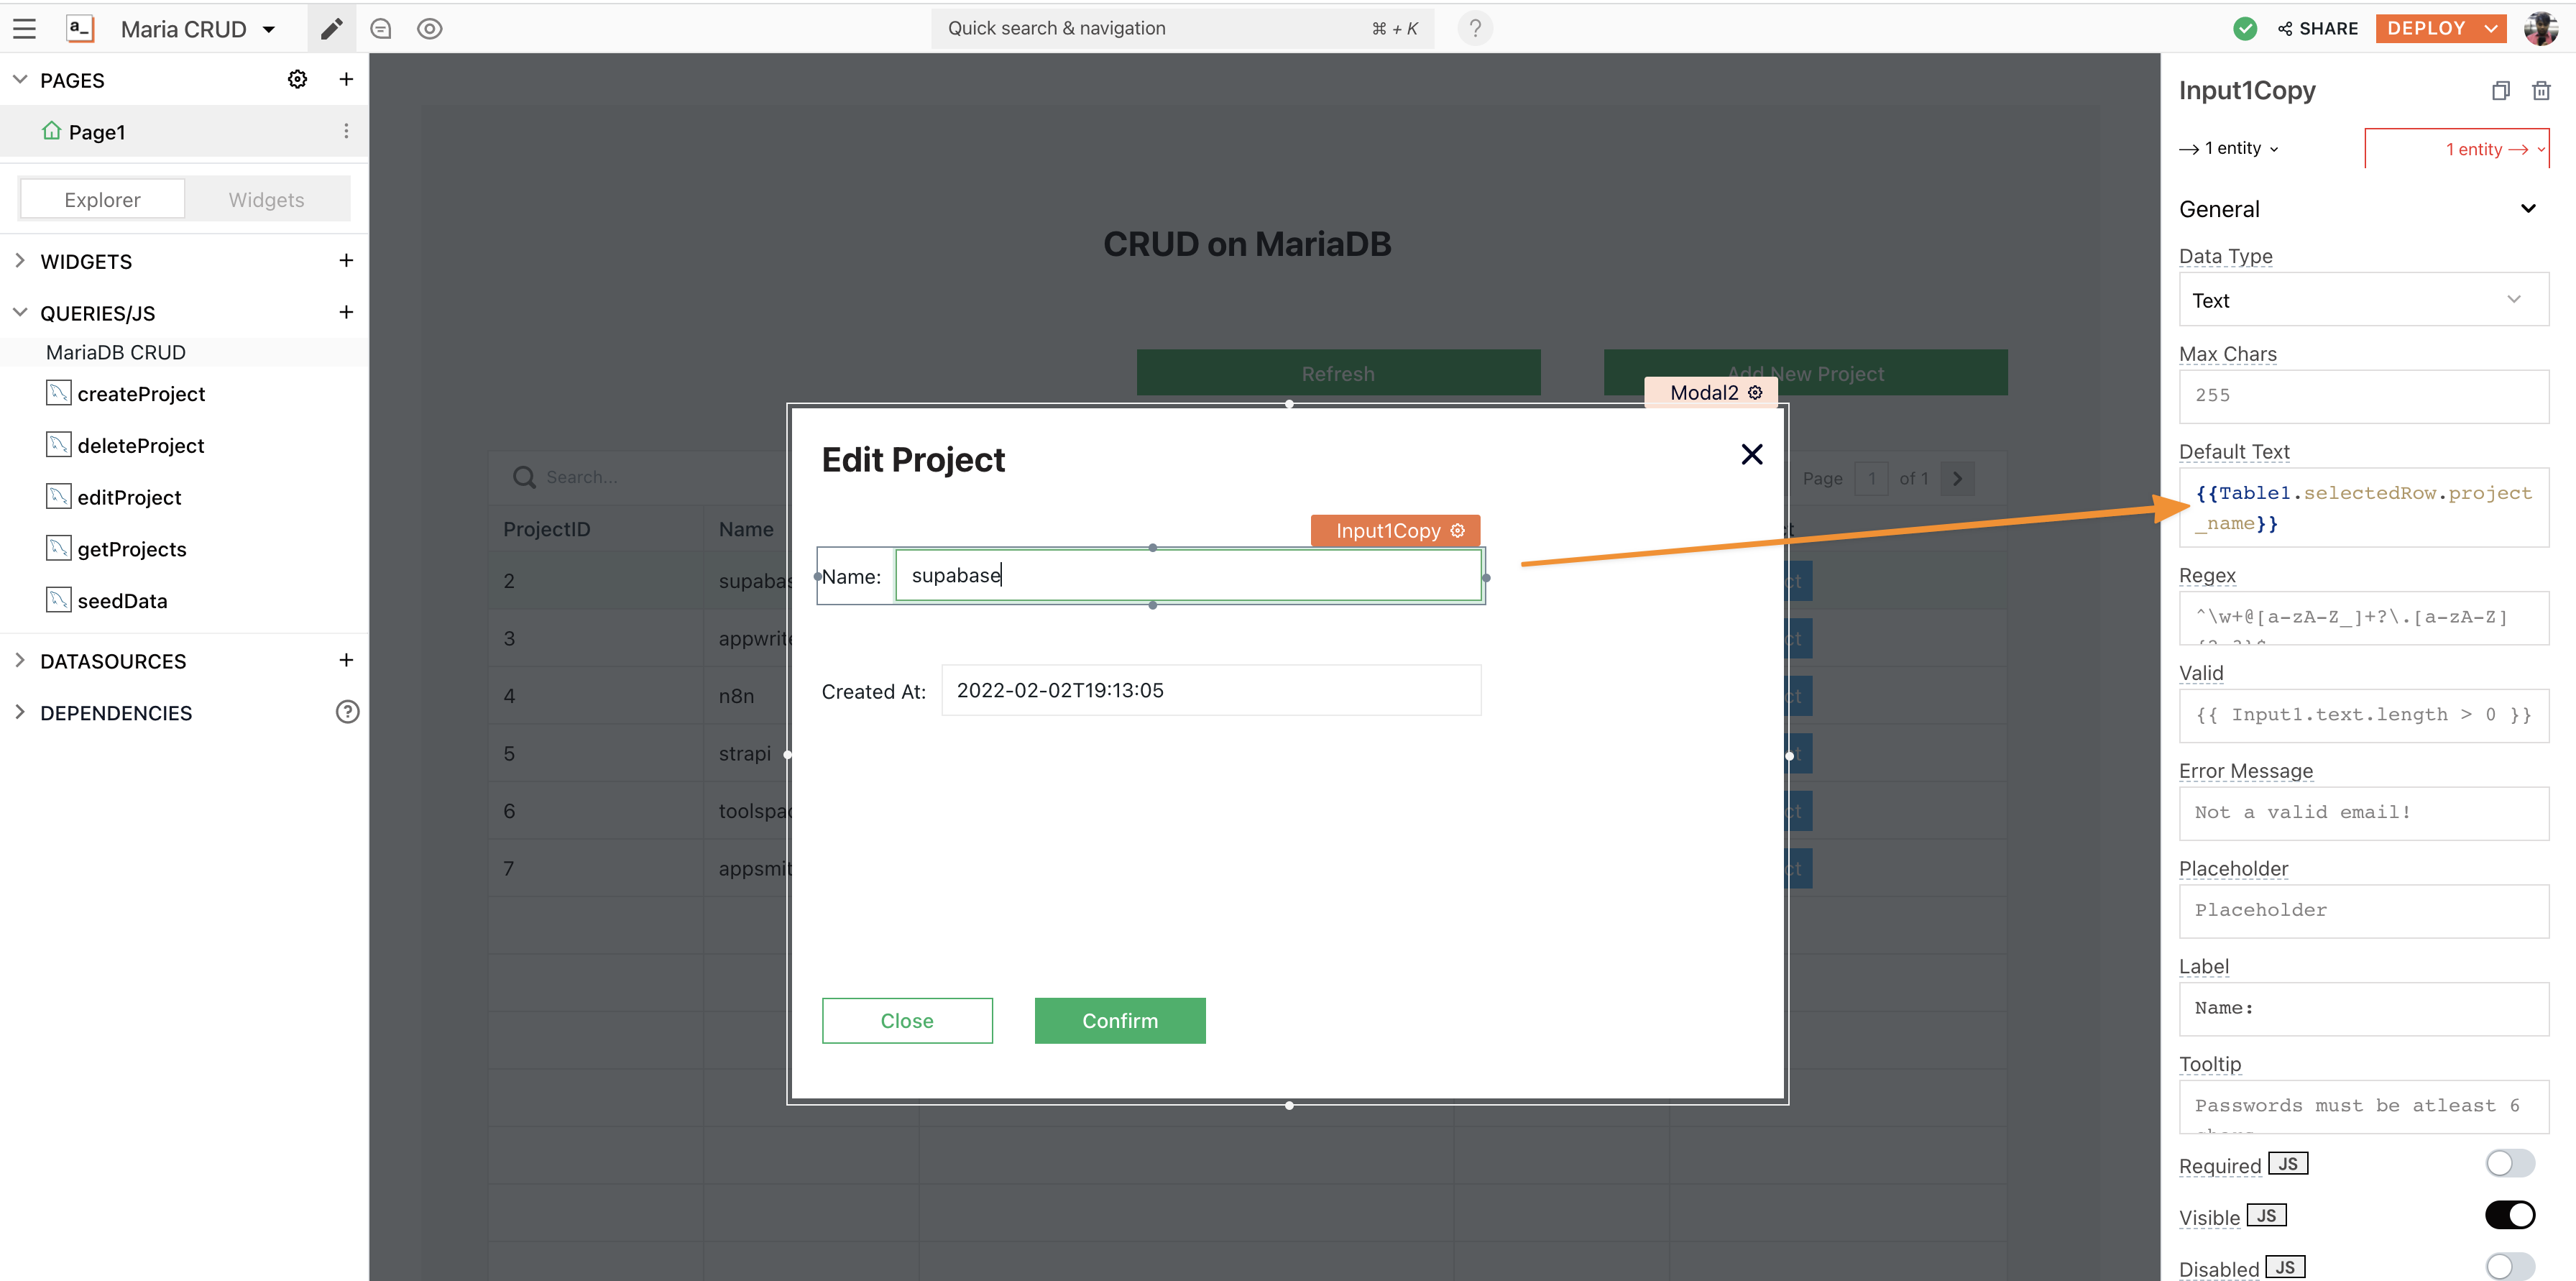
Now, copy-paste Modal1, and set the onClick property of the Edit Project button to open Modal2. Here, in the form, we can also set the default value to show existing information, to display this, use the selectedRow property from the table widget.
Let’s write the Edit query using SQL:
- Click on the
+icon next to the datasources and choose to Create New + from the MariaDB CRUD datasource - Rename the query to editProject
- Copy the following SQL script:
UPDATE projects SET
    project_name = {{Input1Copy.text}}'
    created_at = '{{Input2Copy.text}}'
WHERE  project_id = "{{Table1.selectedRow.project_id}}";
Here, we have an edit query that collects all the data from the form widgets on Modal2. Note that we use the moustache syntax to bind the data from the widgets onto the query body.
We’ll now need to configure the submit button; for this, go back to Modal2 and set the button’s onClick property to execute a query and choose **_editProject_** under the events property:
Implementing the Delete Operation
The delete operation is pretty straightforward with the Table’s selectedRow property; before we dive into it, let’s create a new column on the table and set it to the button. For this:
- Create a new custom column on the table by clicking on
Add a New Columnunder the columns property. - Now, rename this column to ‘Delete Project,’ and click on the cog icon next to it, to configure column settings. Under this, we’ll see column-type properties set to a button type.
Now, let’s write the Delete query using SQL:
- Click on the
+icon next to the datasources and choose the Create New + from the MariaDB CRUD datasource - Rename the query to deleteProject
- Copy the following SQL script:
DELETE FROM projects
  WHERE project_id = {{Table1.selectedRow.project_id}};
Set the Delete Project button’s onClick property to run the deleteProject query.
With these four operations configured, you will be able to read and analyze information from your database, edit the data, add or delete information and update records.
If you’re interested in using a database that is not listed on our website as an integration, please let us know about it by raising a PR on Github and we will do our best to include it at the earliest.
Join our growing community on Discord, and follow us on Youtube and Twitter to stay up to date.


