Waitlists are a powerful way to test your app or feature with a small group of users.
In this guide, we’ll build a waitlist manager that integrates with a SQL DB to provide access control. If you are new to Appsmith, read about the core concepts of Appsmith before following this guide.
Features of the waitlist manager
Our app will access data from a MySQL DB that stores all user data.
- Add or edit users on a waitlist.
- Turn on beta features by version number
- Enable/disable logging.
- Provide a few KPIs, like the number of users by version
The application consists of 3 pages: A dashboard that lists a few useful metrics, an Add users page, and a Manage Users page. The 3 pages will be powered by 7 queries.
This guide will walk you through the structure of the database & the queries used. It won’t dive deeper into how the product will access this data. We assume your product can already talk to your backend, if not you can build APIs using solutions like PostgREST or build your own with NodeJS, Express & Sequelize.
Requirements
Database
This uses a Mysql DB with a single table, Users, as described below.
| Column Name | Type | Description |
| Email ID | text | User’s identifier in our product |
| Name | text | User’s full name |
| Unique_id | int | Unique identifier for each user |
| Enable_Beta | Boolean | A value that is 1 for users with access to beta and 0 for the rest |
| From_Version_code | Int | The version number when the user got access |
| Logging | Boolean | A boolean that enables logging for the user |
| created_at | Date | User Creation Date |
| updated_at | Date | Date User was last updated |
Queries
This application requires seven queries listed below.
List All users Rather than running a select(*) we are listing all columns with human-friendly names. Query:
SELECT id as ID,
  name as name,
  email as Email,
  logging as Logging_Enabled,
  from_version_code as From_Version,
  enable_beta as Enabled_Beta,
  created_at as Created_on,
  updated_at as Last_Updated
FROM waitlist_manager
Add User
This insert query adds users to the waitlist and sets enable_beta & logging to false. The function NOW() set Created_at & Updated_at to the current date. You can modify this behavior if needed.
INSERT INTO waitlist_manager (
    name,
    email,
    logging,
    enable_beta,
    created_at,
    updated_at
  )
VALUES (
    '{{ input_name.text }}',
    '{{ Input_email.text }}',
    false,
    false,
    NOW(),
    NOW()
  );
Update User
This query updates all the properties of the user based on the update form. This dynamic query sets the status of from_version_code to the given value if enabled_beta is set to true, else from_version_code is set to null. The updated_at column is set to NOW() to capture the date of the update.
UPDATE waitlist_manager
SET enable_beta = { { Dropdown_enable_beta.selectedOptionValue } },
  from_version_code = { { Dropdown_enable_beta.selectedOptionValue == = "true" ? Input_version_code.text :null } },
  email = '{{Input_email.text}}',
  logging = { { Dropdown_logging.selectedOptionValue } },
  updated_at = NOW()
WHERE id = '{{ text_user_id.text }}';
List Users By Version
This query provides the number of users per beta version
SELECT from_version_code as Version,
  count(id)
from waitlist_manager
where from_version_code is not null
group by 1
Dashboard Queries
This set of 3 queries will help us build a set of KPIs to monitor:
Total Users Query
SELECT count(id) as count FROM waitlist_manager
Beta Enabled Users
SELECT count(id) as count FROM waitlist_manager where enable_beta = true
Logging Enabled Users
SELECT count(id) as count FROM waitlist_manager where logging = true
Interface
Add Users Page
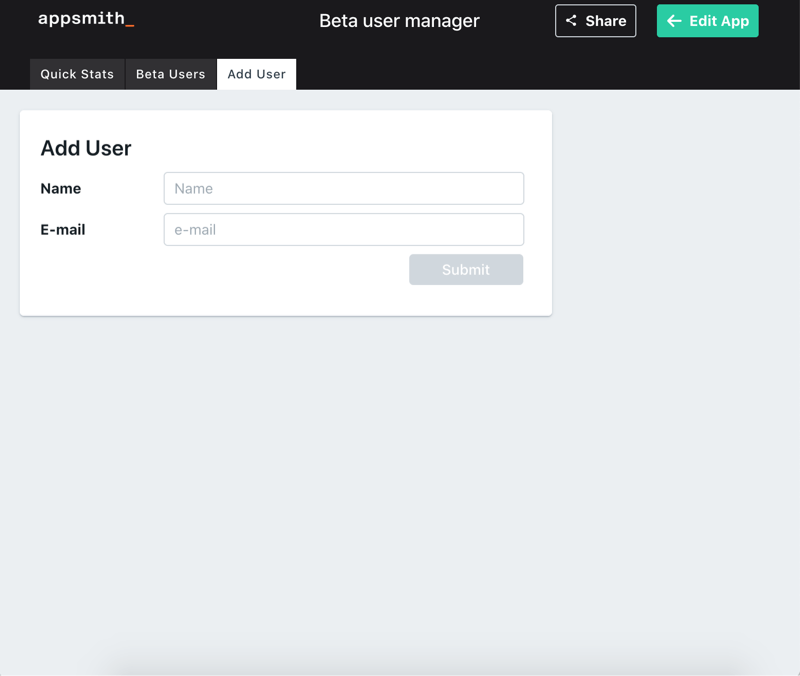
This page is a form with two input fields, for the user’s name and email address. On submit, we add the user to our database using the Add_User query.
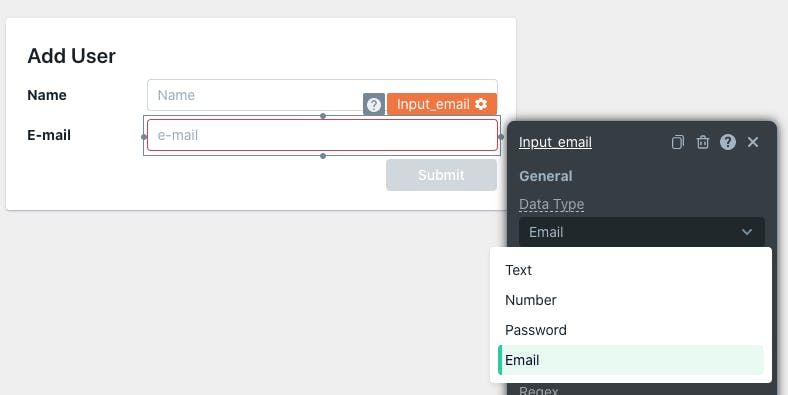
To make sure the user is entering a valid email, we set the field type to email.
Manage Users Page
This page is the workhorse of this application. The table widget lists all the users and the form updates the user details & permissions for the selected user.
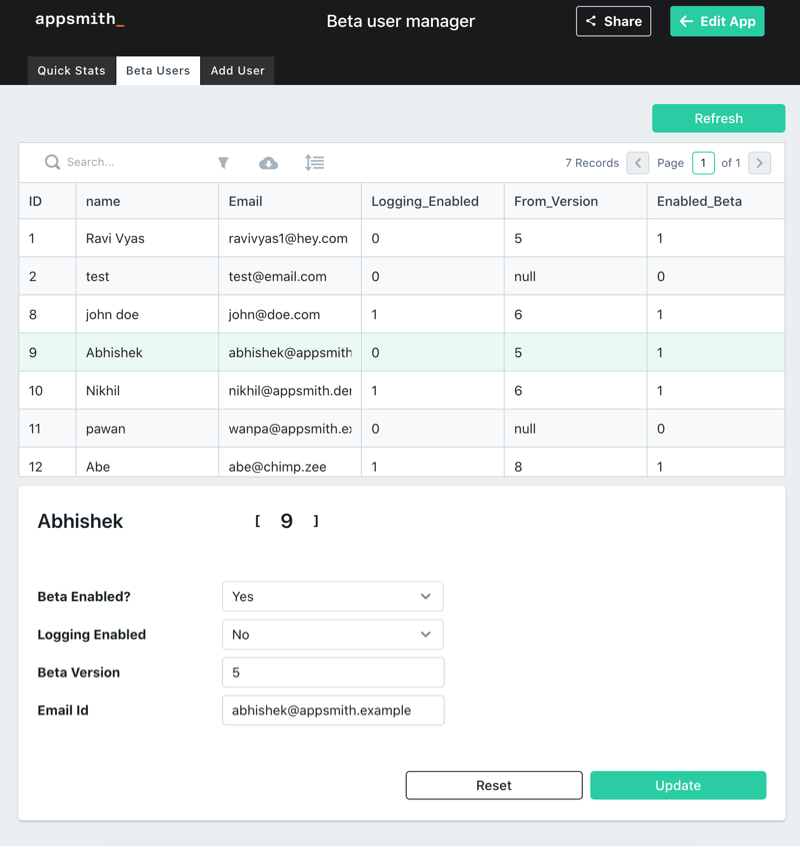
The page is dynamically modified based on certain states.
To provide a better user experience, The form is hidden when the table does not have a row selected. To hide the form, set the Visible JS property to
{{table_users.selectedRow.ID > 0}}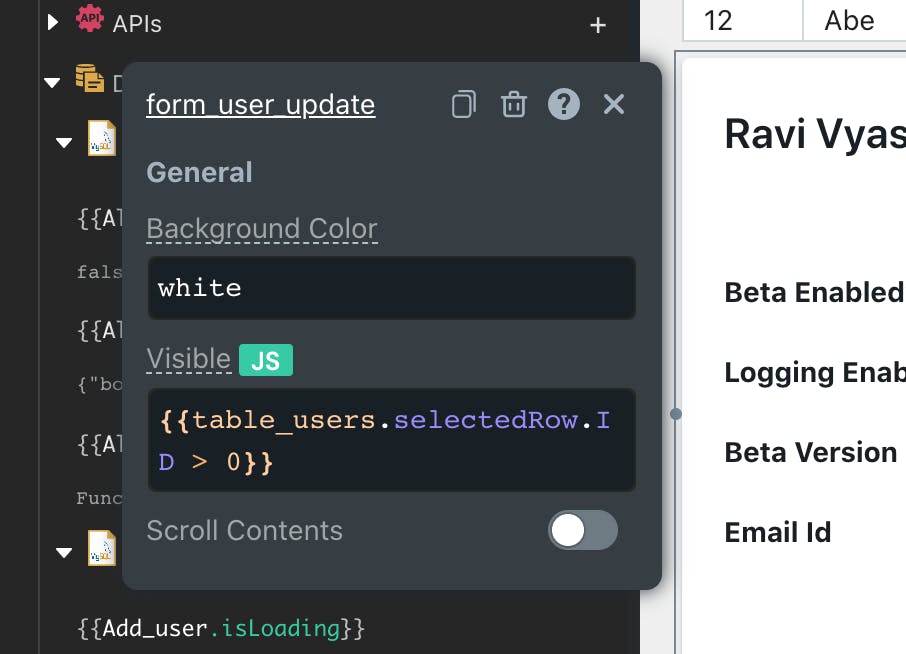
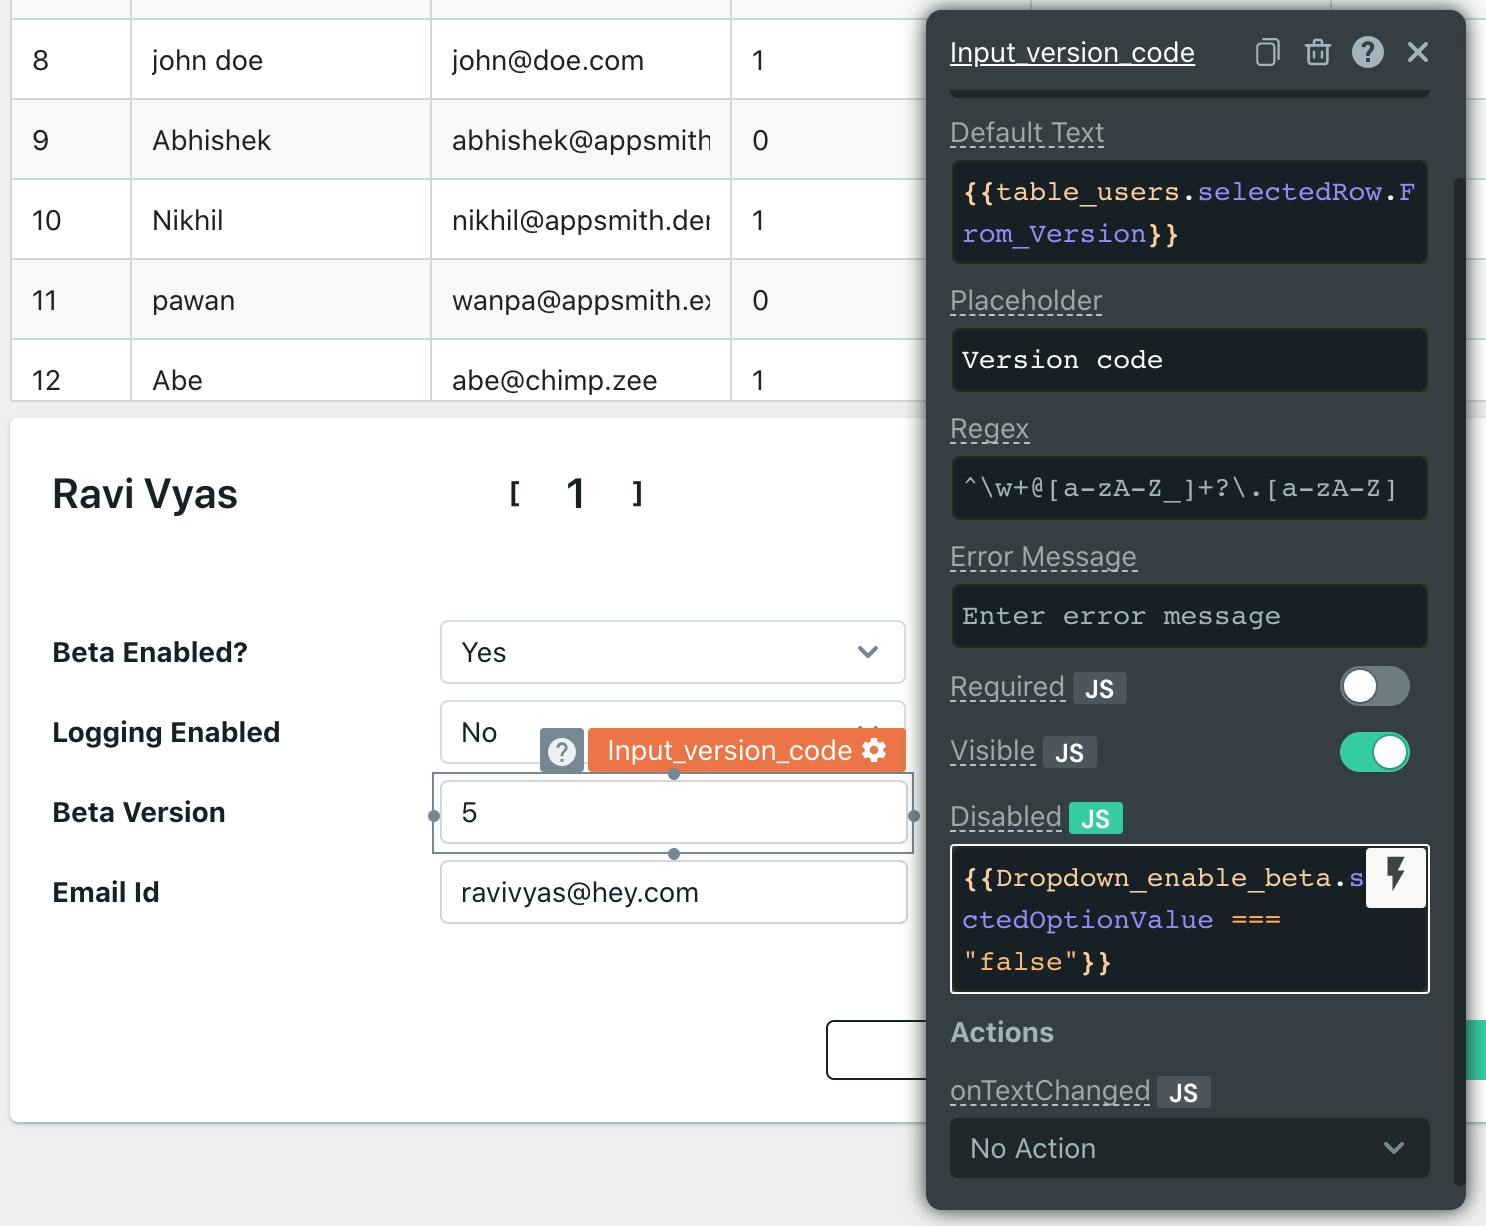
The “Beta Enabled” dropdown disables the “Beta Version” field when set to No.
To achieve this, set the Disabled JS property to
{{Dropdown_enable_beta.selectedOptionValue === "false"}}
as shown below.
Finally, we connect the update button to the update_user query.
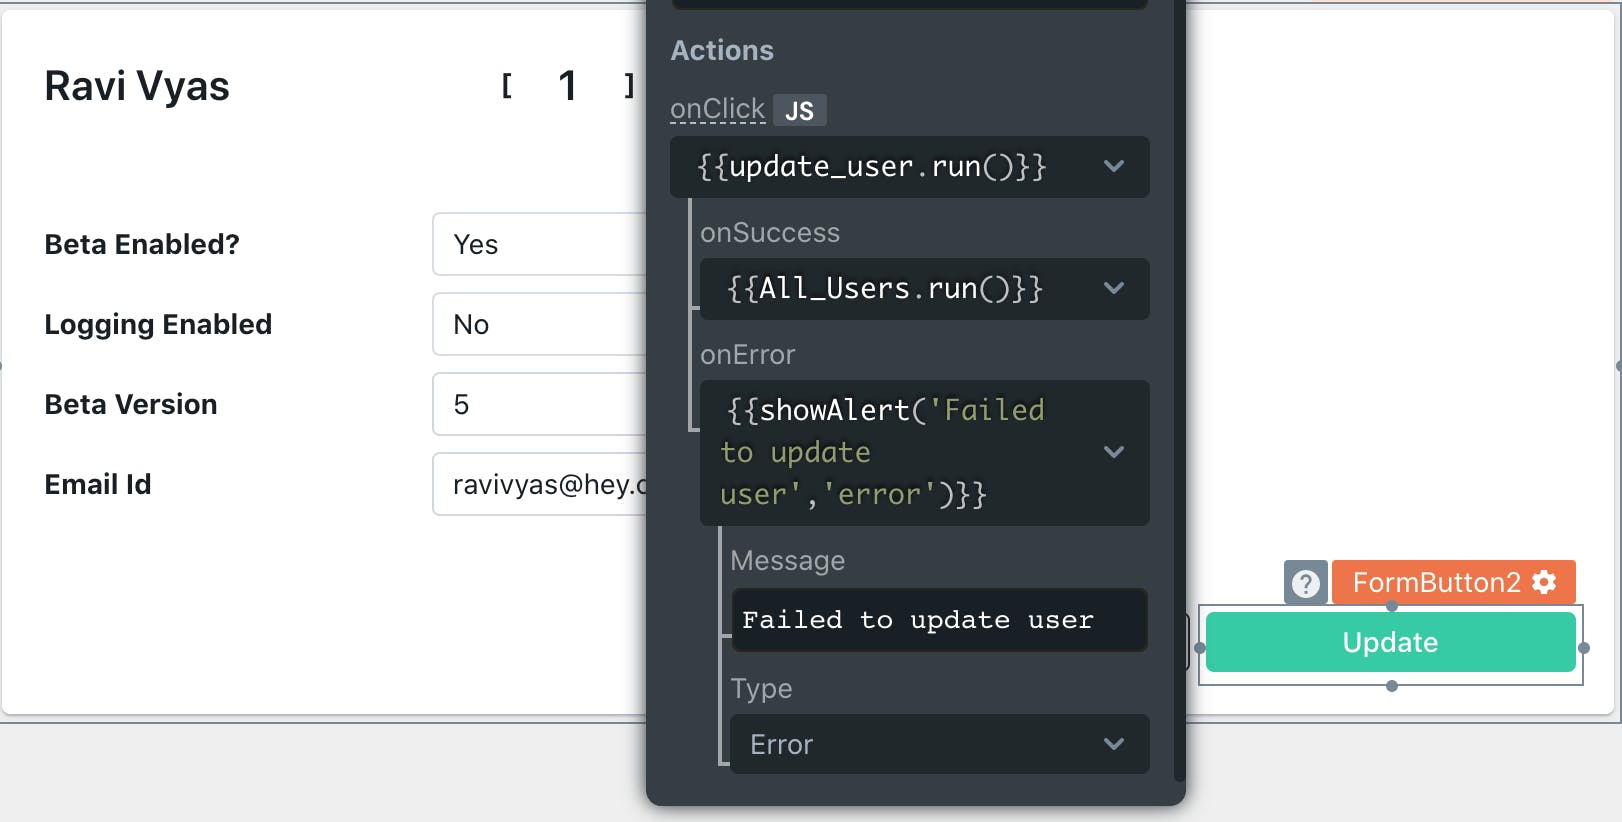
Set the onSuccess property of the form to run the All_users query to refresh the table on any modifications.
Quick Dashboard Page
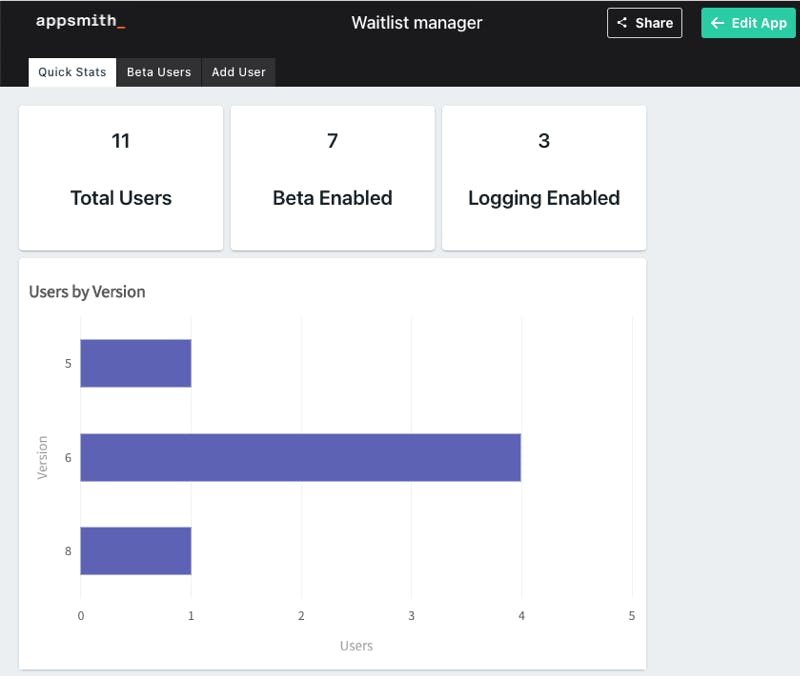
This page provides the following metrics.
- Total users
- Users who have beta enabled
- Users who have logging enabled
- Count of users by beta version.
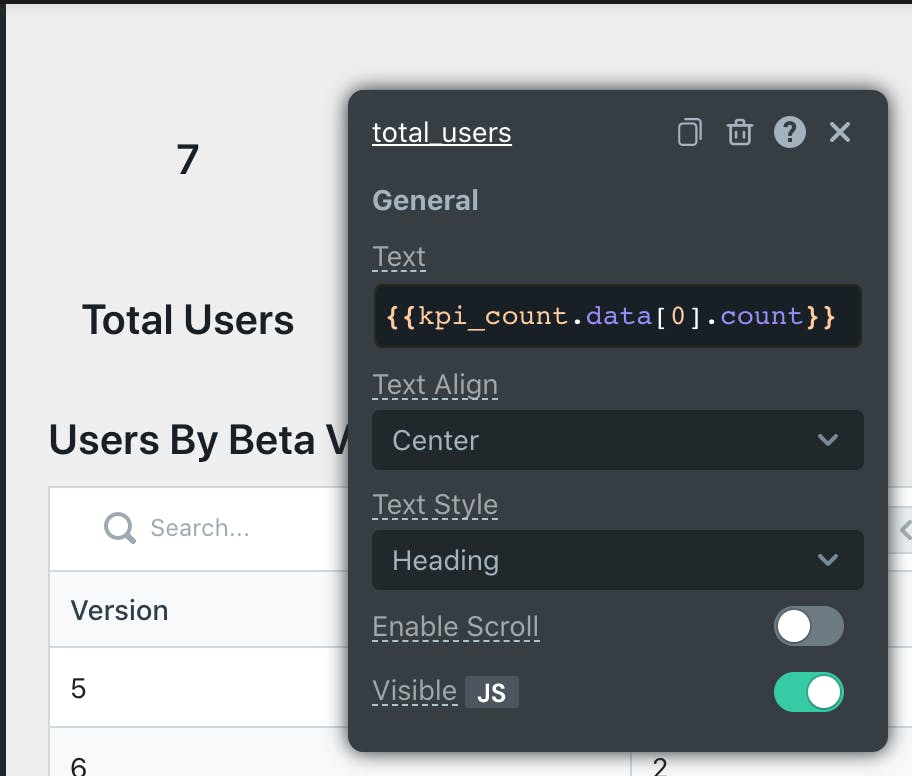
For the three metrics, connect the three labels to the three aggregation queries listed above. Unlike a table, setting a label to the result of the query needs to point to a single value rather than an Array. Here it is set to {{kpi_count.data[0].count}} as the queries will always return a single row and a single column named count.
Finally, add a table and connect it to the List Users By Version query described above.
This completes the application. You can deploy the application by clicking on the deploy link on the top right. Once deployed, it will be visible to everyone in your organization.
For more details on sharing, you can refer to the Access control documentation.
You can play around with it using the link provided below. A few possible extensions are also listed below for you to try out.
Demo Application
You can try the application out here.
Possible Enhancements
As an exercise, you can clone the application and try to extend it. Here are some possible directions you can take.
Add more Features to the current application.
Control more features by adding more columns. For example add an Enable_Premium column, to give the user access to premium features.
Separate Features table
A possible larger refactor of this application is moving the features out of the Users table. The sample table diagram below shows a possible structure.
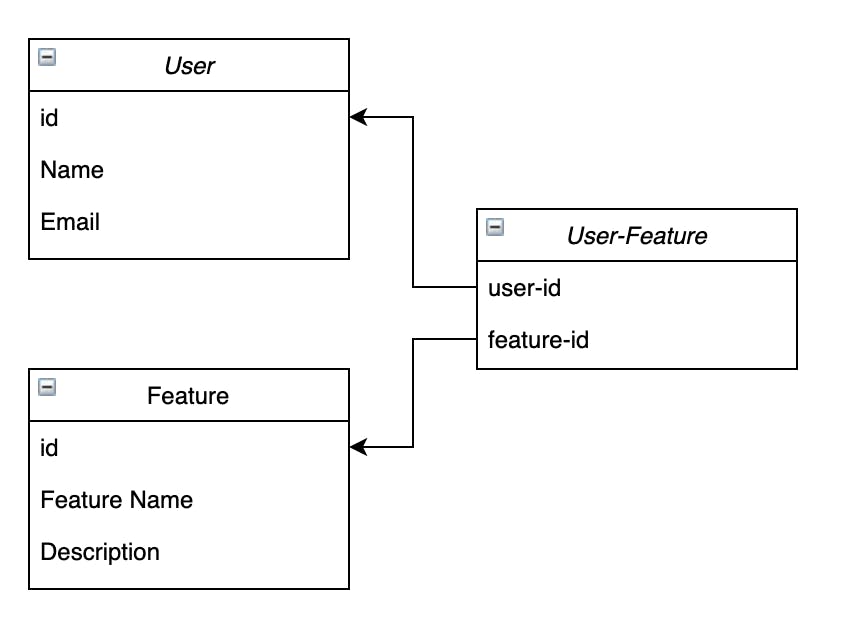 This enables the addition of another form to add new features if needed.
Add More Charts
Since we are capturing the creation date of users, you can add a chart that shows the number of new users added each day.
Create a Public User Submission page.
Making the Add users form public allows users to direct join the waitlist. The best way to do this would be to create a separate application with just the Add users form.
