


Table of contents
Stripe is one of the most prominent developer tools for integrating payments into your website or application. The service allows you to start accepting payments from users in 14 countries and 24 currencies, and all this is relatively easy to set up! However, not every business needs a full-fledged website for collecting payments from their customers. In this short tutorial, we'll be building an app on Appsmith that will generate Stripe payment links for you directly from your dashboard. You can create as many payment links as you like and make them available via email. Even if someone doesn't have an Internet connection or uses a computer without a browser installed, they can still take advantage of your services!
Appsmith is an open-source application builder that integrates with custom APIs and databases. It's perfect for building your team's internal tools, admin panels, and dashboards.
Let's dive in!
Setting up Stripe Account
The first step in building a payment link generator is to set up a Stripe account. You can either create a new account or log in if you're an existing user.
Please note that this application is a built-in test mode, which requires additional information about the business to generate payment links. To make it into a fully-functional application, you will need to add additional details regarding your bank and tax information.
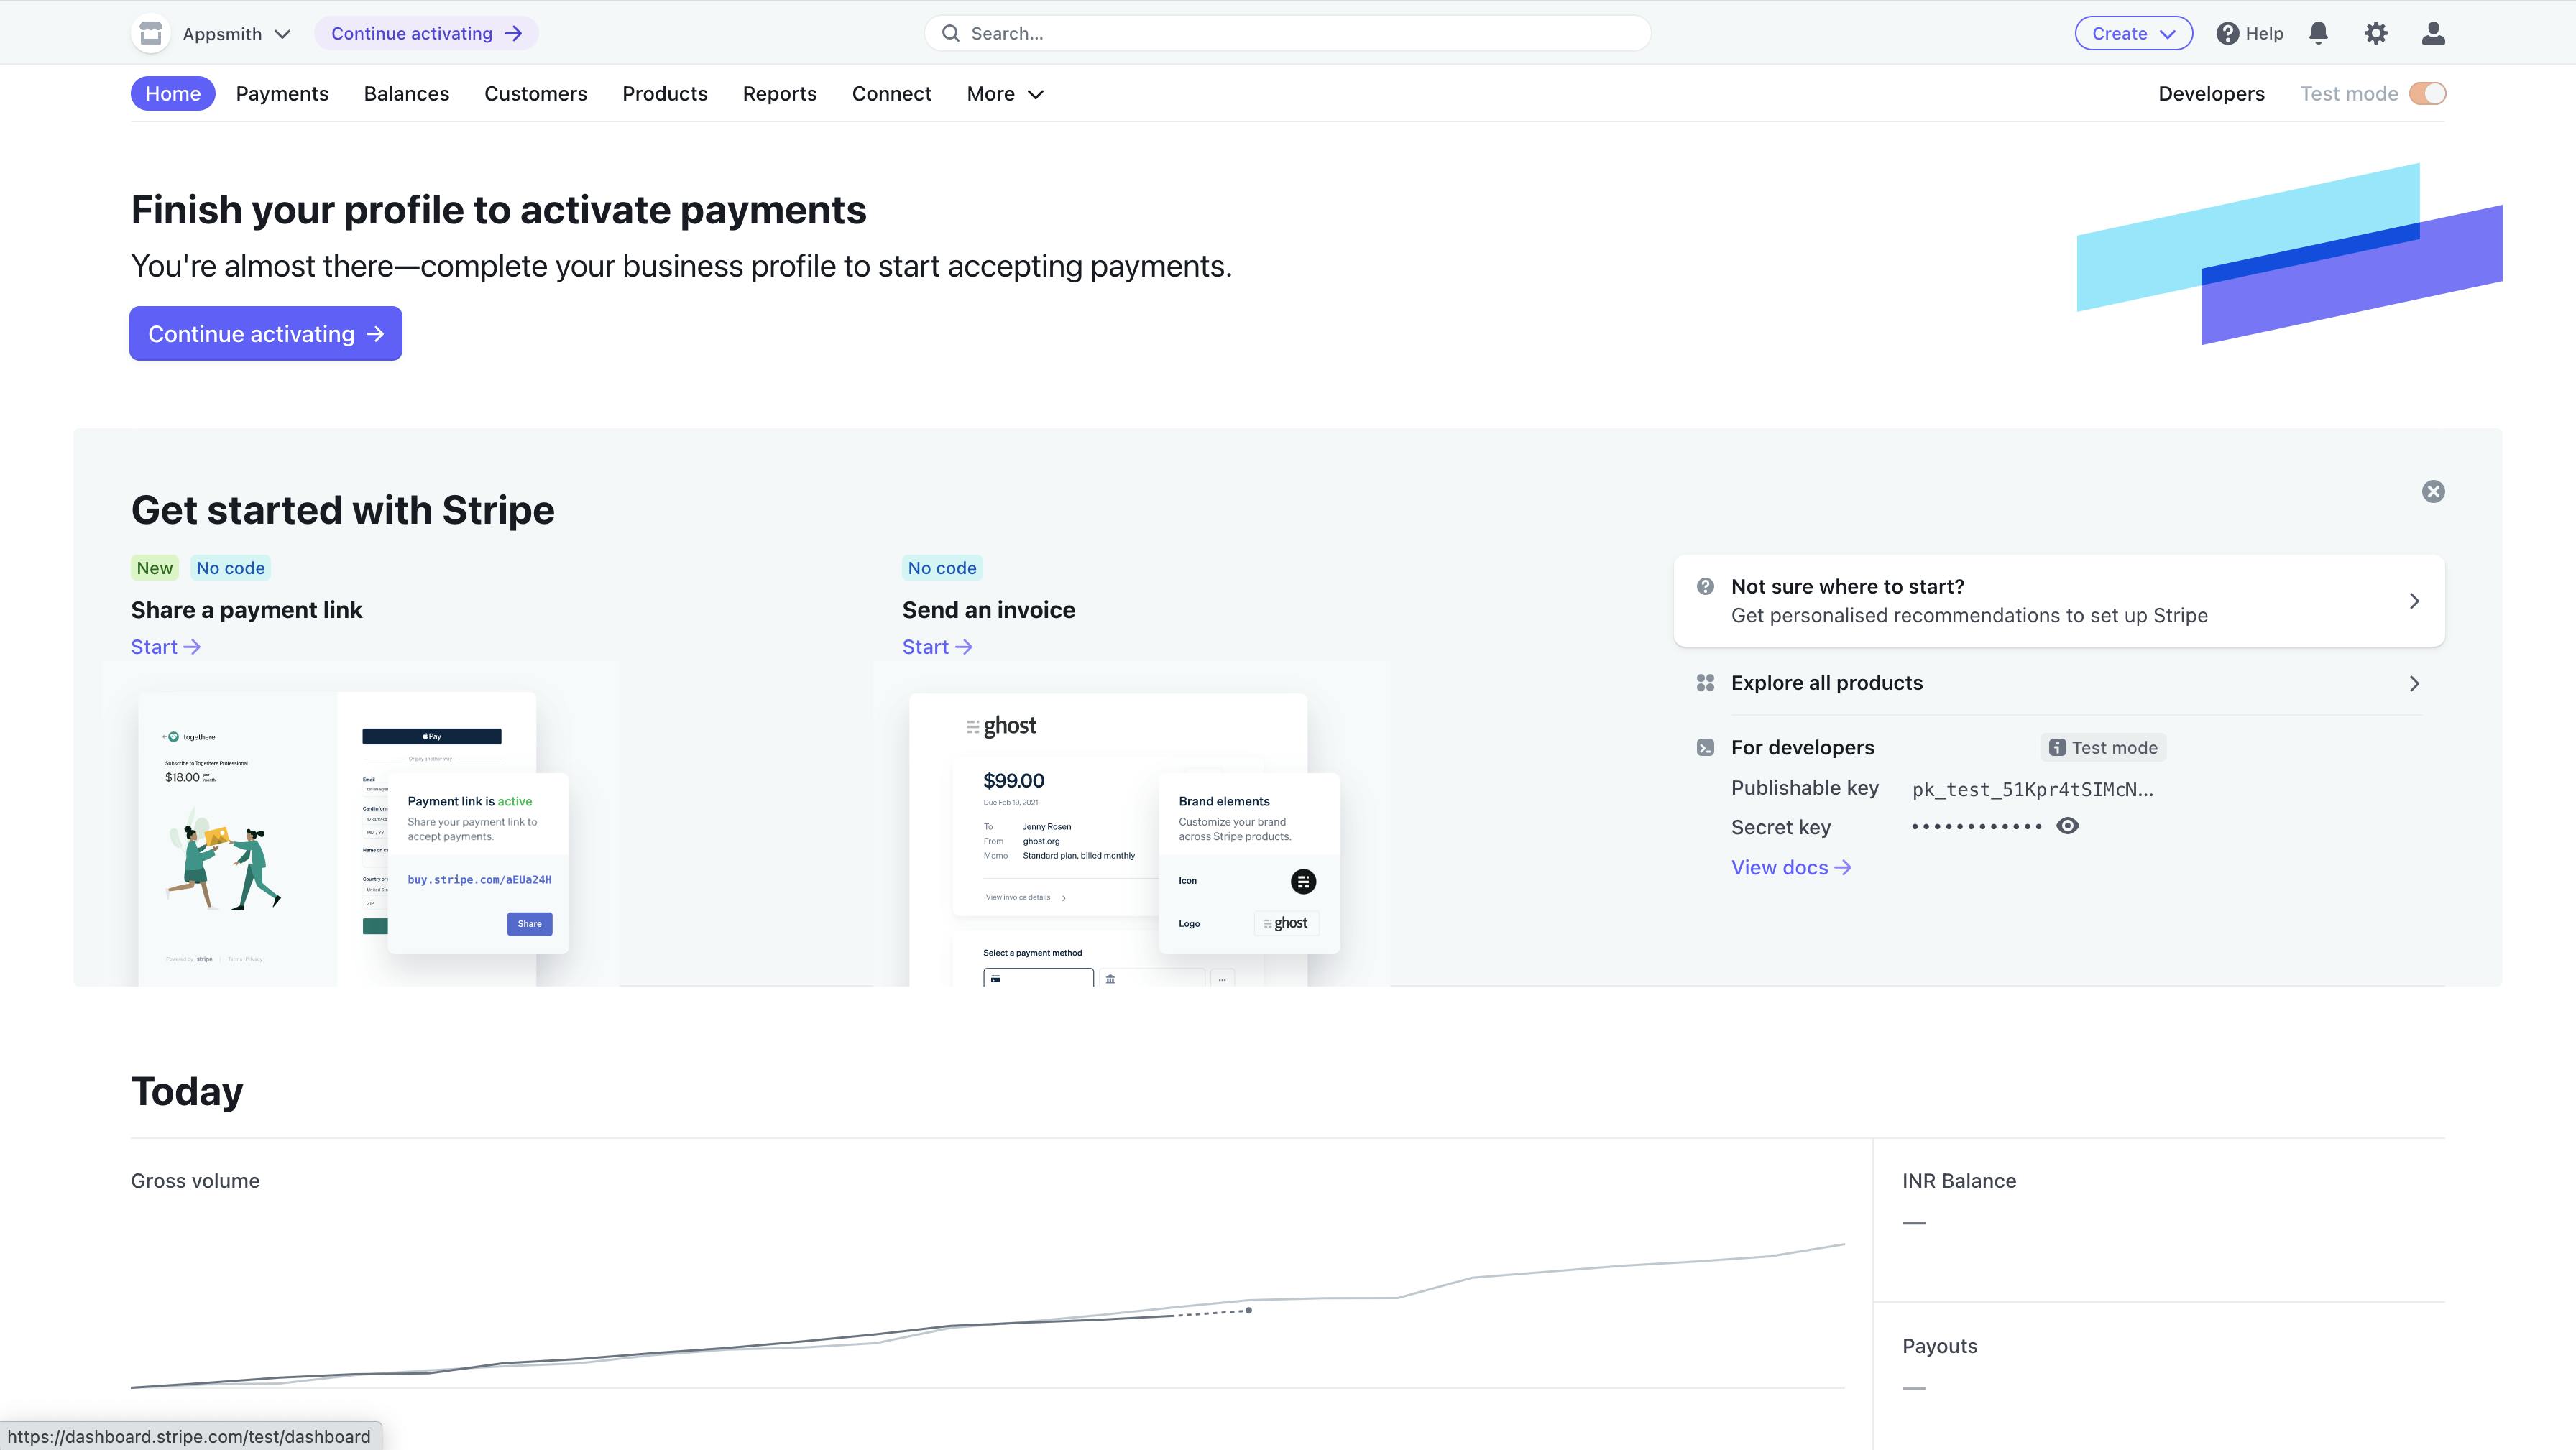
Your dashboard will look like this:
Even in test mode, you will be able to access all the features of Stripe APIs, but this will not be able to make complete transactions from our generated links.
The next step is to make our API requests from Appsmith; we’ll need to copy the secret key that’s available on the main page of the dashboard.
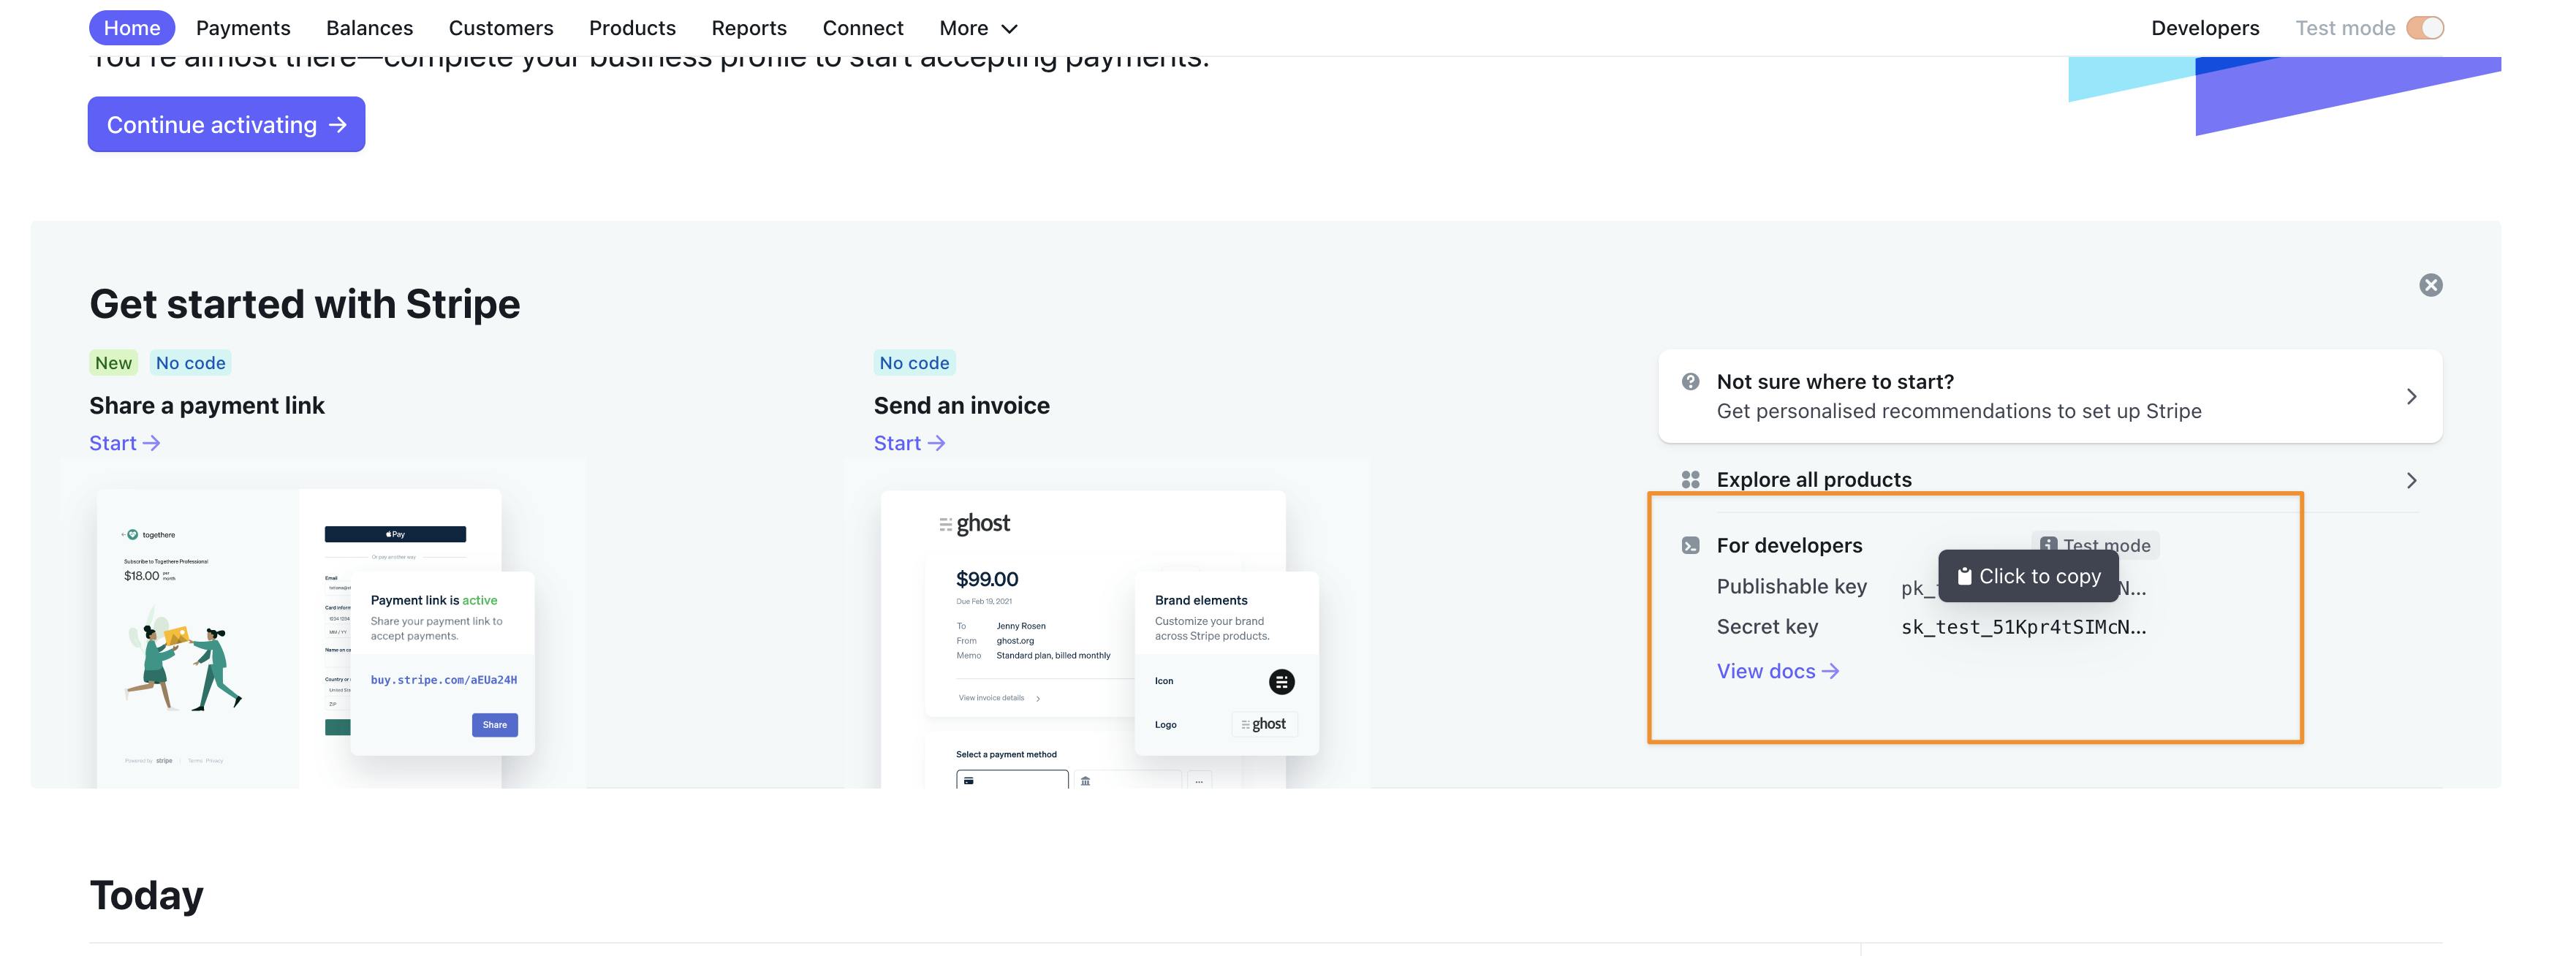
This secret key lets us access our Stripe account via Bearer Token-based authentication.
In the next section, we'll build s simple UI that lets us generate payment links based on the given customer information and payment price.
Building UI on Appsmith
The first step is to create an account on Appsmith. In this guide, I'll be using the cloud version of Appsmith, but you can always choose to use Appsmith locally or self-host it on your server.
- Navigate to appsmith.com and sign-up for a new account if you're a new user or login into the existing one.
- Create a new application under your preferred organization. You'll see an editor with everything you need to build your internal application.
- As soon as you create a new app, you'll see a canvas with all the details around widgets and data sources on the left sidebar.
Now, click on the widgets tab and drag and drop a container widget on the canvas; this will allow us to group all the widgets in a container. This can be completely customizable; you could add borders, background colours, shadows, and more by opening the property pane.
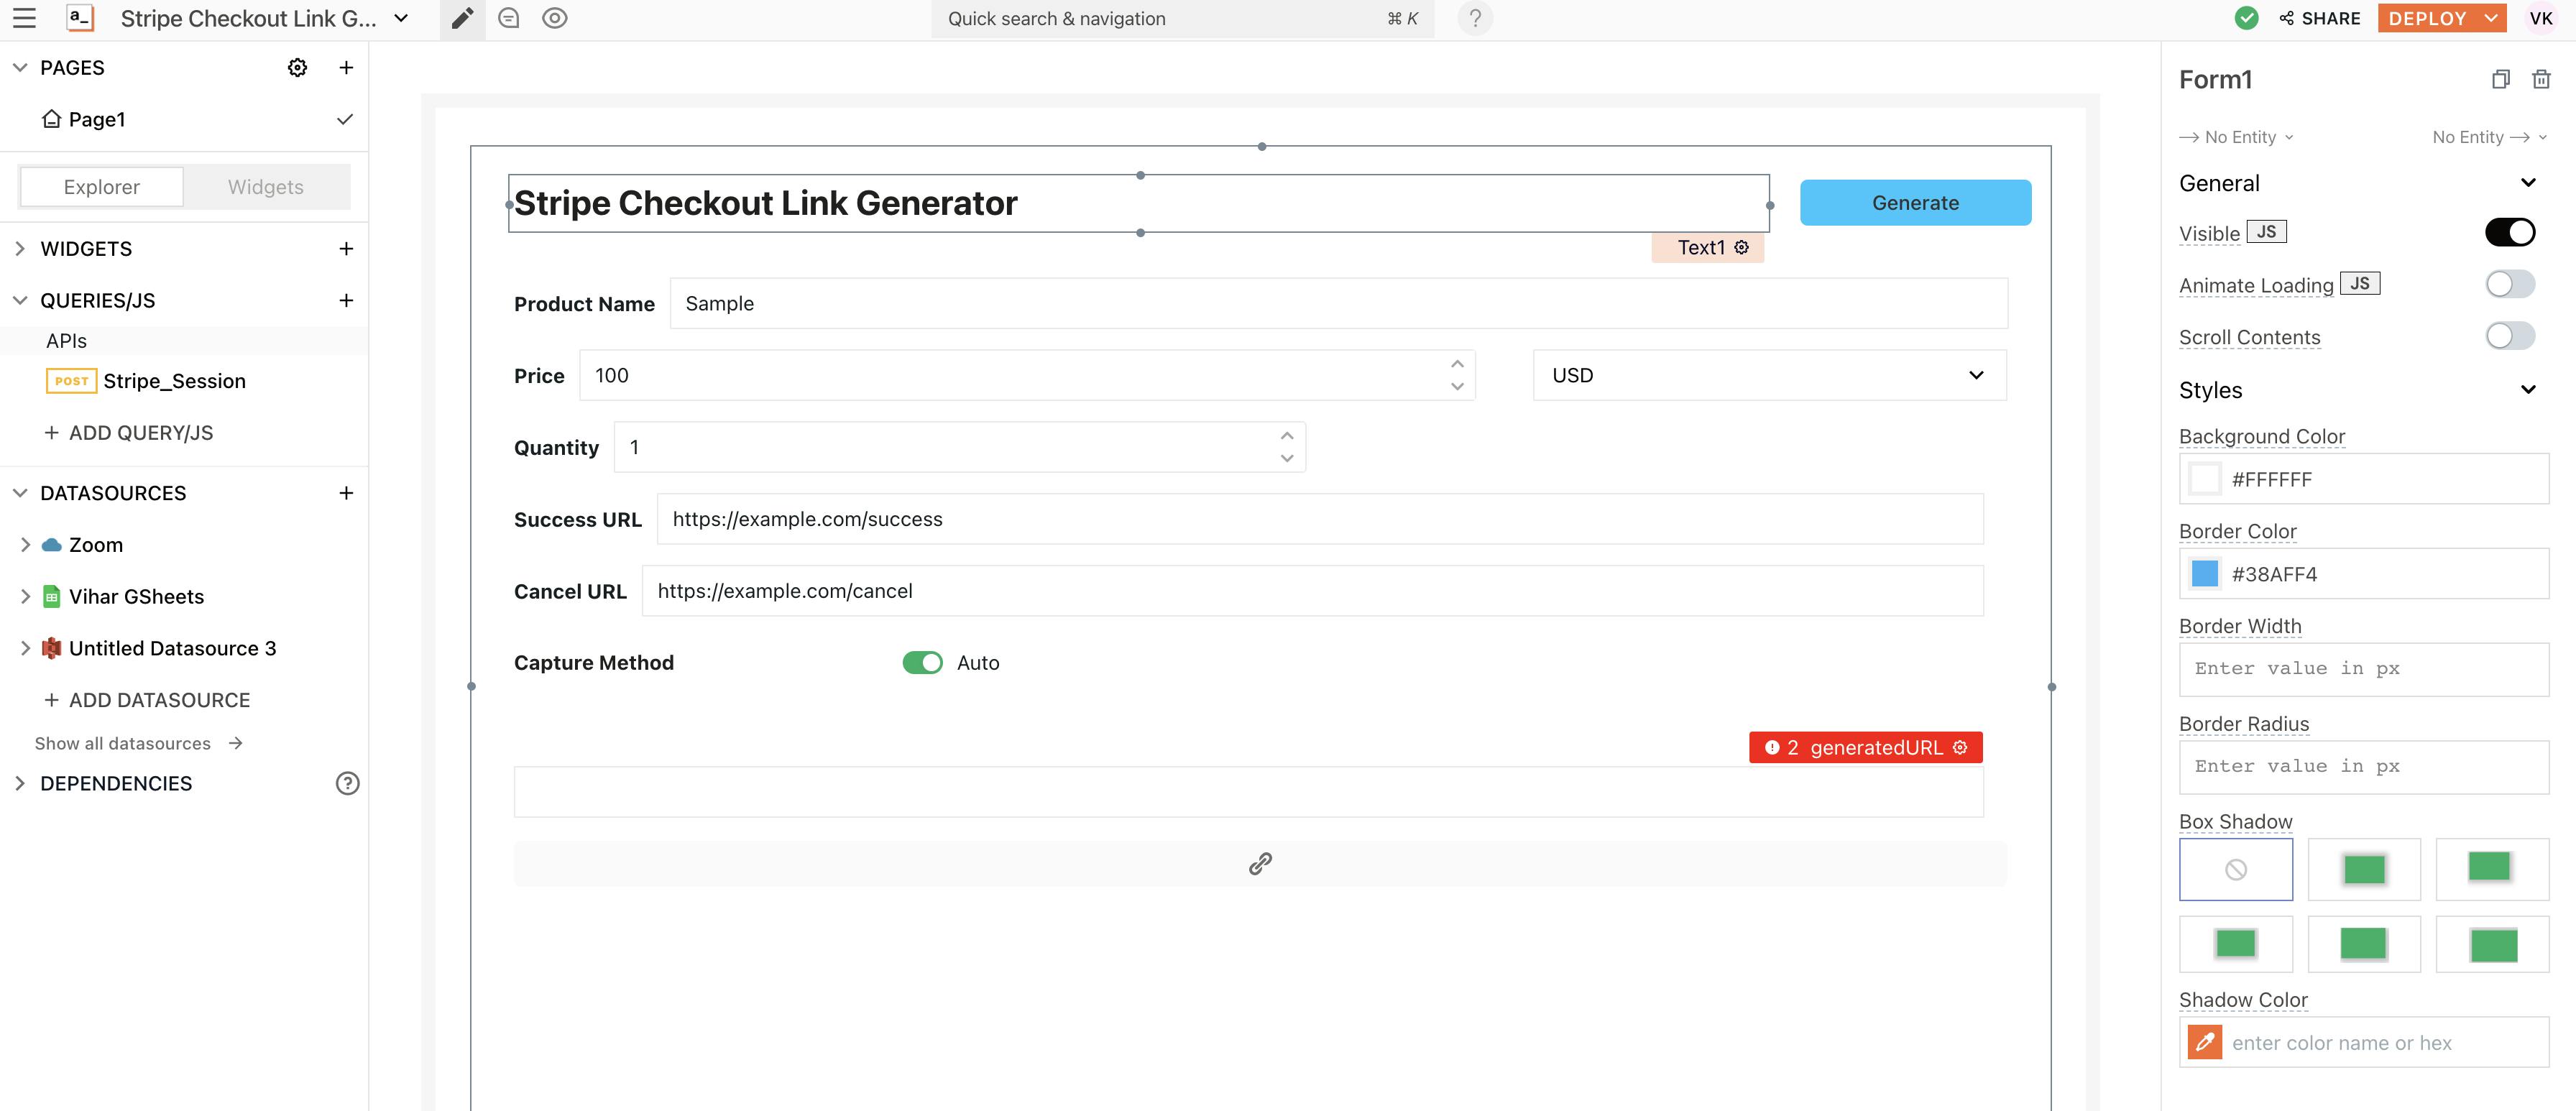
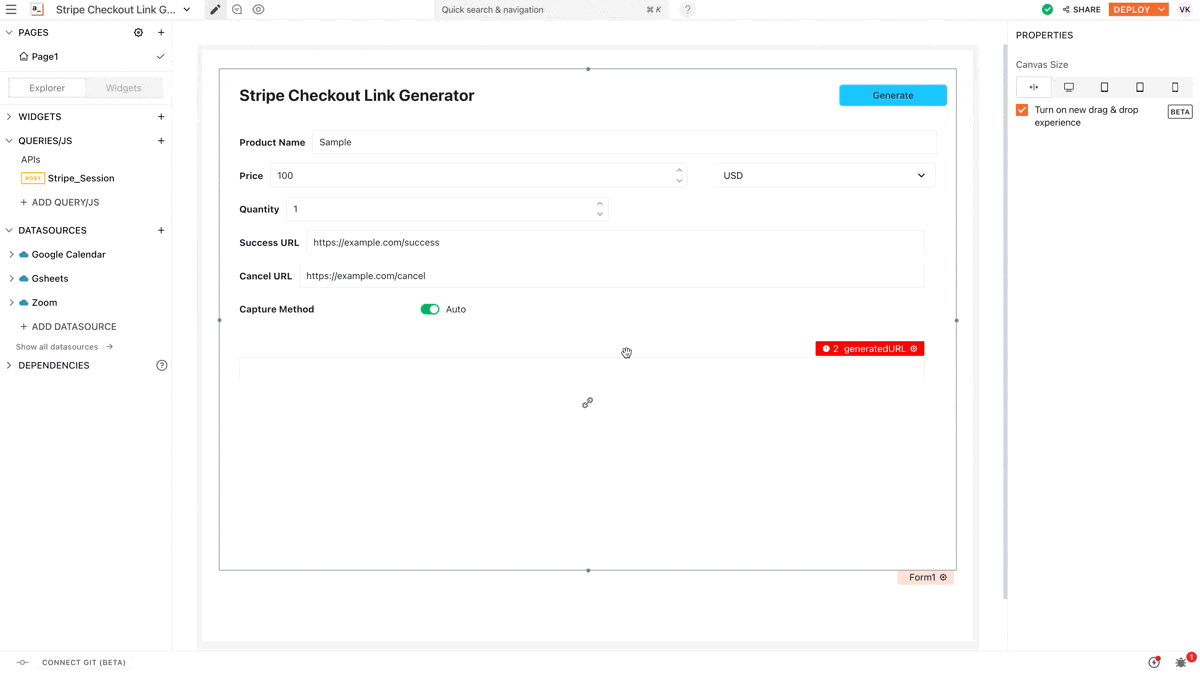
Inside the container widget, drag and drop a new form widget and add a few input widgets onto the container that lets us collect information for payment links:
- Product Name
- Price
- Quantity
- Success URL
- Capture Method
We could also add some additional configuration based on the information that needs to be collected, referring to the Stripe Documentation.
Following is a screenshot of how the UI looks on Appsmith:
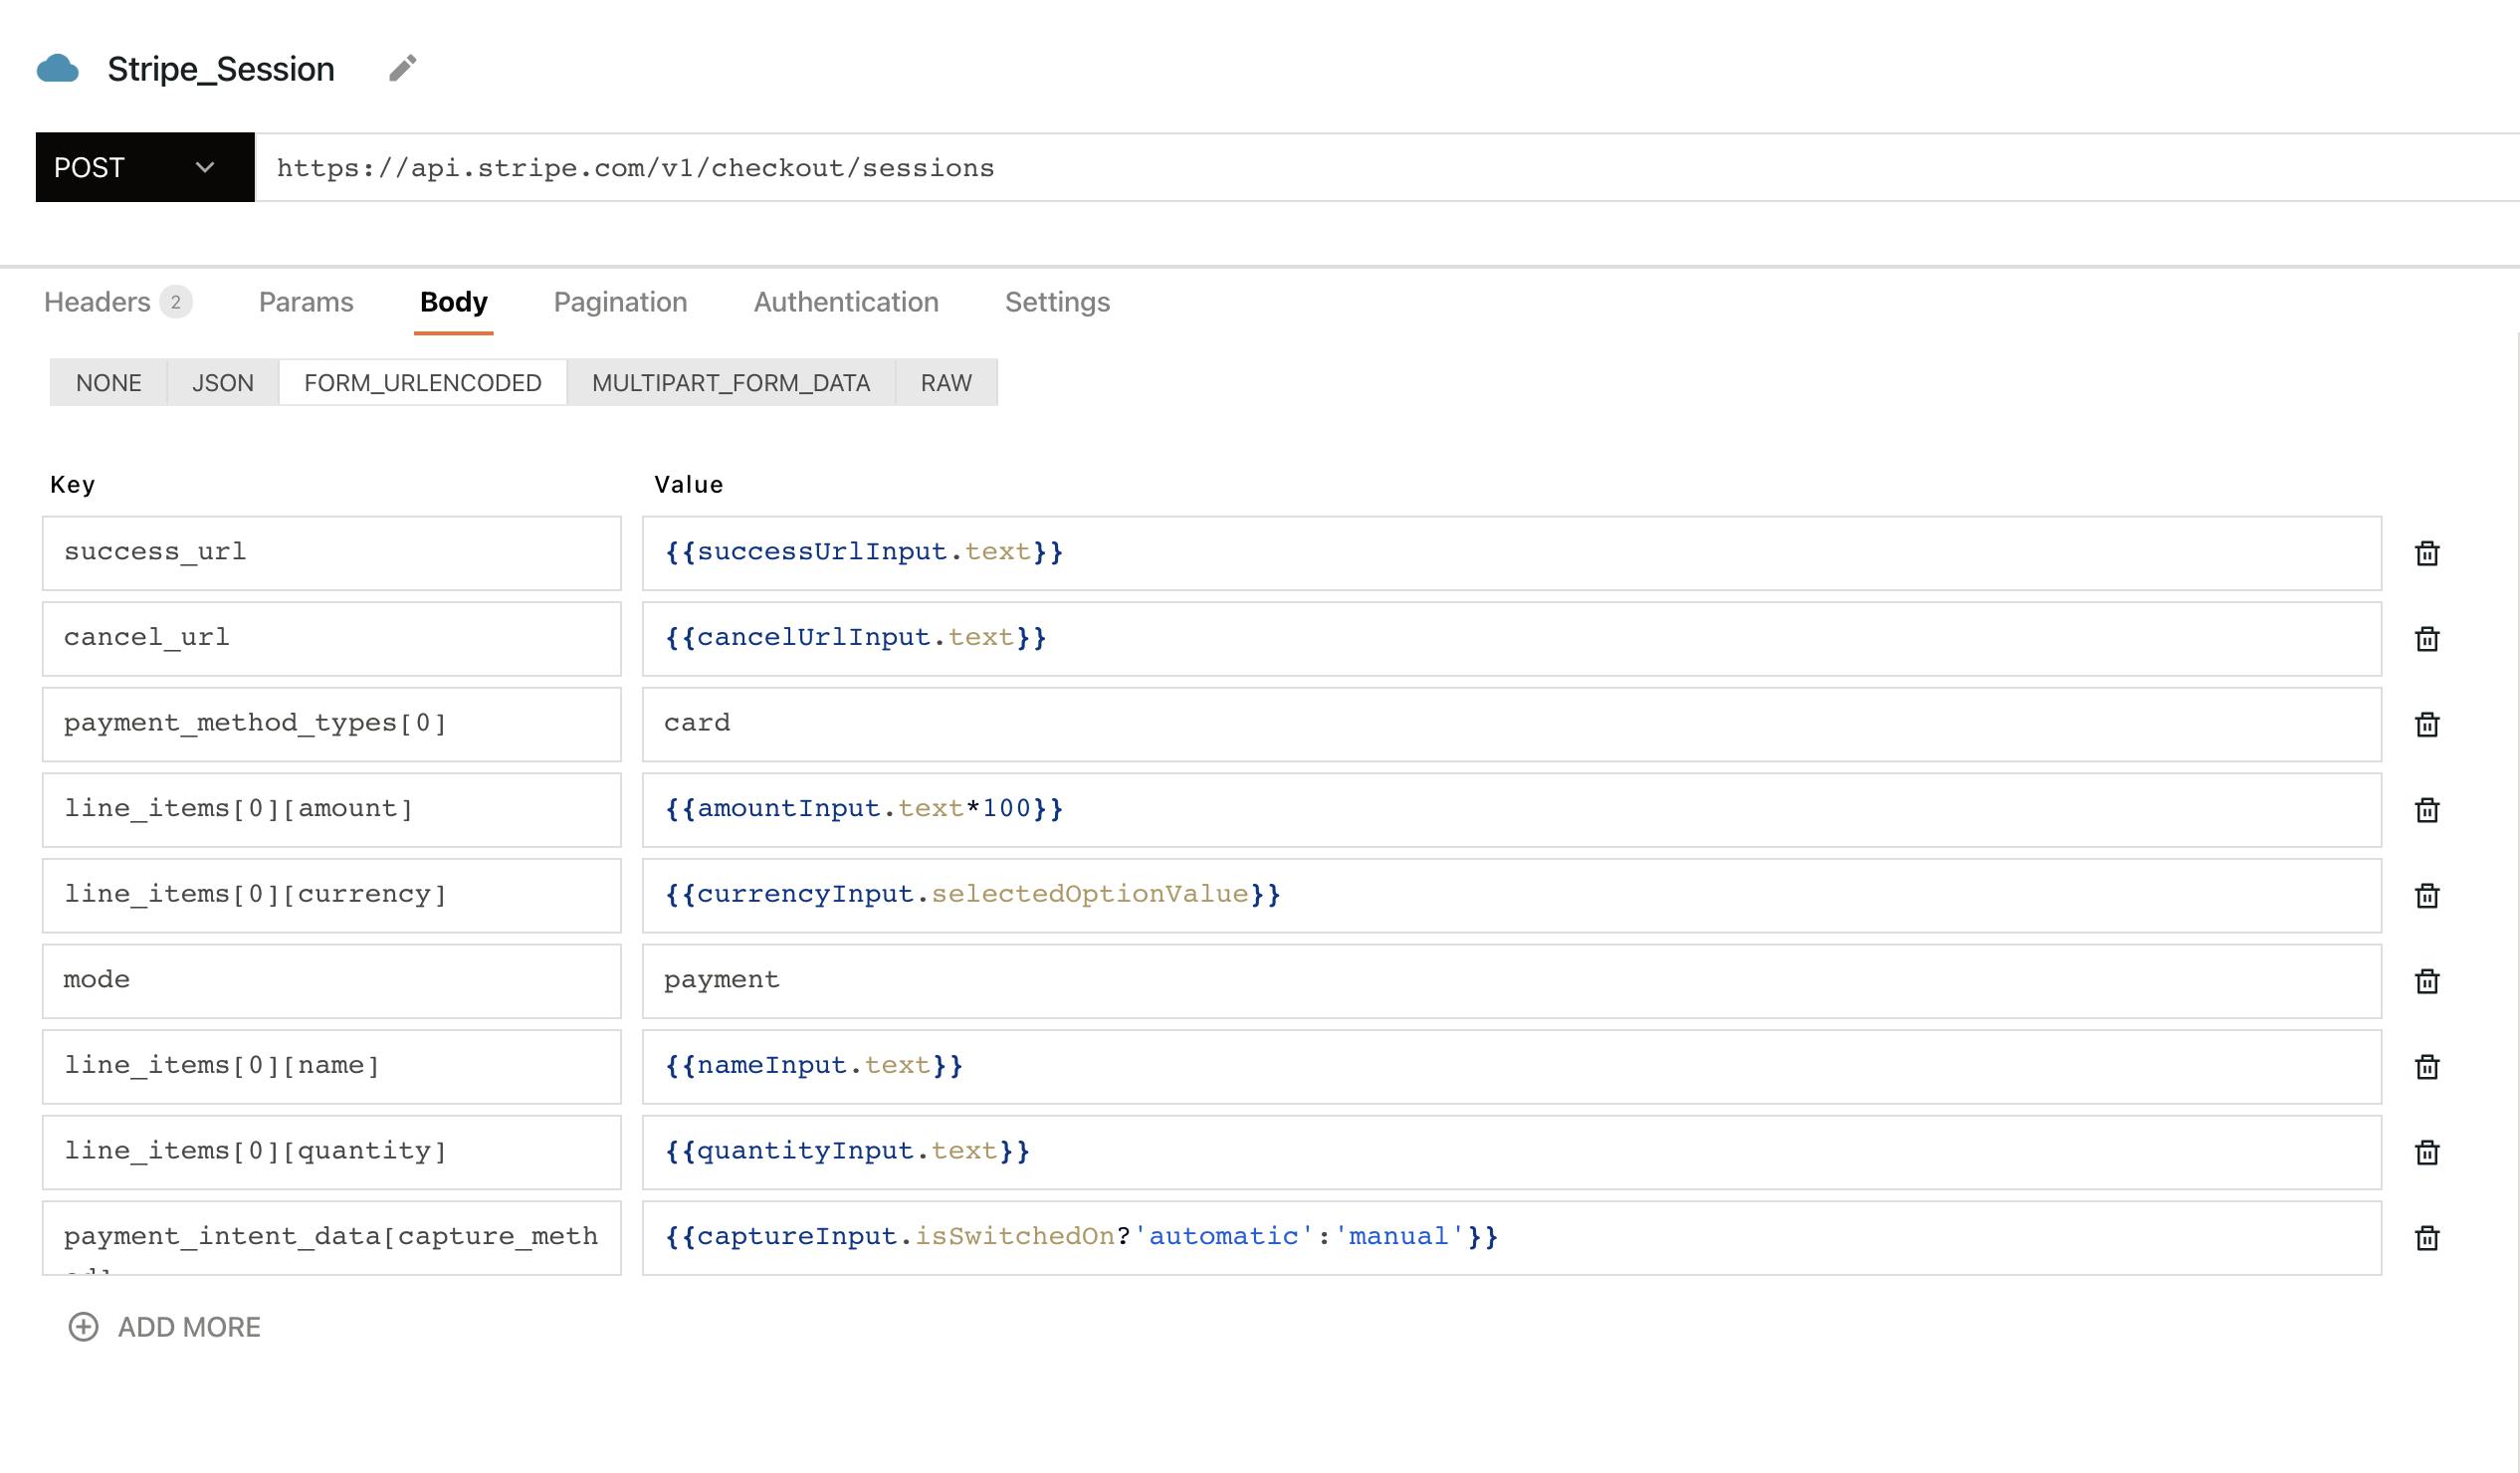
Next, let’s create a new datasource, an API endpoint that’ll create a new Stripe payment link.
- Click on the + icon next to Datasources from the sidebar
- Choose API Endpoint and paste the following URL:
https://api.stripe.com/v1/checkout/sessions
- You can rename this URL by just double-clicking on the existing one; let’s call this
stripe-session. - Stripe APIs use BEARER token-based authentication; hence, the API expects an Authorization header with a bearer token.
- Copy the token from the Stripe dashboard and paste it into the header.
Authorization - BEARER <token>
- Lastly, let’s send the data as a payload using the filling FORM_URLENCODED data since we are collecting all the inputs in a form widget. Alternatively, we could also add the payload in the JSON Body filed.
To bind the data on the API, we’ll need to use the moustache bindings and the input widgets names. Here’s how we can access the data from the price the amount widget:
{{amountInput.text*100}}
Similarly, we add all the required fields on the payload to create a new session. Here’s a screenshot of what the payload looks like:
Our API is now ready; let’s add one more input widget, generating a Stripe Session link (the payment link) for use with the data passed through our input widgets.
Here’s what we’ll need to bind the response from the API endpoint; we can do this by binding the following:
{{stripe_Session.data.url}}
The .data property on an API request will return the response from the API endpoint; here, we’ve accessed the URL field, which is essentially the payment link.
If you open this URL, you’ll see a new Stripe session with the amount and details you’ve entered on the form.
Here’s a recording of how this works:
If you’re interested in using a database not listed on our website as an integration, please let us know about it by raising a PR on Github, and we will do our best to include it at the earliest.
Join our growing community on Discord, and follow us on Youtube and Twitter to stay up to date.