

Build a Custom Application using Slack API
Here's how I (as a non-engineering employee) built my own custom app in under 30 minutes!


I recently joined Appsmith, and I am one of the few non-technical employees here! And as part of the onboarding process, all new team members have to build an app on Appsmith! It doesn’t matter if you’ve studied journalism and anthropology, have no experience in coding or JavaScript, no excuses! The brief was that it could be fun or functional, and anything under the Sun! Anxiety and panic were having a field day while I thought about what to build and where to start and finally decided on making something fun yet functional for Appsmith.
We have a vibrant channel on Slack called the #reading-club, where channel members can share and discuss books they have read. I expect (and hope) that this channel will have a high volume of messages, and the members are likely to grow. Even though there are only 26 members in the channel right now, one has to scroll up to get to earlier recommendations! It can be pretty frustrating to do all that when you’re not checking the channel every day, and it can be confusing to go through different recommendations by different members. The channel is a great way to share your thoughts, but there is no way of organizing those by name.
To this end, I created the Appsmith Reading Club App, and here’s what I hoped it would do:
- A way for non-members to also keep track of book recommendations
- Be a one-stop-shop to see what Appsmith colleagues are reading without the clutter of the group chat
To build the app, here’s what I did:
Building a Rad UI
As a 'visual person,' and I feel most comfortable mapping out the elements and figuring out a flow. It helps me get a clear idea about what each component looks like and sets the scope.
I wanted one part of the app to be a list of names of the channel members, a button that could filter out their messages and display them in chronological order. Here are the widgets I used to build my UI. It took me under 10 minutes to put this together.
- A table widget
- A list widget
- Text widgets
- Image widgets
It's the next steps which are unfamiliar for a non-technical user like me: connecting a data source, writing code, and ensuring my app works! For this part, I enlisted my colleague, Vihar's help.
Here's a short tutorial!
Connecting Slack API
To pull information from a channel on Slack you need to work with the Slack API.
You have to then create an app and then generate OAuth tokens; to be able to do this, you need admin access to your organization’s Slack.
Here’s what our oauth configuration looks like:
oauth_config:
 scopes:
    user:
      - channels:history
      - channels:read
      - files:read
      - identify
      - users.profile:read
      - users:read
      - identity.basic
Next up, you have to link this configuration to your Appsmith application. This short tutorial uses the cloud version of Appsmith. However, you can always export and import Appsmith apps to different environments (cloud, self-hosted, local). The recommended way to use Appsmith is to use Docker; follow the documentation here for detailed instructions if you want to build locally.
In the next step, you will connect to the Slack API that will return all the users from the entire organisation. Since this is a secured API, we need to use the bearer token from the slack developer application to use it.
Follow the steps listed below:
- Click on the
+icon next to the Data Sources. - Select Authenticated API under the APIs section.
- Name the Query as
completeList - Use the following endpoint to fetch all the users from the slack organization:
https://slack.com/api/users.list. - Set the Authentication type to bearer token and copy the key here from the slack app.
Hit
RUNon the top right to execute the query.
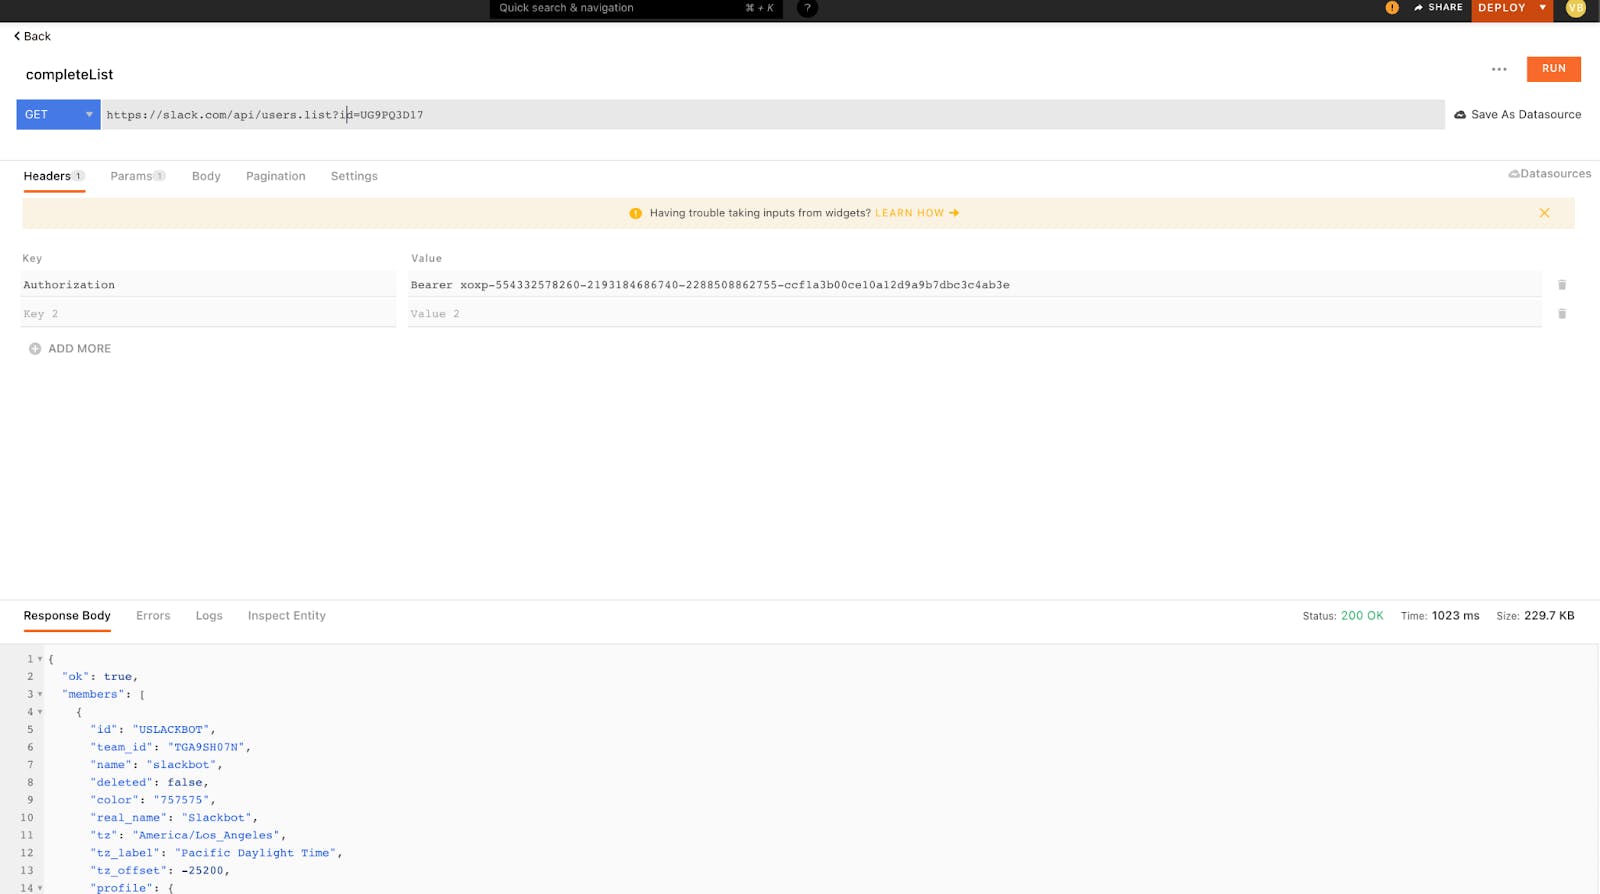
Now in the response pane, you should be able to see all the users from the Slack organization. However, since our goal is only to fetch the users from a particular slack channel; in my case, this was #reading-club. For this, you have to write one more API that fetches details of a specific slack channel.
To do this, follow these steps:
- Click on the
+icon next to the Data Sources. - Select Authenticated API under the APIs section.
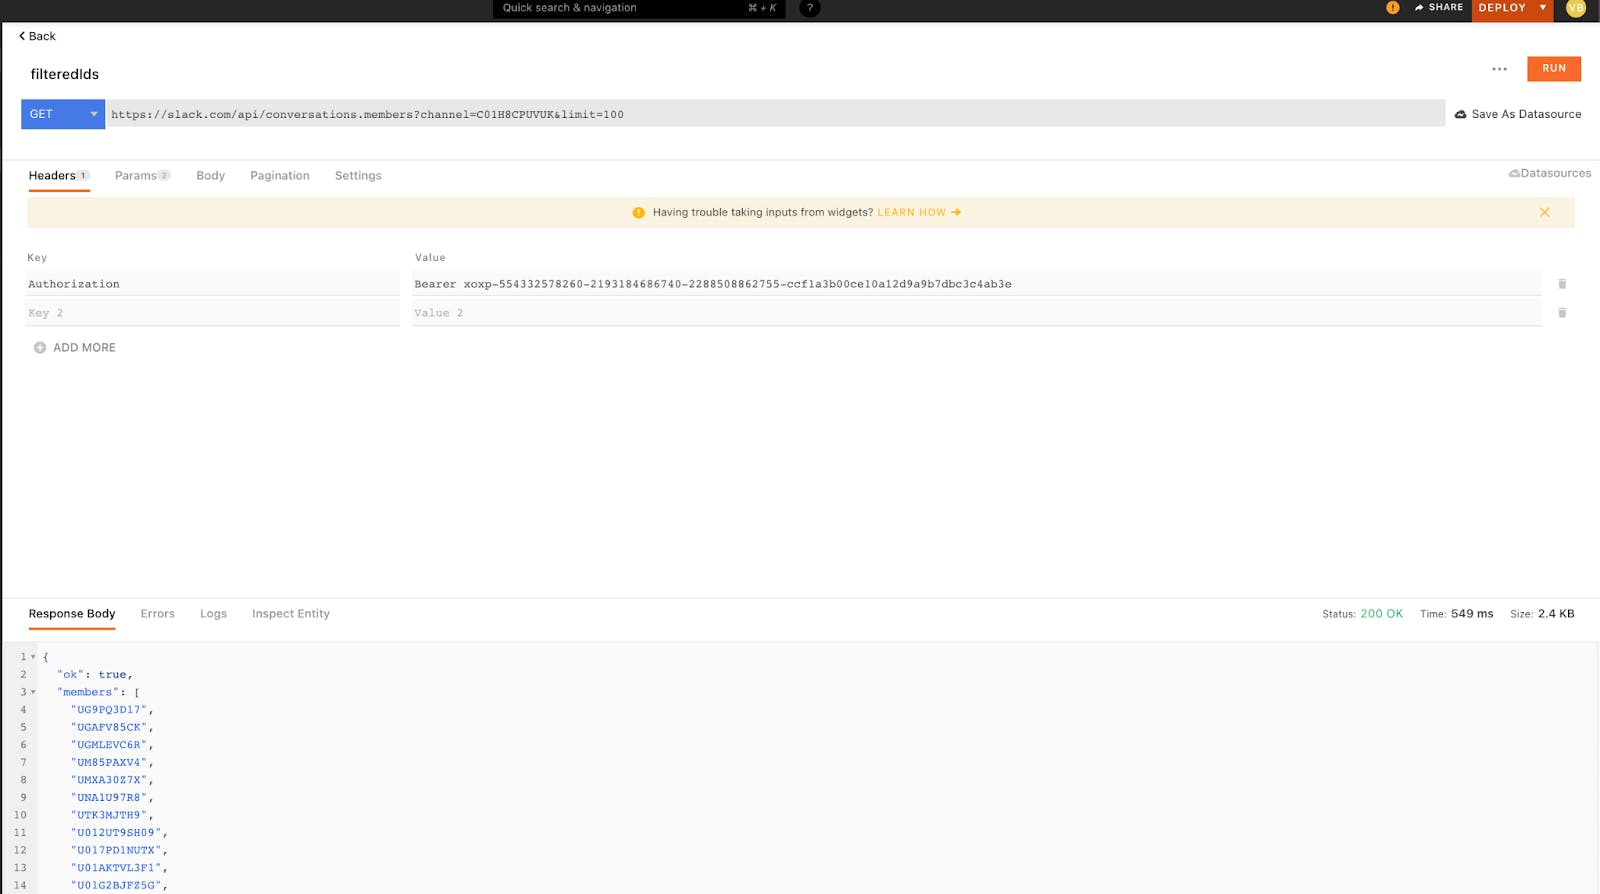
- Name the Query as
filteredIds - Use the following endpoint to fetch all the users from the slack organization:
https://slack.com/api/conversations.members?channel=C01H8CPUVUK&limit=100.- Set the Authentication type to bearer token and copy the key here from the slack app.
- Hit
RUNon the top right to execute the query.
Here, as you can see, we’ve sent an additional parameter, which is channel-id. You can find this by clicking the details of the slack channel.
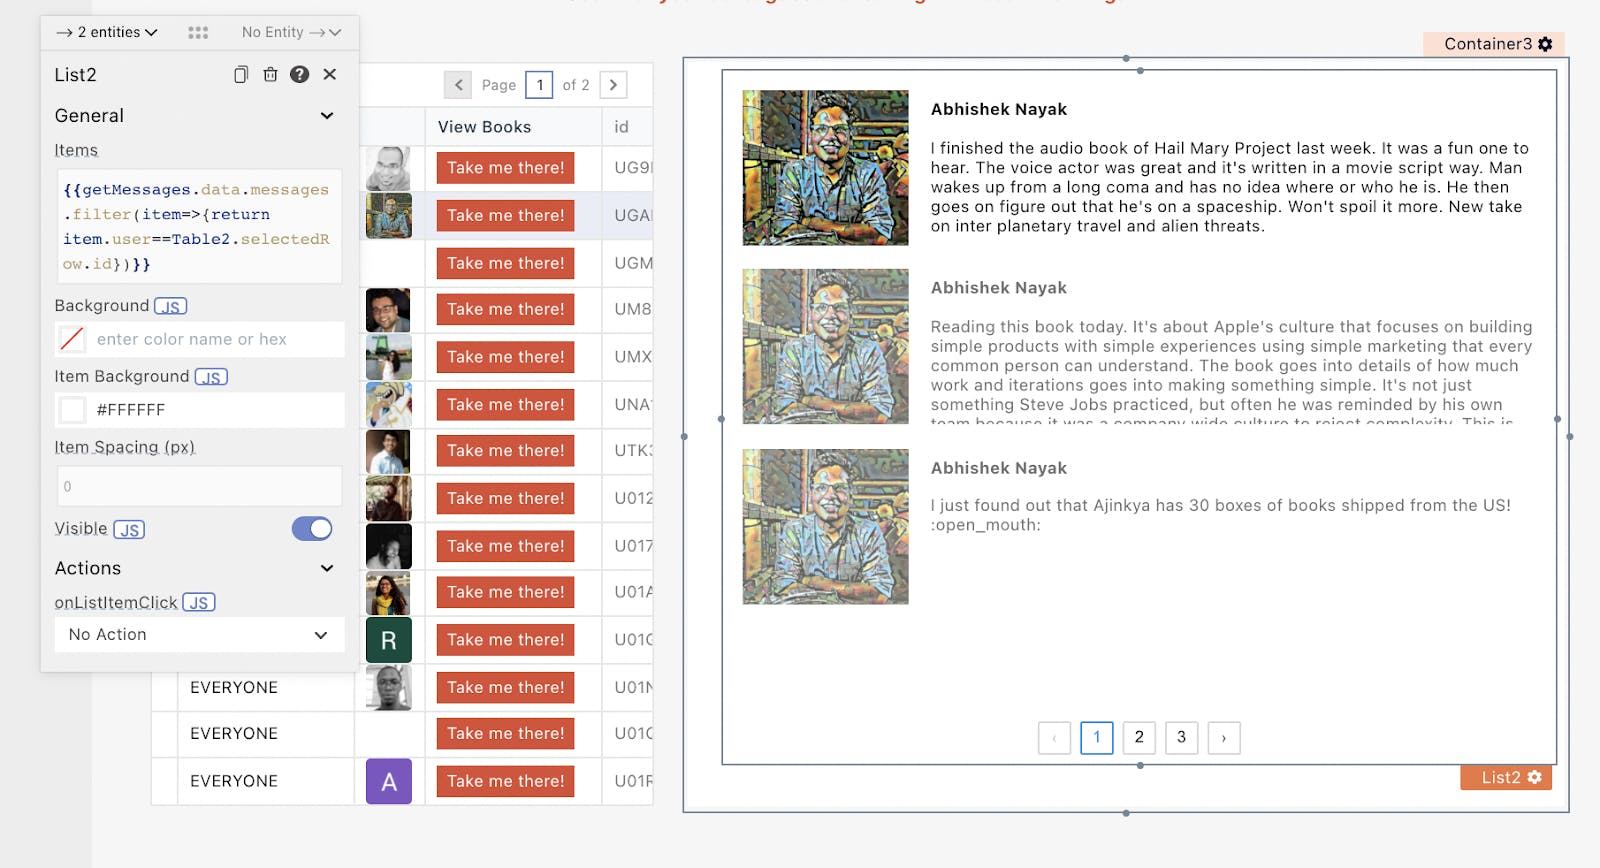
Now, to fetch all the messages from the slack channel, create a new query called getMessages. Follow the same steps, and replace the endpoint with the following:
https://slack.com/api/conversations.history?channel=C01H8CPUVUK&limit=1000
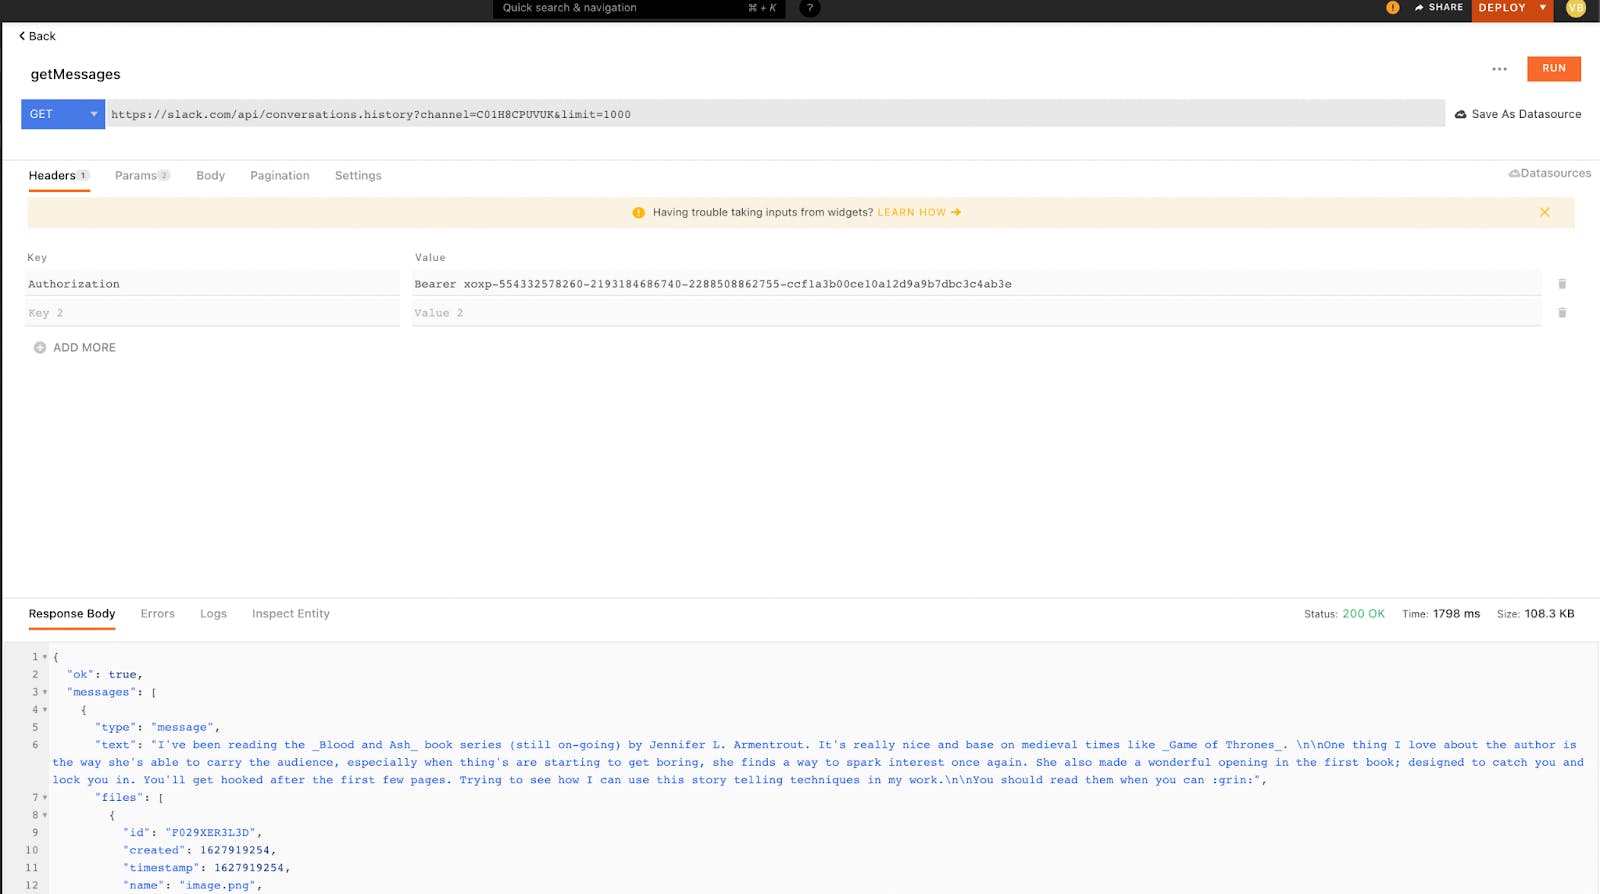
Here, you can limit the number of messages by sending an additional limit parameter. Now that we have everything, you can start building the UI for the app.
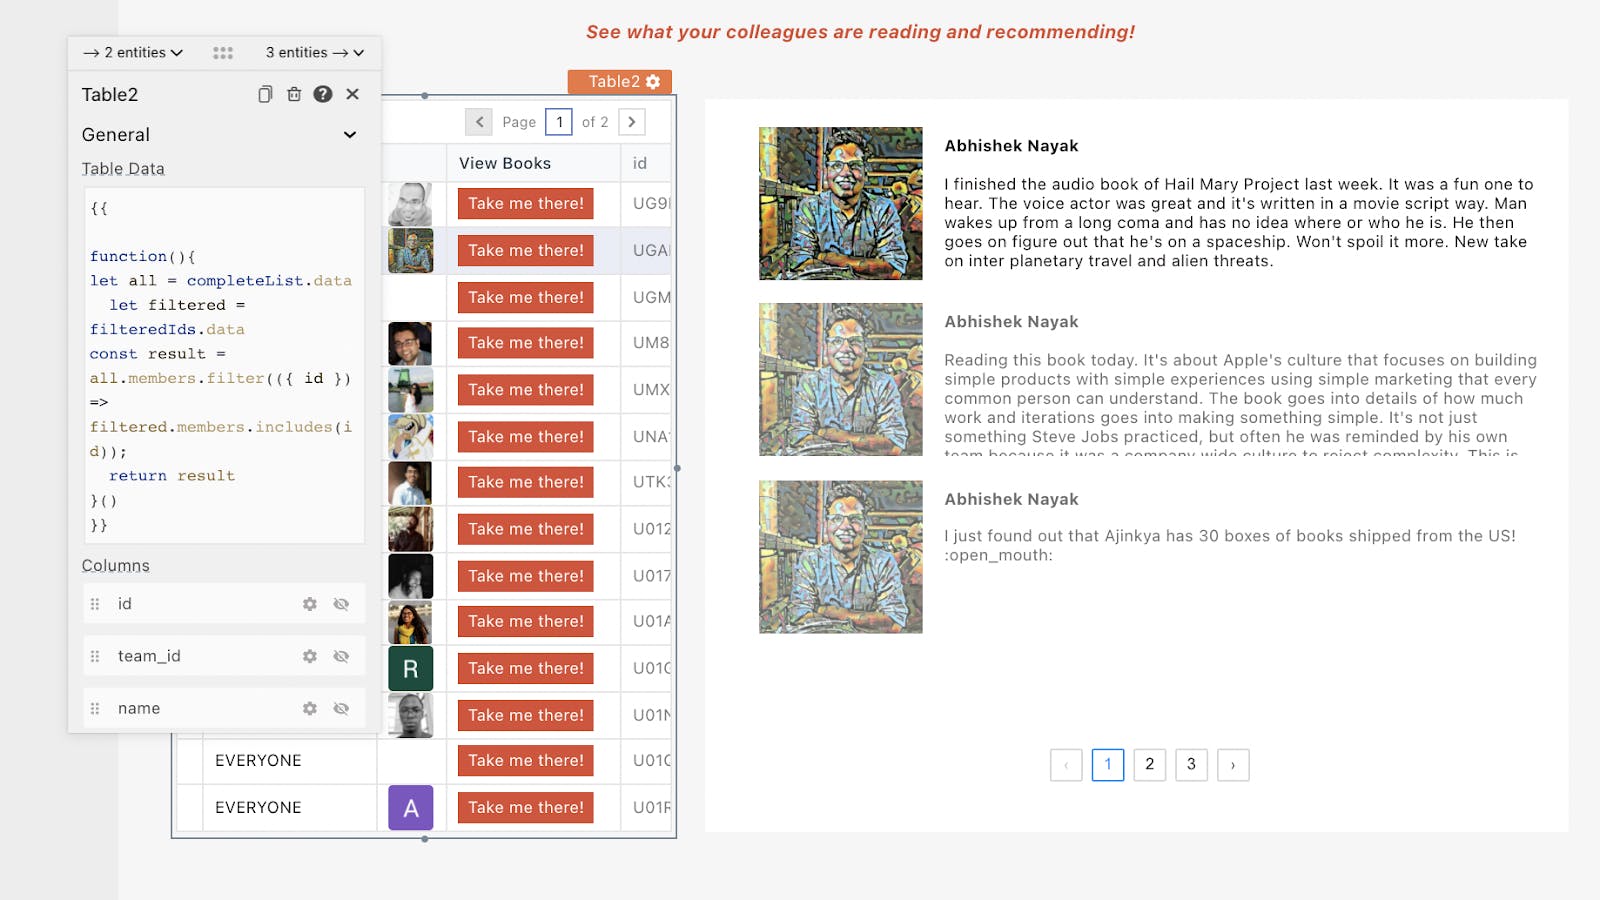
First step is to show all the members of the slack channel using a Table widget; when clicked, it will show all the book suggestions and other messages on a different List widget.
Follow these steps:
- Click on the
+icon next to the widgets, find the Table widget, and drag and drop it onto the canvas. - Open the table’s property pane by clicking on the cog icon on the table.
- Now, under the Table Data property, paste the following JS code snippet:
{{
function() {
    let all = completeList.data
    let filtered = filteredIds.data
    const result = all.members.filter(({
        id
    }) => filtered.members.includes(id));
    return result
}()
}}
In this snippet, we first fetched profiles of all the members in the slack organization and filtered them by user_ids with the selected slack channel. You can use a map function to return all the details of the users.
Next, we configure columns in the table by clicking on the cog icon for each column. For example, to render images from the API, we’ll need to access the profile key. Hence, we set the column type to image and set the column computed value to the following:
{{profile.image_original }}
With all the connections in place, the application will be fully functional. To take a look at my app, click here
It took me approximately 30-40 minutes to make this! My next steps would be to refine this app and add a few more elements, for example, displaying the date and time the messages were sent, images, and replies, filtering out system-generated messages, etc. While my experiments with Appsmith and this world of low code tools may have started with my soft spot for books, I quickly thought of other use-cases that can be implemented via the same app, such as automating other critical conversations/task-management on Slack channels or any other messaging applications. These would make my day-to-day job much easier! :)
It’s a pity that the world of internal apps is not given due attention simply because it’s not always customer-facing. Shifting our perspective to consider all users as customers can be a significant first step in building great internal apps. And low code is the future — internal applications can be tailor-made in a fraction of the time and cost while helping businesses focus on what matters most to their growth.
I love hearing from our users and contributors. If you’re interested in building something on Appsmith or are currently building something, I'd love to pick your brain, please email me: vishnupriya@appsmith.com